
Lawn Care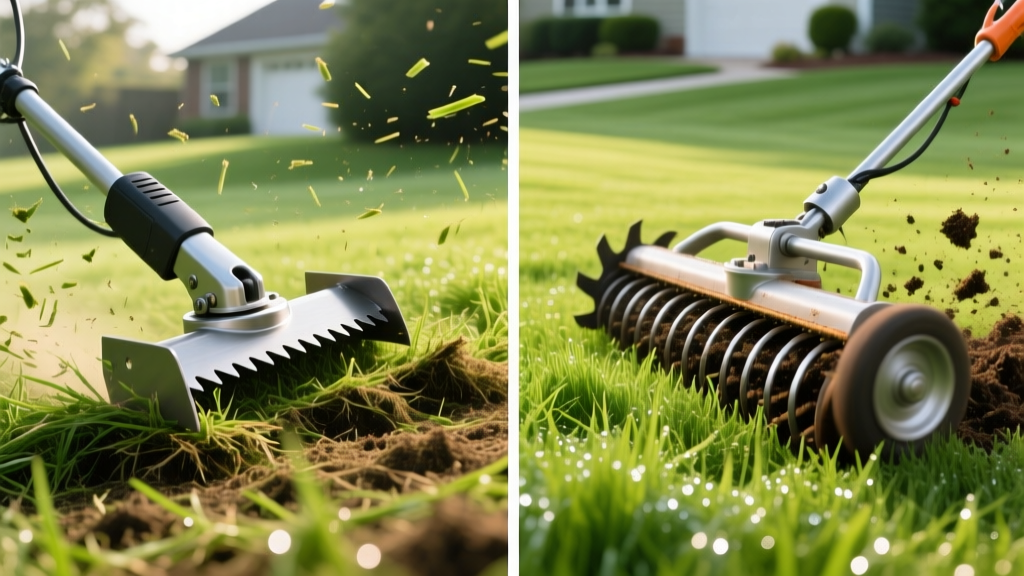
Mower Dethatcher Blade vs Power Rake: Selection and Setup Guide
Understanding the Mower Dethatcher Blade Controversy
The mower dethatcher blade is one of the most polarizing tools in lawn care. Turfgrass professionals often dismiss them as 'scalping hazards,' while budget-conscious homeowners praise them as a cheap alternative to renting heavy machinery. The truth lies in the physics of the tool and the biology of your grass. A standard rotary mower is engineered to slice grass cleanly using aerodynamic lift. When you swap that engineered blade for a heavy, aggressive dethatching attachment, you alter the deck's airflow and place immense rotational stress on the spindle bearings.
However, when selected correctly and calibrated to the millimeter, a mower dethatcher blade can effectively remove light thatch buildup (0.5 to 0.75 inches) without the $85-per-day rental cost of a walk-behind power rake. According to Penn State Extension, thatch layers exceeding 0.5 inches impede water infiltration and harbor fungal pathogens, making mechanical removal necessary for long-term soil health.
Flail Blade vs. Spring Tine: Choosing the Right Attachment
Not all dethatching attachments are created equal. The market is dominated by two distinct designs, each with specific use cases and failure modes.
| Feature | Flail Blade (Steel Knives) | Spring Tine Attachment | Dedicated Power Rake (Rental) |
|---|---|---|---|
| Mechanism | Hinged steel blades slice and lift thatch | Wire tines rake and pull thatch to surface | Vertical slicing knives or heavy flails |
| Aggressiveness | High (Risk of scalping if miscalibrated) | Moderate (Safer for delicate turf) | Very High (Professional grade) |
| Weight Added to Spindle | 2.5 to 4.5 lbs | 1.5 to 2.5 lbs | N/A (Self-propelled machine) |
| Average Cost (2026) | $18 - $28 | $22 - $35 | $75 - $110 / day |
| Best For | Thick, matted cool-season thatch | Light thatch, moss removal, overseeding prep | Severe thatch (>0.75 inches), large lawns |
Expert Insight: If you are managing a Kentucky Bluegrass or Tall Fescue lawn with dense, spongy thatch, the flail blade is superior because it physically cuts the thatch mat. Spring tines tend to 'bounce' over thick thatch layers without penetrating the root zone. Conversely, if you are prepping a lawn for overseeding and just need to scratch the soil surface, the spring tine attachment is vastly safer and easier to calibrate.
Compatibility and Deck Clearance Requirements
Before purchasing a universal mower dethatcher blade, you must verify your mower's physical tolerances. The most common point of failure is inadequate deck clearance.
- Vertical Clearance: You need a minimum of 2.5 inches of vertical space between the bottom of the mower deck and the ground at the lowest cutting height. Flail blades require more swing radius than standard blades; if the deck is too low, the flails will strike the inside of the deck, shattering the hinges and destroying the blade.
- Spindle Load Capacity: Standard walk-behind mower spindles are designed for a 1.5 lb to 2 lb mulching blade. Adding a 4 lb flail blade increases the rotational mass by up to 200%. This generates excessive lateral heat. If your mower has stamped steel spindles (common on sub-$300 residential mowers), avoid heavy flail blades entirely and opt for the lighter spring tine attachments.
- Deck Shape: Dethatcher blades perform poorly in 'deep dome' or high-lift mulching decks. They require a relatively flat deck interior to allow the thatch to be expelled out the side discharge chute.
Step-by-Step Installation and Calibration
Improper installation is the leading cause of turf damage and equipment failure. Follow this exact sequence to ensure safe operation.
- Sever the Power Source: Disconnect the spark plug wire on gas mowers, or remove the battery isolation key on electric models. Never work under a deck with a live ignition circuit.
- Block the Deck: Use a solid wood block to prop up the mower deck. Do not rely on the height-adjustment levers, as they can slip under torque.
- Note Blade Orientation: Before removing the standard blade, photograph the orientation of the cutting edges. The dethatcher blade must rotate in the exact same direction.
- Install and Torque: Slide the mower dethatcher blade onto the spindle star. Hand-thread the bolt, then use a torque wrench to tighten it to the manufacturer's specification (typically 35 to 45 ft-lbs for standard 21-inch decks). Do not use an impact wrench, as over-torquing can strip the spindle threads.
- The 'Penny Test' Calibration: This is the critical step. Place a standard US penny flat on a concrete driveway. Lower the mower deck to your desired operating height. Push the mower over the penny. The flail tips should just barely brush the penny, making a light metallic 'ticking' sound. If the penny is launched or crushed, the deck is too low and will scalp your lawn. If the flails miss the penny by more than 1/4 inch, the blade will not penetrate the thatch layer effectively.
Operational Best Practices to Prevent Turf Damage
CRITICAL WARNING: Never use a mower dethatcher blade on St. Augustine, Centipede, or creeping Bentgrass. These species rely on above-ground stolons for lateral growth. A dethatching blade will rip the stolons out of the soil, effectively destroying the lawn. For these grasses, manual raking or specialized vertical mowers are required.
When operating the mower, your ground speed must be significantly slower than normal mowing—aim for 1.5 to 2.0 miles per hour. Moving too fast prevents the flails from fully penetrating the thatch mat and results in an uneven, patchy extraction.
According to research published by University of Minnesota Extension, the optimal time to dethatch cool-season grasses is early fall (late August to mid-September), when the grass is entering its peak growth phase and can rapidly recover from the mechanical stress. For warm-season grasses like Bermuda and Zoysia, wait until late spring after the lawn has fully greened up and completed its first two mowings of the season.
Always operate with the side-discharge chute open. The volume of thatch generated is immense; attempting to mulch or bag dethatched material will instantly clog the deck and stall the engine. Make two passes over the lawn: the first in a North-South pattern, and the second in an East-West pattern to ensure complete thatch extraction.
Post-Dethatching Maintenance and Blade Storage
A mower dethatcher blade is subjected to severe abrasion from soil, rocks, and dense organic matter. Post-operation maintenance is non-negotiable if you want the tool to last beyond a single season.
- Immediate Cleaning: Use a stiff wire brush and a putty knife to scrape compacted soil and wet thatch from the blade hinges. Damp thatch is highly acidic and will accelerate rust on the pivot points, causing the flails to seize.
- Hinge Lubrication: Apply a dry PTFE lubricant or a lightweight penetrating oil (like Boeshield T-9) to the flail hinges. Avoid heavy greases, which will attract dirt and grit, forming a grinding paste that wears out the pivot holes.
- Flail Replacement: Inspect the steel flails for wear. If the tips are rounded off or reduced in length by more than 15%, they will no longer slice thatch effectively; they will merely beat it. Replacement flails are typically sold in packs of 10 for under $12.
- Storage: Store the blade in a dry environment, coated in a light film of mineral oil. Never leave it mounted on the mower over the winter, as the added weight can warp the spindle shaft if the mower is stored on uneven ground.
When to Skip the Mower Blade and Rent a Power Rake
While a mower dethatcher blade is a highly effective tool for maintenance, it is not a cure-all for severely neglected lawns. You must recognize the threshold where a rotary attachment becomes a liability.
If you measure your thatch layer using a soil probe or a sharp trowel and find it exceeds 0.75 inches in depth, a mower dethatcher blade will fail. The flails simply cannot reach the soil surface to slice the base of the thatch mat. Instead, they will tear the top layer, leaving a ragged, uneven mess and severely stressing the mower's engine and transmission.
In these scenarios, the Michigan State University Extension recommends utilizing a dedicated walk-behind power rake (such as a Ryan Ren-O-Thin or Billy Goat SR1800). These machines feature vertically oriented slicing blades that cut through the thatch and into the top 1/8 inch of soil, promoting deep root pruning and massive lateral growth. While the rental cost is higher, the time saved and the superior agronomic results justify the investment for lawns with severe thatch accumulation.
By understanding the mechanical limits of your mower and the biological needs of your turf, you can leverage a mower dethatcher blade as a precise, cost-effective tool in your annual lawn care arsenal, rather than a blunt instrument that damages your landscape.

