
Lawn Care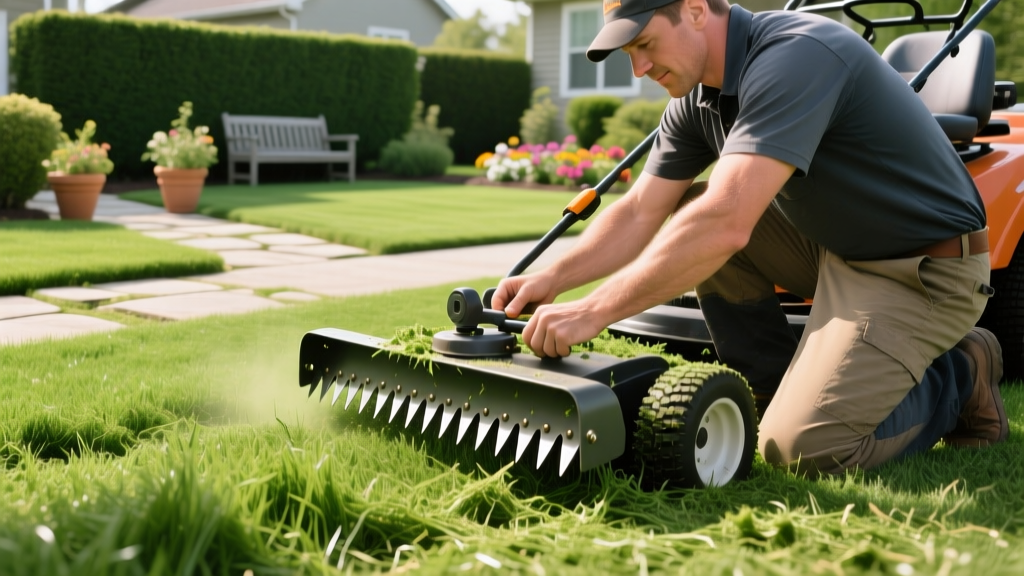
Step-by-Step Guide: Installing and Using a Dethatching Blade
A healthy lawn requires oxygen, water, and nutrients to reach the root zone. When a dense layer of dead and living organic matter—known as thatch—accumulates between the soil surface and the green grass canopy, it acts as a physical barrier. While a thin layer of thatch (under 0.5 inches) provides insulation, excessive thatch harbors fungal pathogens, invites insect infestations, and causes shallow rooting. For homeowners managing moderate thatch buildup without investing in a $1,500 commercial power rake, a dethatching blade is a highly effective, low-cost alternative that mounts directly to your existing rotary mower.
Thatch Assessment: Do You Actually Need a Dethatching Blade?
Before unbolting your mower deck, you must verify that mechanical dethatching is necessary. Removing thatch from a lawn that does not need it causes severe turf stress and opens the canopy to weed invasion.
The 0.5-Inch Rule: According to turfgrass pathology standards, mechanical dethatching is only recommended when the thatch layer exceeds 0.5 inches in depth. Cool-season grasses like Kentucky Bluegrass are particularly prone to rapid thatch accumulation due to their aggressive rhizome growth.
To measure your thatch, use a sharp spade or a dedicated soil probe to extract a 3-inch deep, crescent-shaped wedge from the lawn. Measure the spongy, brown layer situated directly above the mineral soil but below the green grass blades. If the measurement is between 0.5 and 1.0 inches, a mower-mounted dethatching blade is the correct tool. If the layer exceeds 1.0 inches, or if the soil beneath is heavily compacted, you will need to pair the dethatching blade with a core aerator or rent a dedicated walk-behind vertical slicer.
Selecting the Correct Dethatching Blade Profile
Not all dethatching blades are engineered for the same turf type or thatch density. As of 2026, the aftermarket offers three primary profiles for rotary mowers. Selecting the wrong profile can scalp your lawn or fail to penetrate the thatch layer entirely.
| Blade Type | Best For | Turf Compatibility | Avg. Cost (2026) | Aggressiveness |
|---|---|---|---|---|
| Spring-Tine (e.g., Oregon 99-005) | Light to moderate thatch (0.5" - 0.75") | Fescue, Ryegrass, Bluegrass | $25 - $40 | Low to Medium |
| Flail / Knife (e.g., MTD 490-322) | Heavy thatch (>0.75"), severe matting | Bermuda, Zoysia, St. Augustine | $45 - $65 | High |
| Chain-Link / Wire | Surface moss removal, leaf mulching | Not recommended for deep thatch | $30 - $50 | Very Low |
For most residential cool-season lawns, the universal spring-tine blade is the safest choice. The tines flex when they strike hard soil or rocks, preventing damage to the mower deck spindle and minimizing turf scalping.
Step-by-Step Installation Procedure
CRITICAL SAFETY WARNING: Never attempt to remove or install a mower blade without first disconnecting the spark plug wire (gas mowers) or removing the battery key (electric mowers). A dethatching blade stores kinetic energy differently than a standard high-lift blade and can shift unexpectedly during installation.
- Secure the Mower: Tilt the mower on its side. Pro Tip: Always tilt the mower so the carburetor and air filter face upward to prevent oil from flooding the intake manifold and fouling the spark plug.
- Block the Existing Blade: Wedge a piece of 2x4 lumber between the current mower blade and the deck housing to lock the spindle in place.
- Remove the Retaining Bolt: Use the correct socket size for your specific mower brand. Common sizes include 5/8-inch for Toro Recycler models, 14mm for Honda HRX series, and 15/16-inch for many Craftsman and MTD units. Turn counterclockwise to remove.
- Mount the Dethatching Blade: Align the center hole over the spindle. Ensure the curved spring tines or flail edges are pointing downward and forward in the direction of the blade's rotation. If installed backward, the blade will act as a scoop, tearing the grass out by the roots rather than slicing the thatch.
- Torque the Retaining Bolt: Reinstall the washer and bolt. Tighten using a torque wrench set to the manufacturer's specification, typically between 35 and 45 ft-lbs for standard walk-behind mowers. Overtightening can strip the spindle threads, while undertightening risks the blade dislodging at 3,000 RPM.
Execution: Mowing Techniques for Optimal Thatch Removal
Operating a mower equipped with a dethatching blade requires a different approach than standard weekly mowing. The goal is to fracture the thatch layer without severing the living grass crowns.
- Preparation Pass: Before installing the dethatching blade, mow the lawn at your standard height (e.g., 3.0 inches for Tall Fescue) using a standard blade, and bag all clippings. This exposes the thatch layer.
- Height Adjustment: Set your mower deck to 2.5 inches for the first dethatching pass. This height allows the tines to penetrate the thatch while the mower wheels prevent the blade from digging into the topsoil.
- Pass Pattern: Mow in straight, parallel lines, overlapping each pass by exactly 2 inches. Avoid turning sharply on the turf, as the aggressive tines will gouge the lawn during pivots.
- Cross-Pass (If Needed): If the thatch layer is dense, lower the deck to 2.0 inches and perform a second pass perpendicular to the first.
- Debris Removal: A successful dethatching operation will yield a massive volume of brown, fibrous debris. Rake the lawn thoroughly with a heavy-duty leaf rake or use a lawn sweeper. Leaving this debris on the lawn will smother the remaining grass and invite snow mold or brown patch fungus.
Post-Dethatching Lawn Recovery Protocol
Dethatching is a highly stressful mechanical process for turfgrass. The recovery phase is where the actual lawn renovation occurs. According to research published by the University of Minnesota Extension, failing to follow up dethatching with proper agronomic inputs results in a weaker lawn than before the procedure.
The 72-Hour Recovery Timeline
- Day 1 (Immediate): Perform core aeration to relieve soil compaction exposed by the thatch removal. Leave the soil plugs on the lawn to break down naturally.
- Day 2 (Seeding & Feeding): Overseed bare or thin areas with a premium turf-type tall fescue or Kentucky bluegrass blend. Apply a high-phosphorus starter fertilizer (e.g., 24-25-4 N-P-K ratio) to stimulate rapid root development in the newly exposed soil.
- Day 3 (Hydration): Initiate deep, infrequent watering. Apply 0.5 inches of water to activate the starter fertilizer and keep the top inch of soil consistently moist for seed germination.
Troubleshooting and Edge Cases
Why is my dethatching blade leaving bare dirt patches?
This occurs when the mower deck is set too low, or the spindle has excessive vertical play. Check your deck height gauge wheels. If the spindle wobbles when you push it up and down by hand (more than 1/16-inch of play), the spindle bearings are worn and must be replaced before using a dethatching blade, as the vibration will cause the tines to dig erratically into the soil.
Can I use a dethatching blade on St. Augustine grass?
Proceed with extreme caution. St. Augustine grass spreads via thick, above-ground stolons rather than deep rhizomes. An aggressive flail dethatching blade will sever these stolons, effectively destroying the lawn. If you must dethatch St. Augustine, use a spring-tine blade on the highest possible deck setting, and only when the thatch layer exceeds 0.75 inches. For warm-season stoloniferous grasses, manual raking or specialized vertical mowers are often preferred over rotary dethatching attachments, as noted by Penn State Extension turfgrass specialists.
How often should I use the dethatching blade?
A dethatching blade should not be part of your routine monthly maintenance. It is a corrective tool. Most lawns only require mechanical dethatching every 2 to 3 years. To prevent rapid thatch re-accumulation, avoid over-applying synthetic nitrogen fertilizers, which promote rapid top-growth that outpaces the soil microbe decomposition rate, and ensure you are maintaining optimal soil pH (6.0 to 7.0) to encourage thatch-degrading microbial activity.

