
Lawn Care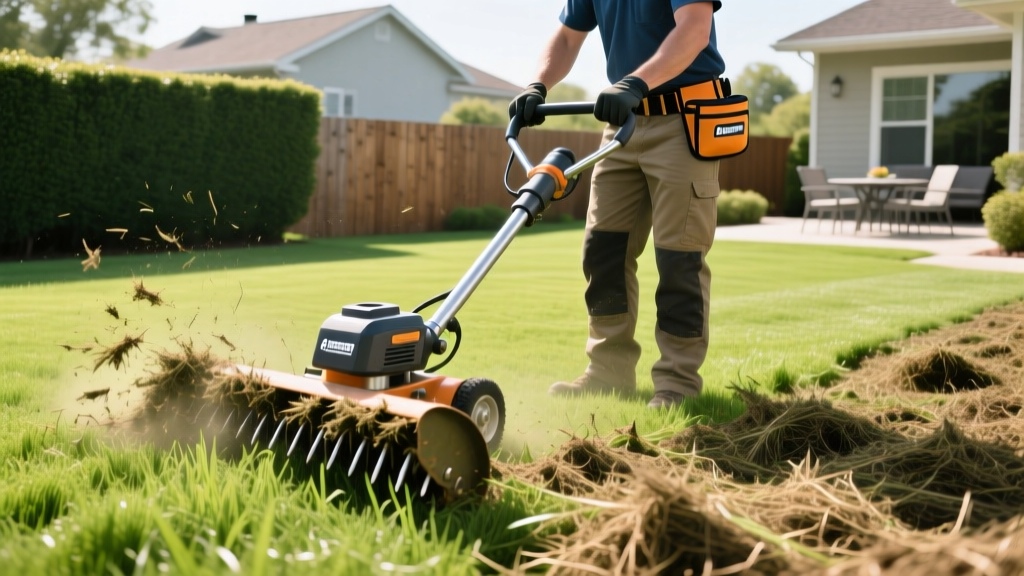
Power Detacher Grass Care: Step-by-Step Thatch Removal
The Thatch Threshold: Diagnostics Before Detaching
A power detacher (frequently referenced in maintenance logs as a detacher grass machine) utilizes vertically rotating spring tines or rigid blades to slice through the thatch layer and pull it to the surface. However, deploying this equipment unnecessarily can sever healthy stolons and rhizomes, setting your lawn back weeks. Thatch—a tightly intermingled layer of living and dead stems, roots, and crowns—only becomes a barrier to water and nutrient penetration when it exceeds specific depth thresholds.
According to turfgrass research from Penn State Extension, cool-season grasses like Kentucky Bluegrass and Tall Fescue can tolerate up to 0.5 inches of thatch. Warm-season grasses, such as Bermuda and Zoysia, require a stricter threshold of 0.25 inches due to their aggressive lateral growth habits. Before renting or purchasing equipment, you must verify the thatch depth physically.
The Core Sample Extraction
Do not estimate thatch depth by looking at the surface. Use a 6-inch soil probe or a heavy-duty flat-head screwdriver to extract a 3-inch vertical core from at least three different zones in your lawn. Measure the brown, spongy layer located directly between the green vegetation and the mineral soil. If the layer exceeds the thresholds mentioned above, proceed with the detacher grass procedure outlined below.
Equipment Selection Matrix for Detacher Grass Maintenance
Selecting the correct machine dictates the efficiency of the thatch extraction and the physical toll on the operator. The market is segmented by swath width, tine material, and power source.
| Equipment Type | Reference Model | 2026 Avg. Cost | Best Application | Limitations |
|---|---|---|---|---|
| Manual Thatching Rake | Ames True Temper Thatch Rake | $45 - $60 | Lawns under 500 sq ft; spot treatments | Extreme physical exertion; inconsistent depth |
| Electric Detacher | Sun Joe AJ801E (14-inch) | $160 - $190 | Suburban lawns (500 - 2,500 sq ft) | Cord management; struggles with matted Bermuda |
| Gas-Powered Rental | Class 43 / Ryan Lawnaire Dethatcher | $65 - $95 / day | Large properties (2,500+ sq ft) | Heavy (100+ lbs); requires truck/trailer transport |
| Commercial Walk-Behind | Billy Goat HRR18H (Hydrostatic) | $1,400 - $1,600 | Landscapers; estate management | High capital cost; overkill for residential use |
Phase 1: Pre-Procedure Lawn Preparation
Running a detacher over an unprepared lawn guarantees uneven soil scarification and missed thatch pockets. Execute these preparatory steps 48 to 72 hours before detaching.
- Mowing Reduction: Lower your mower deck to 50% of your standard maintenance height. For Tall Fescue normally maintained at 3.5 inches, mow down to 1.75 inches. This exposes the thatch layer to the detacher tines and prevents the machine from bogging down in long foliage.
- Moisture Calibration: Water the lawn deeply 48 hours prior to the procedure. The goal is to soften the top 2 inches of soil so the detacher blades can penetrate slightly without tearing healthy root systems. Warning: Never operate a power detacher on saturated, muddy soil; the tines will compact the soil structure and create deep ruts.
- Obstacle Clearance: Walk the grid and flag all sprinkler heads, shallow valve boxes, and invisible dog fence lines with high-visibility marking paint. Detacher blades operating at 1/8-inch soil depth will easily sever unmarked irrigation lines.
Phase 2: Step-by-Step Detacher Grass Execution
The physical extraction requires a systematic approach to ensure uniform coverage without scalping the turf canopy.
Step 1: Blade Depth Calibration
Locate a discreet test patch near a property line. Set the machine's depth lever to the highest setting (shallowest). Engage the tines and push forward 10 feet. Inspect the trail. The blades should slice through the brown thatch and barely scarify the mineral soil (approximately 1/8 inch into the dirt). If the tines are not pulling up thatch, lower the depth dial one notch and repeat. According to the University of California IPM guidelines, aggressive depth settings that pull up living grass roots indicate improper calibration.
Step 2: The Grid Pass Pattern
Operate the detacher in a strict North-to-South pattern, overlapping each pass by 2 inches to prevent un-thatched stripes. Once the entire lawn is covered in the first direction, rotate 90 degrees and complete an East-to-West pass. This cross-hatch pattern is mandatory for warm-season grasses with thick lateral stolons, as a single-direction pass will simply push the thatch mats aside rather than extracting them.
Step 3: Debris Clearance
Stop the machine every 15 minutes to clear the tine housing. Accumulated thatch wraps around the rotating axle, reducing RPMs and straining the motor. After completing the grid, use a heavy-duty landscape rake or a commercial lawn vacuum to remove all extracted debris. Leaving dead thatch on the surface will smother the remaining grass and create an ideal microclimate for fungal pathogens like Pythium blight.
CRITICAL WARNING: Terrain Scalping
If your lawn features undulating terrain, low spots, or exposed tree roots, you must manually raise the detacher deck when crossing these elevations. Gas-powered detachers lack the suspension to track uneven ground, and maintaining a fixed depth over a berm will result in severe scalping, stripping the lawn down to bare dirt.
If your lawn features undulating terrain, low spots, or exposed tree roots, you must manually raise the detacher deck when crossing these elevations. Gas-powered detachers lack the suspension to track uneven ground, and maintaining a fixed depth over a berm will result in severe scalping, stripping the lawn down to bare dirt.
Phase 3: Post-Detaching Recovery Protocol
A freshly detatched lawn is highly stressed but exceptionally receptive to soil amendments and new seed. The recovery window is critical for preventing weed invasion.
Core Aeration Synergy
For compacted clay soils, detaching should immediately precede core aeration. With the thatch barrier removed, the aerator tines can pull clean, 3-inch soil cores without clogging. This dual-procedure maximizes soil oxygenation and prepares the seedbed for renovation.
Overseeding and Fertilization
Within 24 hours of clearing the debris, overseed the lawn. The shallow grooves left by the detacher blades act as natural seed furrows, improving seed-to-soil contact. Apply 5 to 8 lbs of Tall Fescue seed per 1,000 square feet, or 1 to 2 lbs of Kentucky Bluegrass per 1,000 square feet. Follow immediately with a high-phosphorus starter fertilizer (such as a 10-18-10 NPK ratio) to stimulate rapid root development in the new seedlings.
Hydration Schedule
Transition to a light, frequent watering schedule. Apply 0.1 inches of water twice daily (morning and early afternoon) for the first 14 days to keep the seedbed consistently moist. Once the new grass reaches 2 inches, revert to standard deep-and-infrequent irrigation cycles to force root depth.

