
Lawn Care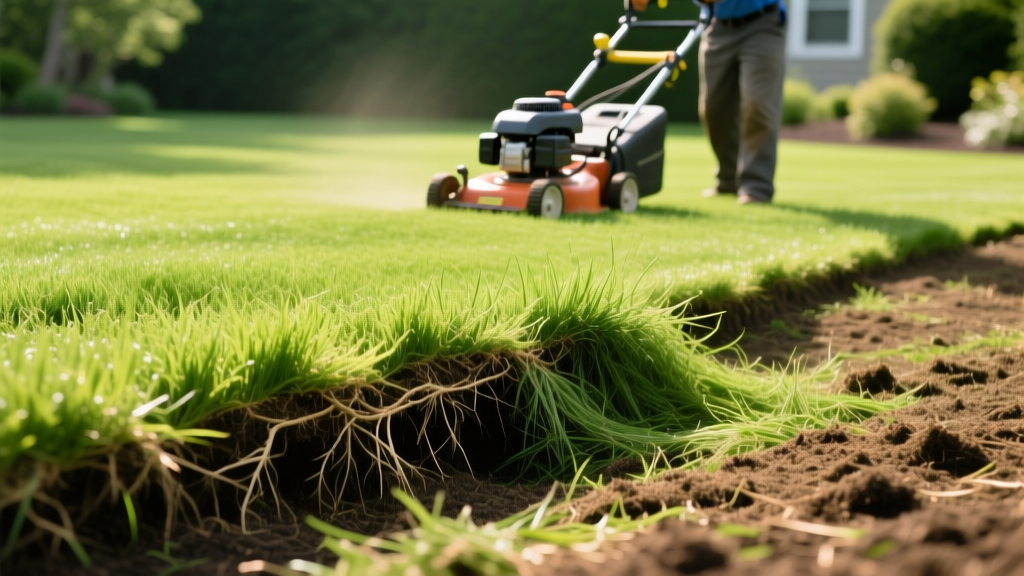
When to Use Power Raking: Thatch Diagnosis and Lawn Recovery
The Thatch Threshold: Diagnosing Your Lawn's Hidden Problem
A spongy lawn that retains footprints and turns brown during mild droughts is the primary symptom of excessive thatch. Thatch is a tightly intermingled layer of living and dead stems, roots, and crowns that develops between the zone of green vegetation and the underlying soil surface. While a thin layer (under 0.5 inches) provides beneficial insulation and moisture retention, excessive thatch creates a hydrophobic barrier that prevents water, oxygen, and nutrients from reaching the root zone.
Before renting heavy equipment, you must accurately diagnose the thatch depth. According to turfgrass pathology guidelines from the University of Minnesota Extension, guessing the thatch depth by simply looking at the surface is a critical error that leads to unnecessary lawn scalping.
The Core Sample Diagnostic Test:
- Use a soil probe, bulb planter, or sharp trowel to extract a 3-inch deep, 2-inch wide plug from your lawn.
- Examine the cross-section. You will see green grass blades at the top, soil at the bottom, and a distinct brown, fibrous layer in the middle.
- Measure the brown layer with a ruler. If it exceeds 0.75 inches, mechanical intervention is required. If it exceeds 1.25 inches, aggressive power raking is indicated.
Power Raking vs. Dethatching: Selecting the Correct Aggression Level
The most common failure mode in DIY lawn renovation is confusing a power rake with a dethatcher. Rental centers often use the terms interchangeably, but the mechanical action and resulting turf trauma are vastly different. Using a power rake on a lawn that only requires gentle dethatching will rip out healthy turfgrass crowns, setting your lawn back by an entire growing season.
| Feature | Power Rake (Flail Blades) | Dethatcher (Spring Tines) | Core Aerator |
|---|---|---|---|
| Mechanism | Rotating flail knives that slice and lift | Bouncing spring-loaded wire tines | Hollow coring spoons extracting soil plugs |
| Target Thatch | Over 1.0 inch (Severe buildup) | 0.5 to 0.75 inches (Moderate) | N/A (Targets soil compaction) |
| Turf Trauma | High (Requires 3-4 week recovery) | Low to Moderate (1-2 week recovery) | Low (Promotes immediate root growth) |
| Best Grass Types | Zoysia, Bermuda, Tall Fescue | Kentucky Bluegrass, Ryegrass | All cool and warm-season grasses |
As noted by Michigan State University Extension, power raking should be viewed as a surgical reset for neglected lawns, not an annual maintenance task. If your thatch is under 1 inch, opt for a spring-tine dethatcher or focus on core aeration and topdressing to encourage microbial breakdown of the organic layer.
The Calibration Protocol: Preventing Crown Destruction
The number one cause of post-power-raking lawn death is improper blade depth calibration. If the flail blades strike the soil surface, they will sever the turfgrass crowns and tear up the root system. The blades must only penetrate the thatch layer, hovering slightly above the actual dirt.
Step-by-Step Blade Adjustment
- The Concrete Baseline: Roll the power rake onto a flat, level concrete driveway or sidewalk. This provides a hard, unyielding surface that mimics the absolute lowest point the blades can reach without hitting soil.
- Set the Clearance: Lower the blade assembly until the flails just barely kiss the concrete. Then, raise the assembly exactly 1/4 inch for aggressive warm-season grasses (like Bermuda or Zoysia) or 1/2 inch for cool-season grasses (like Tall Fescue or Kentucky Bluegrass). Use a wooden block or feeler gauge to verify the gap.
- Test Pass: Make a single 10-foot pass on the lawn. Inspect the extracted debris. It should be 90% brown thatch and dead material. If you see large clumps of green, living grass with white roots attached, the blades are set too deep. Raise them immediately.
Warning: Wet Soil Hazard
Never power rake when the soil is wet or saturated. Wet soil causes the machine's wheels to sink, which inadvertently lowers the blade assembly relative to the turf crown. This guarantees severe scalping. Wait until the top 2 inches of soil are completely dry to the touch.
Never power rake when the soil is wet or saturated. Wet soil causes the machine's wheels to sink, which inadvertently lowers the blade assembly relative to the turf crown. This guarantees severe scalping. Wait until the top 2 inches of soil are completely dry to the touch.
Execution, Cleanup, and Post-Trauma Recovery
Operate the power rake in straight, overlapping lines, similar to mowing patterns. Make one pass in a North-South direction, and a second pass in an East-West direction for severe thatch. The lawn will look entirely destroyed—brown, thin, and shredded. This is the expected outcome and necessary for the recovery phase.
The 14-Day Recovery Protocol
Following the Penn State Extension guidelines for turf renovation, immediate intervention is required to stabilize the exposed soil and crowns.
- Debris Removal (Day 1): Rake or use a commercial leaf blower to remove 100% of the extracted thatch. Leaving it on the lawn will smother the remaining grass and invite fungal pathogens like Pythium blight.
- Overseeding (Day 2-3): The exposed soil and shallow grooves left by the flail blades create an ideal seedbed. Apply Tall Fescue seed at a rate of 6 to 8 lbs per 1,000 sq ft, or Kentucky Bluegrass at 2 to 3 lbs per 1,000 sq ft.
- Starter Fertilization (Day 3): Apply a high-phosphorus starter fertilizer (e.g., 18-24-12 N-P-K ratio) at a rate that delivers 1.0 lb of actual Nitrogen per 1,000 sq ft. Phosphorus is critical here to stimulate rapid root development in the severed crowns and new seedlings.
- Hydration (Days 1-14): Water lightly 2 to 3 times daily for 10 minutes to keep the top 1 inch of soil consistently moist. Do not apply heavy, deep watering, which will wash away seeds and cause soil erosion in the freshly grooved turf.
"Thatch accumulation is rarely caused by leaving grass clippings on the lawn. Clippings are 80% water and decompose rapidly. True thatch is composed of lignin-heavy stems and roots that accumulate when nitrogen fertilization outpaces microbial decomposition."
Cost Breakdown: DIY Rental vs. Professional Renovation
When deciding whether to tackle power raking yourself, factor in the physical labor of debris removal, which is often more exhausting than operating the machine itself.
| Expense Category | DIY Approach (5,000 sq ft) | Professional Service (5,000 sq ft) |
|---|---|---|
| Equipment / Labor | $75 - $110 (4-hour rental) | $175 - $250 (Includes labor & hauling) |
| Seed & Fertilizer | $60 - $90 | Usually included in renovation package |
| Debris Hauling | $0 (Curbside yard waste bags) or $40 (Dump fee) | Included |
| Total Estimated Cost | $135 - $240 | $175 - $250 |
| Time Investment | 6 - 9 hours (including cleanup) | 0 hours (Supervision only) |
For lawns under 3,000 square feet, the DIY route offers modest savings. However, for properties exceeding 5,000 square feet, the sheer volume of extracted thatch (often yielding 15 to 30 heavy contractor bags of debris) makes professional services highly cost-effective when factoring in disposal logistics and physical strain. Always verify that a professional service is utilizing a dedicated walk-behind power rake with flail blades, rather than simply attaching a dethatching module to a commercial mower, which lacks the necessary kinetic force to penetrate severe thatch layers.

