
Lawn Care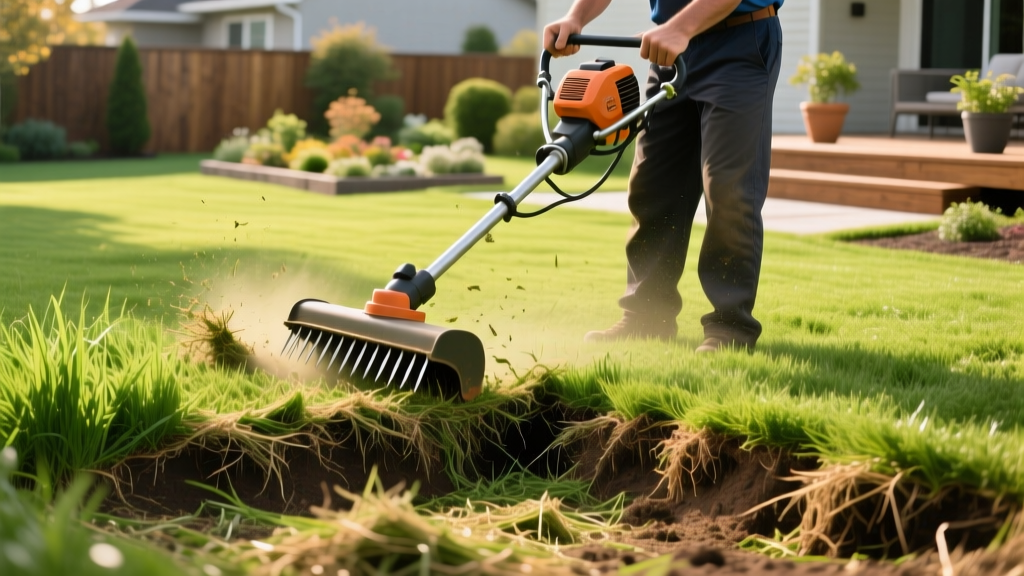
Power Thatcher Lawn Guide: Step-by-Step Dethatching Process
Understanding Thatch and the Power Thatcher
Thatch is a tightly bound layer of dead and living shoots, stems, and roots that develops between the green vegetation and the soil surface. While a thin layer (under 0.5 inches) insulates the soil and retains moisture, excessive thatch blocks water infiltration, harbors fungal pathogens, and prevents fertilizer from reaching the root zone. According to UMass Extension, once thatch exceeds 0.75 inches, mechanical intervention is required to prevent turf decline.
A power thatcher—often referred to as a vertical mower or power rake—uses a series of spinning, vertically oriented blades or tines to slice through the thatch layer and pull it to the surface. Unlike manual dethatching rakes, which are only viable for lawns under 500 square feet, a motorized thatcher provides the consistent torque and depth control necessary for full-property renovation. This step-by-step procedure outlines the exact calibration, execution, and recovery protocols required to dethatch without destroying your turf crown.
Critical Warning: Never operate a power thatcher on saturated soil. Wet soil causes the thatcher blades to tear living root systems and destabilize the turf crown, leading to severe scalping and long-term erosion.
Phase 1: Pre-Thatching Assessment and Preparation
Proper preparation dictates the success of the dethatching process. Skipping these steps is the primary cause of turf damage during mechanical renovation.
1. Measure the Thatch Layer
Use a sharp spade or a soil probe to cut a 3-inch deep wedge into the lawn. Measure the distinct brown, spongy layer above the dark topsoil. If the layer is less than 0.5 inches, cancel the dethatching; your lawn does not need it. If it measures between 0.5 and 1.0 inches, proceed with standard power raking. If it exceeds 1.0 inches, you will need to make multiple passes at varying depths to avoid ripping out live grass roots.
2. Moisture Calibration
Water the lawn deeply 48 hours before dethatching. The soil should be moist but not muddy. Perform the screwdriver test: push a 6-inch flathead screwdriver into the soil. It should slide in with moderate resistance. If it slides in effortlessly and comes out coated in mud, the soil is too wet. If you cannot push it past 2 inches, water the lawn for another 30 minutes and wait 24 hours.
3. Mowing and Site Clearing
Mow the lawn to a height of 1.5 inches, which is roughly half the standard maintenance height for most turfgrasses. This exposes the thatch layer to the thatcher blades. Walk the property and flag all shallow sprinkler heads, valve boxes, and hidden landscape lighting with high-visibility marking paint to prevent the thatcher from shattering plastic irrigation components.
Phase 2: Equipment Selection and Blade Calibration
Selecting the right machine and calibrating the blade depth are the most technical aspects of the procedure. As of 2026, homeowners typically choose between electric dethatchers for small urban lots and gas-powered commercial units for larger properties.
| Equipment Type | Model Example | Best For | Approximate Cost (2026) |
|---|---|---|---|
| Electric Dethatcher | Sun Joe AJ801E (12-Amp) | Lawns under 3,000 sq ft | $189 (Purchase) |
| Gas Power Rake | Billy Goat Outback PR550H | Lawns 3,000 - 10,000 sq ft | $115/day (Rental) |
| Walk-Behind Verticutter | Classen CP-2060 | Severe thatch / Commercial | $165/day (Rental) |
Calibrating Blade Depth
Most rental thatchers arrive with the blades set far too low, which will scalp the lawn down to bare dirt. You must adjust the blade depth based on your specific grass type:
- Cool-Season Grasses (Kentucky Bluegrass, Tall Fescue, Perennial Ryegrass): Set the blades to penetrate the thatch layer but remain 0.25 inches above the actual soil surface. The blades should score the thatch, not gouge the dirt.
- Warm-Season Grasses (Bermuda, Zoysia, St. Augustine): Set the blades slightly higher, roughly 0.375 inches above the soil. Warm-season grasses spread via above-ground stolons, and setting the blades too low will sever these vital runners, stunting recovery.
To calibrate, place the thatcher on a flat concrete driveway. Lower the blades until they just kiss the concrete, then raise the depth lever one or two notches to achieve the required clearance.
Phase 3: The Dethatching Execution
Operating a power thatcher requires a specific physical pattern to ensure uniform thatch removal without over-stressing any single area of the turf.
Pro Tip: Treat the thatcher like a heavy lawnmower. Keep the throttle high to maintain blade RPM, and push at a steady, walking pace. Moving too slowly allows the blades to chew up live grass crowns; moving too fast leaves the thatch layer intact.
- The Primary Pass: Drive the thatcher in straight, parallel lines across the lawn, overlapping each pass by 2 inches. Follow the same pattern you use for mowing.
- The Perpendicular Pass: For lawns with thatch exceeding 0.75 inches, make a second set of passes perpendicular to the first (creating a cross-hatch grid pattern). This lifts matted, horizontal thatch that the first pass missed.
- Edge Management: Turn off the blade engagement (or lift the deck) when turning around at the end of each row. Dragging spinning blades through a tight turn will rip circular divots into the lawn.
Phase 4: Debris Removal and Post-Thatch Recovery
After dethatching, your lawn will look severely damaged, covered in piles of brown, fibrous debris. This is normal. The immediate cleanup and subsequent recovery steps are critical to prevent weed invasion and disease.
Debris Extraction
Do not leave the pulled thatch on the lawn; it will smother the remaining grass and block sunlight. Use a heavy-duty metal leaf rake or a commercial lawn vacuum to remove 100% of the surface debris. For a standard 5,000-square-foot lawn, expect to generate between 15 and 30 cubic feet of thatch waste. Bag it for municipal yard waste collection or add it to a high-heat compost pile.
Overseeding and Fertilization
Dethatching opens the soil canopy, making it the ideal time to introduce new seed and nutrients. According to Penn State Extension, combining dethatching with core aeration and overseeding yields the highest turf density recovery.
- Aeration: Run a core aerator over the lawn immediately after debris removal to relieve soil compaction and create seed-to-soil contact holes.
- Seeding: Apply turf-type tall fescue or Kentucky bluegrass seed at a rate of 5 to 8 lbs per 1,000 square feet.
- Fertilization: Apply a high-phosphorus starter fertilizer (such as a 18-24-12 N-P-K ratio) at a rate of 1.0 lb of actual nitrogen per 1,000 square feet to fuel rapid root establishment.
Phase 5: Troubleshooting Common Failure Modes
Even with careful execution, environmental variables can cause unexpected issues post-thatching. Use this decision framework to address common failure modes:
Symptom: The lawn remains brown and shows no green shoots after 21 days.
Cause: Blade depth was set too low, destroying the turf crown and root nodes, or the lawn was subjected to a heatwave immediately after dethatching without adequate irrigation.
Fix: The turf is dead and cannot recover. You must perform a full lawn renovation. Apply a non-selective herbicide, till the top 2 inches of soil, lay down fresh sod, or hydroseed the area.
Symptom: Broadleaf weeds and crabgrass rapidly colonize the lawn within 14 days.
Cause: Dethatching exposes bare soil and dormant weed seeds to sunlight. If pre-emergent herbicides were not applied correctly (or were stripped away during debris removal), weeds will outcompete slow-growing grass seed.
Fix: Apply a post-emergent selective herbicide (like Quinclorac for crabgrass or 2,4-D for broadleaf weeds) once the new grass seedlings have been mowed three times. Never apply pre-emergents immediately after dethatching if you plan to overseed, as they will prevent grass seed germination.
Symptom: Fungal patches (Dollar Spot or Brown Patch) appear on the stressed turf.
Cause: Heavy watering combined with the open wounds created by the thatcher blades creates an entry point for fungal pathogens.
Fix: Switch to deep, infrequent watering (watering only in the early morning). Apply a systemic fungicide containing Azoxystrobin or Propiconazole to halt the spread, and ensure the mower blades are razor-sharp to prevent further tearing of the leaf tissue during recovery mowing.

