
Lawn Care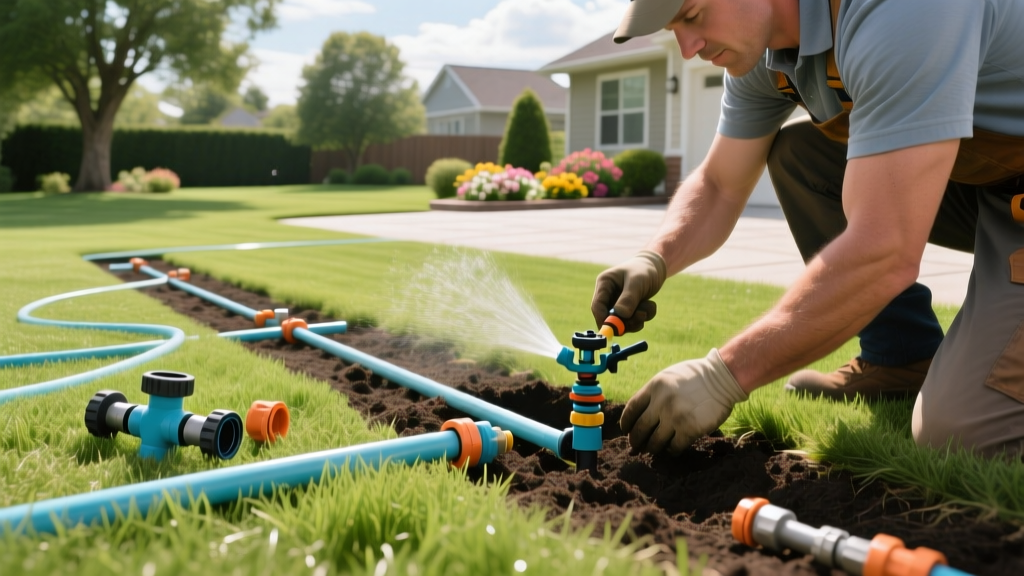
Putting in a Lawn Sprinkler System: DIY Steps, Costs, and Layouts
Putting in a lawn sprinkler system is a high-impact landscaping upgrade that requires precise hydraulic calculations, strategic hydro-zoning, and strict adherence to local plumbing codes. While hiring a professional crew is common, a well-planned DIY installation can save thousands of dollars and yield a system tailored exactly to your yard's microclimates. Success depends on moving beyond basic grid layouts and understanding precipitation rates, friction loss, and component compatibility.
DIY vs. Professional Installation: Cost and Scope Matrix
Before purchasing materials, evaluate the financial and logistical reality of your project. The following matrix breaks down the expectations for a standard 5,000-square-foot suburban lawn divided into four irrigation zones.
| Factor | DIY Installation | Professional Installation |
|---|---|---|
| Total Cost (5,000 sq ft) | $1,200 – $2,500 | $3,500 – $6,500 |
| Time Investment | 30 – 50 hours (weekends) | 2 – 4 days |
| Trenching Method | Manual shovel or rented walk-behind trencher ($150/day) | Vibratory plow (minimal turf damage) |
| Permits & Inspections | Homeowner must pull and schedule | Contractor handles all code compliance |
| Warranty | Manufacturer parts only (1–5 years) | Labor and parts (1–3 years typical) |
Pro Tip: If your property features heavy clay soil, extensive tree root networks, or steep elevation changes exceeding 15 degrees, the cost of renting a rock saw or dealing with complex backflow requirements often negates DIY savings. Hire a licensed irrigator for these edge cases.
Hydraulic Baseline: Testing Pressure and Flow
You cannot design a zone layout without knowing your water supply's physical limits. Residential municipal water typically delivers between 40 and 65 PSI (pounds per square inch) and 8 to 12 GPM (gallons per minute) through a standard 3/4-inch water meter.
- Test Static Pressure: Screw a pressure gauge onto an outdoor hose bib closest to your water main. Ensure no other water sources in the house are running. Record the PSI. If it exceeds 75 PSI, you must install a pressure-reducing valve (PRV) at the point of connection to prevent blown solenoid diaphragms and misting sprinkler heads.
- Test Flow Rate (GPM): Run a garden hose at full blast into a 5-gallon bucket. Time how many seconds it takes to fill. Divide 300 by the number of seconds to get your maximum GPM. For example, 300 / 30 seconds = 10 GPM.
According to the EPA WaterSense program, designing zones that exceed your available GPM will cause severe pressure drops, resulting in poor head-to-head coverage and dry spots.
Hydro-Zoning and Head Selection
A critical mistake when putting in a lawn sprinkler system is mixing head types on the same valve. Different nozzles output water at vastly different precipitation rates (PR).
- Spray Heads (Fixed): Output 1.5 to 2.0 inches per hour. Ideal for small, rectangular areas under 15 feet wide. Use models like the Rain Bird 1800-SAM-PRS, which includes a built-in pressure regulator and check valve to prevent low-head drainage on slopes.
- Rotor Heads (Gear-Driven): Output 0.4 to 0.6 inches per hour. Required for large expanses (15 to 40 feet). The Hunter I-20 or Rain Bird 5000 Plus are industry standards for durability and arc adjustment.
Warning: Never wire spray heads and rotor heads to the same zone valve. Because rotors apply water much slower, the spray head zones will become waterlogged and drown your turf before the rotor zones receive adequate moisture.
Material Specifications: Pipe and Fittings
Selecting the correct pipe class ensures your system survives ground movement and water hammer (pressure surges when valves close).
Mainline vs. Lateral Lines
The mainline runs from the house to the valve manifolds and is under constant municipal pressure. Use Schedule 40 PVC (typically 1-inch or 1.25-inch diameter) for the mainline. It is rigid and rated for high PSI.
The lateral lines run from the valves to the sprinkler heads and only pressurize when the zone is active. You can use Class 200 PVC (thinner wall, easier to cut) or Polyethylene tubing connected with insert fittings and stainless steel crimp clamps. Poly tubing is highly recommended in regions with deep frost lines, as its flexibility prevents cracking during winter freeze-thaw cycles.
Step-by-Step Trenching and Assembly
Follow this sequence to ensure a code-compliant and structurally sound installation.
- Utility Locates: Call 811 at least 72 hours before digging to have municipal utilities marked. This is a legal requirement and prevents catastrophic damage to buried gas or fiber-optic lines.
- Trenching Depth: Dig trenches 8 to 12 inches deep. This places the pipe below the reach of standard lawn aerator tines (which typically penetrate 3 to 4 inches).
- Backflow Preventer Installation: Install a Pressure Vacuum Breaker (PVB) or Reduced Pressure Zone (RPZ) assembly above ground, at least 12 inches higher than the highest sprinkler head in your yard. As noted by Penn State Extension, this device is legally mandated to prevent contaminated lawn water from siphoning back into the municipal drinking supply.
- Gluing PVC: Use a two-step process. Apply purple PVC primer to both the pipe and the fitting hub to soften the plastic, followed by medium-body clear PVC cement. Hold the joint firmly for 15 seconds to prevent the pipe from pushing out of the fitting due to hydraulic pressure.
- Flushing the Lines: Before attaching the sprinkler heads, cap the ends of the lateral lines and turn on each zone manually for 30 seconds to flush out dirt, PVC shavings, and rocks that could clog the head nozzles.
Common Failure Modes and Edge Cases
Even with premium components, poor execution leads to system failure. Watch out for these specific installation errors:
- Head-to-Edge Spacing: Amateurs often space sprinkler heads so the water reaches the edge of the lawn. Wind and evaporation will leave the perimeter dry. Professional irrigators use head-to-head spacing, meaning the spray from one head physically reaches the adjacent head's body, ensuring overlapping distribution uniformity.
- Ignoring Friction Loss: Every 100 feet of 1-inch PVC pipe reduces your available pressure by roughly 2 to 3 PSI. If you run a lateral line 250 feet to the back of the property without upsizing to 1.25-inch pipe, the furthest heads will fail to pop up fully.
- Missing Flush Valves: Always install an automatic flush valve at the very end of each lateral line. This allows debris to clear every time the zone pressurizes, extending the life of your nozzles.
Putting in a lawn sprinkler system is an exercise in fluid dynamics and landscape architecture. By respecting your water meter's GPM limits, separating hydro-zones by precipitation rate, and adhering to backflow codes, you will build a system that conserves water and maintains a resilient, deep-rooted turf canopy for decades.

