
Lawn Care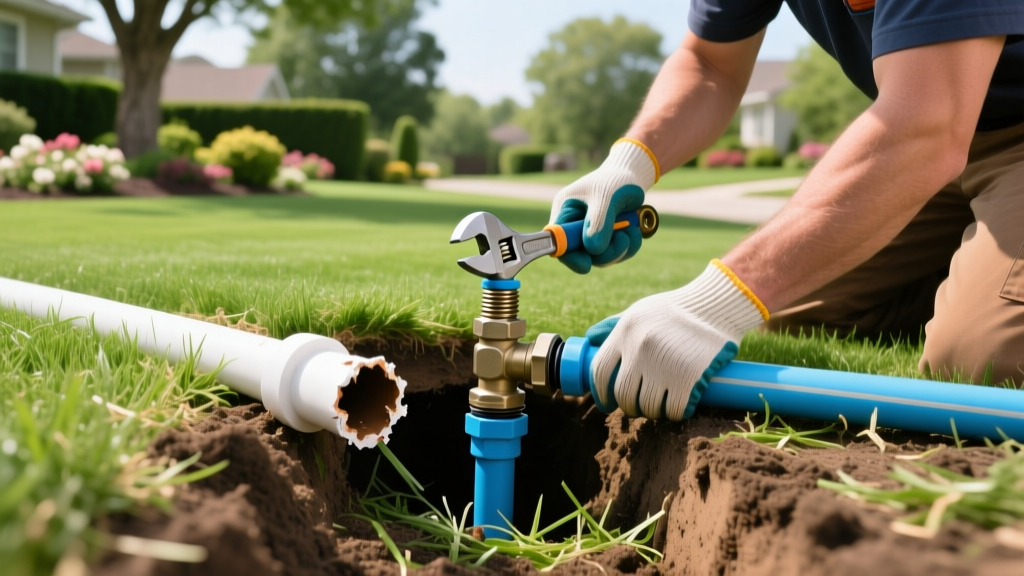
How to Fix a Broken Sprinkler Line: PVC & Poly Pipe Repair
Diagnosing the Break: Is It PVC or Poly?
Before grabbing a shovel, you must accurately identify the symptoms and the pipe material. A broken underground irrigation line typically manifests as a localized soggy patch, a sudden drop in water pressure at the zone heads, or a geyser erupting through the topsoil. According to the EPA WaterSense program, even a small 1/16-inch leak in a pressurized line can waste over 1,000 gallons of water per month, severely impacting your utility bill and soil health.
Residential irrigation systems primarily use one of two materials. Identifying which one you have dictates your repair strategy, required fittings, and curing times.
| Characteristic | Schedule 40 / Class 200 PVC | Polyethylene (Poly) Pipe |
|---|---|---|
| Appearance | Rigid, white or gray plastic | Flexible, black plastic with a waxy feel |
| Joining Method | Solvent welding (primer and cement) | Insert fittings with stainless steel crimp clamps |
| Common Failure Point | Brittle fractures from soil shifting or root intrusion | Tears from freeze-thaw expansion or rodent damage |
| Average Repair Time | 45 minutes (includes 15-min cure time) | 20 minutes (no chemical cure time required) |
Essential Tools and Material Costs
As of 2026, DIY repair costs remain highly affordable compared to professional call-out fees, which currently average $125 to $185 per visit. Here is the exact toolkit you need for a permanent fix.
PVC Repair Kit ($15 - $30)
- Hydro-Rain or Toro Slip-Fix Expansion Coupling: $12 - $18. This telescoping fitting eliminates the need to dig a massive trench to bend the pipe for a standard coupling.
- Oatey Purple Primer and Medium-Body Clear Cement: $8 - $12. Do not use 'all-in-one' glues for pressurized underground lines; they fail under thermal expansion.
- Hacksaw or PVC Ratchet Cutters: For clean, square cuts.
Poly Pipe Repair Kit ($20 - $40)
- Barbed Poly Insert Coupling: $3 - $6. Ensure it matches your pipe's SDR (Standard Dimension Ratio) rating, typically SDR 9 or SDR 11.
- Oetiker Stainless Steel Pinch Clamps or Crimp Rings: $15 for a pack of 50.
- Crimp Tool or Pinch Clamp Pliers: $25 - $45. Mandatory for achieving a watertight seal.
How to Fix a Broken Sprinkler Line: PVC Repair
Repairing rigid PVC requires precision. Solvent welding creates a chemical bond that fuses the plastic, meaning you only get one chance to seat the fitting correctly.
- Excavate the Work Area: Dig a hole at least 12 inches wider than the suspected break and 6 inches deeper than the pipe. This provides the necessary elbow room to cut and prime the pipe. Shoring up the trench walls with a piece of plywood prevents soil collapse while you work.
- Cut Out the Damaged Section: Using a hacksaw or ratchet cutter, remove the cracked section. Make perfectly square cuts. Pro Tip: Leave at least 2 inches of clean, unblemished pipe on both sides of the break to ensure a solid bonding surface.
- Dry and Deburr: Wipe the remaining pipe ends completely dry with a rag. Use a utility knife to remove interior and exterior burrs. Moisture or dirt will compromise the solvent weld.
- Prime the Pipe and Fitting: Apply Oatey purple primer to the outside of the pipe ends and the inside of the Slip-Fix coupling. The primer softens the PVC and creates a chemical pathway for the cement.
- Apply Cement and Seat: Apply a generous, even layer of medium-body cement over the primed areas. Immediately push the Slip-Fix coupling onto the pipe while giving it a quarter-turn to distribute the cement. Hold firmly for 15 seconds to prevent push-out.
- Extend and Repeat: Pull the telescoping Slip-Fix to bridge the gap, then repeat the priming and cementing process on the opposite side.
Repairing Polyethylene (Poly) Irrigation Pipes
Poly pipe is highly flexible and commonly used in regions with severe freeze-thaw cycles. Because it cannot be glued, it relies on mechanical friction and compression.
The Crimp Clamp Mistake
Many homeowners attempt to repair poly pipe using standard worm-gear hose clamps (the ones with a slotted screw). This is a critical error. Worm-gear clamps exert uneven pressure, cutting into the soft poly material over time and eventually causing a secondary leak.
⚠️ WARNING: Always use stainless steel pinch clamps (Oetiker style) or copper crimp rings specifically designed for poly irrigation pipe. These provide 360-degree uniform compression, ensuring a permanent, leak-free seal that withstands underground soil shifting.
Poly Repair Steps
- Cut out the damaged section using pipe cutters.
- Slide two pinch clamps onto the existing pipe ends, positioning them about 2 inches back from the cut.
- Push the barbed insert coupling fully into one side of the pipe. If the poly is stiff, dip the fitting in hot water for 30 seconds to soften the plastic.
- Slide the clamp over the barb and use your pinch clamp pliers to crimp it shut. You will hear a distinct 'click' when the tension is correct.
- Repeat on the opposite side.
Pressure Testing and Backfilling
Before throwing dirt back into the trench, you must pressure test the repair. Turn on the zone manually from the irrigation controller. Let the system pressurize and run for 5 minutes. Inspect the joints for weeping or spraying. According to the University of Minnesota Extension, verifying system integrity before backfilling saves hours of re-excavation if a joint fails.
Once confirmed leak-free, backfill the hole with the native soil, tamping it down every 4 inches to prevent future settling. Avoid throwing sharp rocks directly onto the repaired pipe; use a layer of sand or sifted topsoil as a protective buffer.
Frequently Asked Questions
Can I use flexible rubber hose to bridge a broken underground PVC line?
No. While it might seem like a quick fix, standard rubber garden hose is not rated for constant underground burial or the continuous 50-80 PSI static pressure of an irrigation mainline. It will degrade from soil microbes and UV exposure if exposed, leading to catastrophic failure. Always use rated Schedule 40 PVC or Poly pipe.
What if the pipe keeps breaking in the exact same spot?
Recurring breaks in the same location usually indicate an external stressor. Check for aggressive tree root systems growing under the pipe, heavy vehicular traffic driving over the lawn above the line, or improper winterization causing repeated freeze expansion. If roots are the culprit, reroute the pipe around the root ball or install a physical root barrier.
How deep should sprinkler lines be buried to prevent future breaks?
Irrigation lateral lines should be buried 8 to 12 inches deep, while mainlines should be 12 to 18 inches deep. This depth protects the pipes from surface aeration tools, shallow landscaping edgers, and minor frost heave, while remaining accessible for future repairs.

