
Lawn Care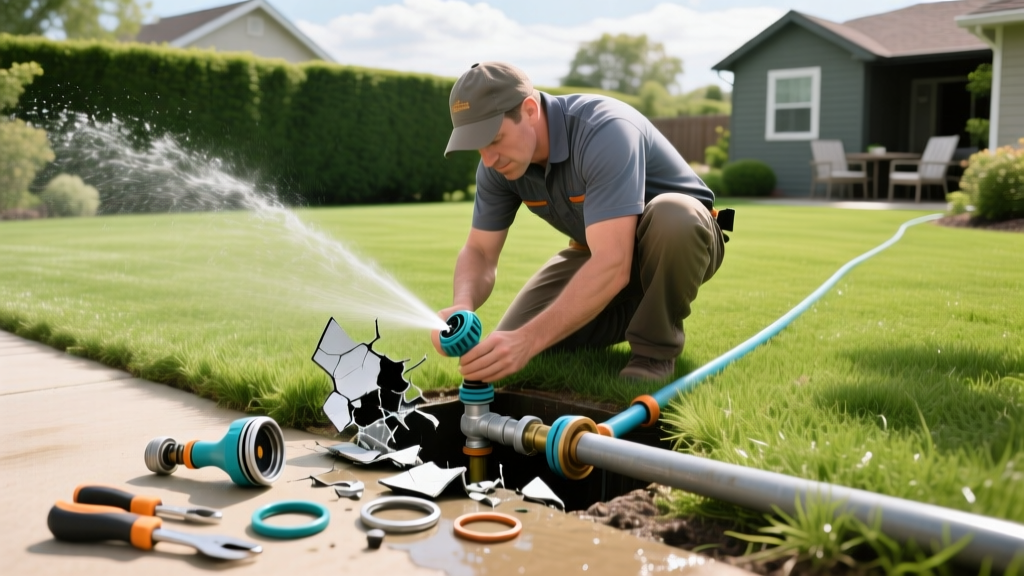
How to Repair Lawn Sprinkler Heads, Valves, and Leaks
A malfunctioning irrigation system does more than create brown patches in your turf; it wastes massive amounts of water and drives up utility bills. According to the EPA WaterSense program, a broken or misaligned sprinkler system can waste up to 25,000 gallons of water annually per household. Learning how to repair lawn sprinkler components—from clogged pop-up heads to failed solenoid valves—saves homeowners an average of $120 to $180 per service call.
This comprehensive guide covers the exact diagnostic frameworks, part numbers, and repair techniques used by certified irrigation technicians, updated with 2026 material costs and smart-controller integrations.
The Irrigation Diagnostic Framework
Before digging trenches or replacing parts, map the symptom to the root cause. Use this decision tree to isolate the failure point in your zone:
- Symptom: Geyser shooting from the sprinkler head.
Cause: Missing nozzle, stripped riser threads, or broken swing joint.
Fix: Replace the nozzle or install a new flexible swing joint. - Symptom: Zone will not turn off manually or via controller.
Cause: Debris trapped under the valve diaphragm or a shorted solenoid.
Fix: Flush the valve body and replace the diaphragm kit. - Symptom: Low pressure across the entire zone; heads barely pop up.
Cause: Mainline leak before the zone valve, or a partially closed master valve.
Fix: Check the master valve bleed screw and inspect the yard for saturated soil. - Symptom: Controller shows a 'Short Circuit' or 'Fault' error.
Cause: Corroded splice in the field wiring or a burnt solenoid coil.
Fix: Test solenoid ohms and replace wire nuts with grease-filled connectors.
How to Repair Lawn Sprinkler Heads and Nozzles
Pop-up spray heads (like the Rain Bird 1804 VAN) and rotary heads (like the Hunter PGP Ultra) are the most frequent failure points. Lawnmowers, aerators, and foot traffic routinely crack the housings.
Step-by-Step Head Replacement
- Excavate: Use a hand trowel to dig a 6-inch diameter circle around the broken head. Remove soil down to the inlet fitting.
- Unscrew: Twist the broken body counterclockwise. If the nipple breaks off inside the fitting, use a 1/2-inch internal pipe wrench (nipple extractor) to remove the remnant.
- Check the Swing Joint: Never connect rigid PVC directly to a sprinkler head. Always use a flexible swing joint or funny pipe. This allows the head to absorb impact without snapping the mainline.
- Seal the Threads: Wrap the male threads of the swing joint with 3 layers of PTFE (Teflon) tape or apply a non-hardening pipe thread sealant. Do not use tape on the ratchet threads at the top of the body.
- Clean the Filter: Before attaching the new head, pull out the 100-mesh stainless steel filter screen inside the inlet and rinse it. A clogged filter is the #1 cause of uneven spray patterns.
Pro Tip: When replacing standard spray nozzles, upgrade to High-Efficiency Nozzles (HENs) like the Rain Bird U-Series or Hunter MP Rotator. These apply water at a slower rate (0.4 to 0.6 inches per hour), drastically reducing runoff on sloped lawns and clay soils.
Fixing Sprinkler Valves and Solenoid Failures
If a zone fails to activate, the issue is almost always at the valve manifold. The two primary culprits are the solenoid and the diaphragm.
Testing the Solenoid with a Multimeter
The solenoid is the electromagnetic cylinder on top of the valve. To test it, set your digital multimeter to the Ohms (Ω) setting, specifically the 200Ω range. Touch the red and black probes to the two wires protruding from the solenoid.
- Normal Reading: 20 to 60 ohms. The coil is intact.
- Open Loop ('OL' or '1'): The internal copper wire is broken. Replace the solenoid.
- Zero or Near-Zero Ohms: The coil has shorted out internally. Replace the solenoid.
Replacement solenoids, such as the Hunter SRV or Rain Bird DVF models, cost between $12 and $18 in 2026. Always twist the new solenoid in clockwise until it clicks; over-tightening will crack the plastic bonnet.
Cleaning and Replacing the Diaphragm
If the solenoid tests fine but the zone won't open, grit or sand is likely trapped under the rubber diaphragm, blocking the water ports. Turn off the main water supply, unscrew the 4 to 6 bonnet screws, and lift the diaphragm assembly. Flush the lower valve body with a bucket of water to eject any pebbles. If the rubber diaphragm is torn, warped, or has a compromised spring, install a direct-match rebuild kit (typically $8 to $11).
Warning: Never use petroleum-based lubricants like Vaseline on valve diaphragms or O-rings. Petroleum degrades EPDM rubber rapidly, causing the valve to leak internally within a single season. Use only silicone-based plumber's grease.
Repairing Leaking PVC and Poly Irrigation Pipes
Underground pipe leaks manifest as localized soggy spots, sunken soil, or a sudden drop in water pressure. The repair method depends entirely on your pipe material.
| Pipe Type | Identification | Best Repair Method | Material Cost |
|---|---|---|---|
| PVC (Schedule 40) | Rigid, white plastic, glued joints | Expansion Coupling (e.g., Toro Slip-Fix) | $14 - $22 |
| Polyethylene | Flexible, black roll pipe, barbed fittings | Stainless steel insert fittings + dual clamps | $4 - $8 |
| Funny Pipe | 1/2-inch flexible black tubing at the head | Cut out bad section, push in new barbed coupler | $1 - $3 |
For PVC repairs, avoid cutting out a massive section of pipe to install standard couplings. Instead, use an expansion coupling like the Toro Blue Stripe Slip-Fix. You only need to cut out a 2-inch section of the damaged pipe. The Slip-Fix telescopes, allowing you to glue it in place without bending or moving the surrounding underground pipes. For poly pipe, always use stainless steel insert fittings with two hose clamps per side. Standard plastic barbed fittings will crack under soil shifting and freeze-thaw cycles.
Upgrading Wiring and Smart Controllers
When you repair lawn sprinkler wiring, the environment is inherently hostile. Moisture and soil minerals will corrode standard wire nuts within 12 to 18 months, leading to ghost-shorting and erratic zone behavior.
According to irrigation best practices outlined by Utah State University Extension, all underground field splices must be waterproofed. Strip the 18-gauge multi-strand wires, twist them together, and cap them with grease-filled wire nuts (such as the 3M DBR/Y-6 or direct-bury silicone gel connectors). The silicone gel completely displaces moisture, ensuring a decades-long electrical connection.
If your controller is over 7 years old, a repair is the ideal time to upgrade to a smart EPA WaterSense-certified controller. Models like the Rachio 3e or Hunter Pro-C with Hydrawise ($250 to $350 installed) utilize local weather station data to automatically skip watering after rain events, paying for themselves in water savings within two seasons.
2026 Cost Breakdown: DIY vs. Professional Repair
Deciding whether to tackle the repair yourself or hire a licensed irrigation contractor depends on your comfort with PVC gluing and electrical troubleshooting. Below is the current market pricing for common repairs.
| Repair Task | DIY Material Cost | Professional Service Cost | Time Required |
|---|---|---|---|
| Replace 1 Pop-Up Head | $6 - $12 | $85 - $125 (Minimum trip charge) | 15 - 20 mins |
| Replace Valve Solenoid | $14 - $18 | $110 - $150 | 20 - 30 mins |
| Rebuild Valve Diaphragm | $8 - $11 | $125 - $175 | 30 - 45 mins |
| Fix PVC Mainline Leak | $20 - $35 | $250 - $400 (Includes excavation) | 1 - 2 hours |
By mastering these foundational repair techniques, you keep your turf deeply hydrated, protect your landscape investment, and eliminate the water waste associated with aging irrigation infrastructure.

