
Lawn Care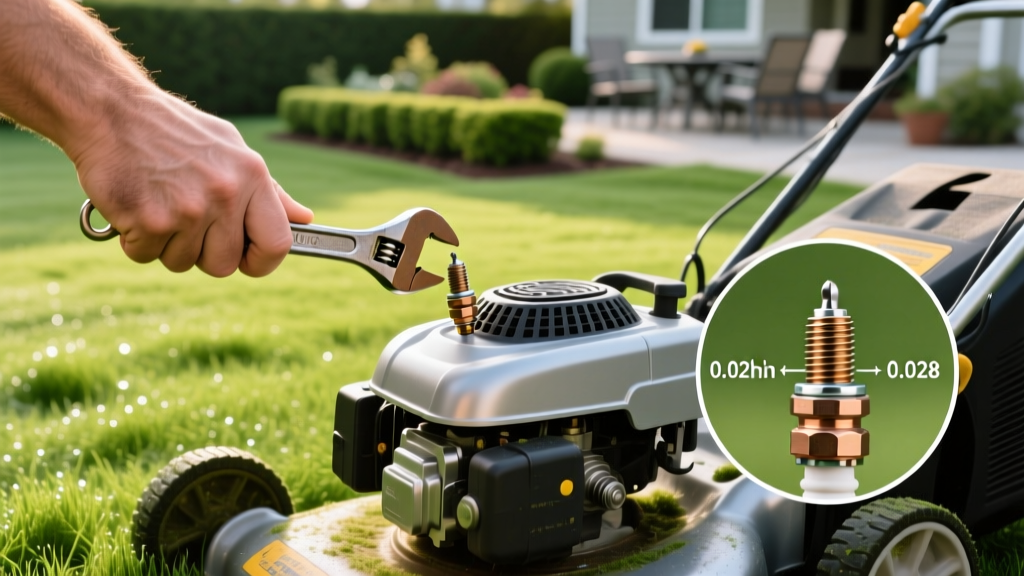
How to Change a Mower Spark Plug: Gap Settings & Steps
A failing spark plug is the leading cause of hard starting, rough idling, and unburned fuel washing into your mower’s crankcase. While a walk-behind mower spark plug costs between $3.50 and $8.00, ignoring it can lead to carburetor flooding, fouled ignition coils, and degraded engine oil. Learning how to change a mower spark plug is a foundational small-engine maintenance skill that takes less than 15 minutes but requires specific torque and gapping knowledge to avoid catastrophic cylinder head damage.
This guide covers the exact diagnostic matrices, gap specifications, and installation procedures for the most common residential mower engines, including the Briggs & Stratton 625EXi series and the Honda GCV170 overhead valve (OHV) platforms.
Diagnosing a Failing Spark Plug: Symptom Matrix
Before pulling the plug, verify that your mower’s performance issues actually point to ignition failure. Use this diagnostic matrix to isolate the problem.
| Symptom | Primary Cause | Secondary Check |
|---|---|---|
| Requires excessive choke to start | Electrode wear causing a wide gap | Check fuel age and carburetor jets |
| Engine surges at idle | Carbon tracking on ceramic insulator | Inspect air filter for severe clogging |
| Dies immediately under thick grass load | Insufficient spark voltage / cracked porcelain | Test ignition coil air gap (should be 0.010') |
| Backfiring through carburetor | Incorrect spark plug heat range | Verify exact OEM plug model number |
Selecting the Correct Replacement Plug
Small engine manufacturers do not manufacture spark plugs; they source them from Champion, NGK, or Bosch. Using the exact OEM-specified model is critical because small air-cooled engines operate at significantly higher cylinder head temperatures than liquid-cooled automotive engines.
Standard Flathead vs. OHV Engines
- Briggs & Stratton Flathead (L-Head): The industry standard is the Champion RJ19LM or NGK B2-LM. These engines require a specific thread reach and heat range to prevent pre-ignition.
- Honda & Briggs OHV Engines: Overhead valve engines like the Honda GCV160/GCV170 typically require the NGK BPR5ES or Champion RC12YC. The 'R' denotes a built-in resistor, which is mandatory on mowers with electronic fuel injection (EFI) or digital ignition modules to prevent electromagnetic interference.
Warning: Do Not Substitute Automotive Plugs
Never install a standard automotive spark plug (like an NGK BPR6ES) in a mower engine, even if the thread pitch matches. Automotive plugs run 'colder' and will rapidly carbon-foul in an air-cooled mower engine that operates under heavy, low-RPM torque loads.
Never install a standard automotive spark plug (like an NGK BPR6ES) in a mower engine, even if the thread pitch matches. Automotive plugs run 'colder' and will rapidly carbon-foul in an air-cooled mower engine that operates under heavy, low-RPM torque loads.
Essential Tools and Safety Preparation
Stripping the threads on an aluminum mower cylinder head turns a $5 repair into a $150 Heli-Coil insert job. Gather these specific tools before beginning:
- Spark Plug Socket: 5/8' (16mm) or 13/16' (21mm) depending on your engine. Crucial: It must have an internal rubber or magnetic boot to grip the ceramic insulator and prevent it from snapping off inside the cylinder head.
- Wire Feeler Gauge: Specifically a brass or steel blade gauge capable of measuring 0.020' to 0.040' increments.
- Compressed Air Canister or Blowgun: To clear debris from the spark plug well.
- Dielectric Grease: For the spark plug boot interior.
Step-by-Step: How to Change a Mower Spark Plug
1. Disconnect the Ignition Boot
Locate the thick black wire leading to the engine block. Grip the rubber or plastic boot—never the wire itself—and twist gently while pulling straight out. Pulling the wire can snap the internal copper core, leading to intermittent misfires.
2. Purge the Spark Plug Well
Before loosening the plug, use compressed air to blow out grass clippings, soil, and chaff surrounding the base of the plug. If debris falls into the combustion chamber when the plug is removed, it will score the cylinder wall and destroy the piston rings upon startup.
3. Remove the Old Plug
Seat your spark plug socket fully onto the hex nut. Turn counter-clockwise. If the plug resists, stop immediately. Do not apply excessive leverage. Spray a small amount of penetrating oil (like PB Blaster) around the base threads, wait 10 minutes, and try again to avoid snapping the plug shell inside the head.
4. Read the Old Plug (Engine Diagnostics)
The color of the removed plug’s ground strap and center electrode tells you about your engine’s internal health:
- Tan/Light Brown: Optimal combustion. Engine is running perfectly.
- Dry Black/Sooty: Rich fuel mixture. Check your air filter and choke linkage.
- Wet/Oily: Oil is entering the combustion chamber. Check for overfilled crankcase oil or worn breather valve.
- White/Blistered: Engine is running too hot. Check cooling fins for debris blockage or verify you aren't using a plug with a heat range that is too cold.
5. Gap the New Spark Plug
Even if a plug comes 'pre-gapped' from the factory, shipping vibrations and handling often alter the gap. According to NGK's technical guidelines, you must verify the gap before installation. For 90% of standard push mowers, the required gap is 0.030 inches (always verify the sticker on your mower deck or engine shroud).
Slide the 0.030' blade of your feeler gauge between the center and ground electrodes. It should drag slightly. If it is too wide, gently tap the ground strap on a wooden surface. If it is too narrow, use the bending notch on your gauge tool to pry the ground strap outward. Never pry against the center electrode, as this will crack the ceramic insulator.
6. Thread by Hand (The Most Critical Step)
Modern mower cylinder heads are made of soft cast aluminum. Never start a spark plug with a ratchet. Thread the new plug into the cylinder head entirely by hand. It should spin smoothly for at least 8 to 10 full rotations. If you meet resistance within the first two turns, the plug is cross-threaded. Back it out immediately and restart.
7. Final Torque
Once the plug is seated hand-tight, use your socket and ratchet to tighten it further. According to Briggs & Stratton maintenance specifications, standard 14mm thread plugs require 18 to 22 lb-ft of torque. If you do not have a torque wrench, the standard rule for a new plug with a crush washer is to tighten it an additional 1/2 to 2/3 of a turn past hand-tight to properly seat the washer.
Pro-Tip: Skip the Anti-Seize
Most generic guides recommend applying anti-seize lubricant to spark plug threads. NGK explicitly advises against this for their nickel-plated spark plugs. Anti-seize acts as a lubricant and alters the torque coefficient by up to 20%. If you torque a lubricated plug to standard dry specifications, you will over-torque it, stretching the aluminum threads and potentially stripping the cylinder head.
Most generic guides recommend applying anti-seize lubricant to spark plug threads. NGK explicitly advises against this for their nickel-plated spark plugs. Anti-seize acts as a lubricant and alters the torque coefficient by up to 20%. If you torque a lubricated plug to standard dry specifications, you will over-torque it, stretching the aluminum threads and potentially stripping the cylinder head.
8. Reconnect the Boot
Apply a tiny dab of dielectric grease inside the rubber ignition boot. This prevents moisture intrusion and prevents the rubber from baking onto the ceramic terminal over the summer. Push the boot onto the terminal until you feel and hear a distinct 'click'.
Frequently Asked Questions
How often should I change my mower's spark plug?
For standard copper-core plugs, replace them every 100 hours of operation or once per mowing season, whichever comes first. If you have upgraded to an Iridium or Platinum small engine plug (like the NGK Iridium IX series), you can extend the interval to 300 hours, though the higher upfront cost ($9-$12) rarely justifies the lifespan extension for average residential lawns.
Can I clean and reuse a fouled spark plug?
While you can clean light carbon deposits with a wire brush, it is highly discouraged. Cleaning alters the microscopic surface of the electrodes, changing the spark dispersion pattern. Furthermore, you cannot reverse electrode erosion. Given that a replacement plug costs less than a cup of coffee, cleaning is a false economy that risks hard-starting and flooded carburetors.
My mower still won't start after changing the plug. What next?
If you have confirmed the new plug is gapped correctly and installed properly, the issue lies elsewhere in the ignition or fuel system. First, test for spark: remove the plug, reconnect the boot, ground the metal threads of the plug against the engine block, and pull the starter cord in a shaded area. If you see a crisp blue spark, your ignition system is fine, and your issue is fuel delivery (likely a clogged carburetor jet or stale ethanol fuel). If there is no spark or it is weak and orange, your ignition coil has failed or the coil air gap has widened due to vibration.

