
Lawn Care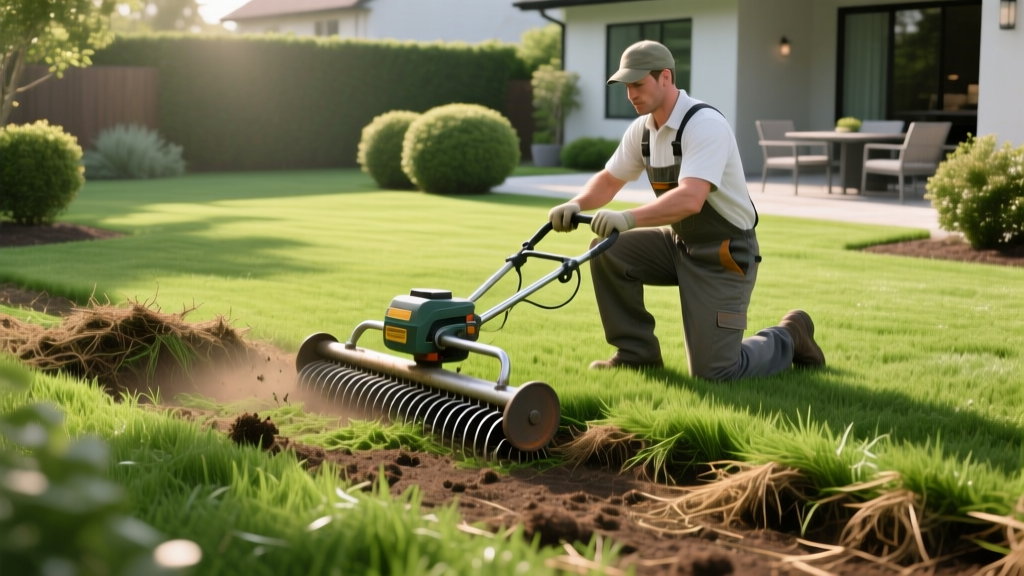
How to Fix a Lawn That Needs Dethatching: Step-by-Step
The 0.5-Inch Rule: Diagnosing a Lawn That Needs Dethatching
Thatch is a tightly intermingled layer of living and dead stems, roots, and rhizomes that accumulates between the soil surface and the active green canopy. While a thin layer (under 0.5 inches) insulates roots and retains moisture, excessive thatch blocks water infiltration, harbors turf diseases like brown patch, and prevents fertilizer from reaching the root zone. If your turf feels spongy underfoot, or if you are dealing with a lawn that needs dethatching, mechanical intervention is required.
The Core Sample Diagnostic Test
Do not guess your thatch depth. Use a sharp spade or a soil probe to extract a 3-inch deep, wedge-shaped core sample from the lawn. Measure the distinct brown, spongy layer between the green grass blades and the dark topsoil. If this layer exceeds 0.5 inches, dethatching is mandatory. If it is under 0.5 inches but the soil is compacted, you need core aeration, not dethatching.
According to turfgrass researchers at the University of Minnesota Extension, thatch accumulation is often accelerated by heavy applications of synthetic, high-nitrogen fertilizers and overwatering, which suppress the soil microbes responsible for breaking down lignin-rich grass clippings.
Equipment Selection Matrix: Match the Tool to the Thatch Depth
Selecting the wrong equipment can scalp your turf or fail to penetrate the thatch layer. Match your tool to the severity of the thatch buildup and your total lawn square footage.
| Equipment Type | Best Use Case | Blade / Tine Spacing | Estimated Cost (2026) |
|---|---|---|---|
| Manual Thatch Rake | Lawns < 1,000 sq ft; Thatch 0.5" - 0.75" | N/A (Curved steel tines) | $35 - $55 (Retail) |
| Power Rake (Dethatcher) | Lawns 1,000 - 5,000 sq ft; Thatch 0.75" - 1.5" | 1" (Cool-season) / 2-3" (Warm-season) | $75 - $95 / Day (Rental) |
| Verticutter | Lawns > 5,000 sq ft; Thatch > 1.5" | Adjustable vertical blades | $120 - $160 / Day (Rental) |
Step-by-Step Dethatching Procedure
Executing this process correctly requires precise timing and soil moisture management. Follow this sequential protocol to safely remove thatch without destroying the active turf canopy.
Phase 1: Site Preparation (48 Hours Prior)
- Lower the Mowing Height: Mow the lawn to approximately 1.5 inches, which is about half its normal recommended height. Bag the clippings to expose the thatch layer.
- Hydrate the Soil Profile: Water the lawn deeply 48 hours before dethatching. The goal is moist soil (roughly 1 inch of water penetration). If the soil is too dry, the dethatcher tines will bounce off the surface; if it is muddy, the machine will tear out healthy root systems and cause severe soil compaction.
- Mark Hidden Hazards: Flag all sprinkler heads, shallow valve boxes, and invisible dog fence lines with high-visibility marker paint to prevent mechanical damage.
Phase 2: The Mechanical Removal Pass
When operating a rented power rake (such as the Sunbelt Rentals Class 08-1000), blade depth calibration is the most critical variable.
- Set the Blade Depth: Adjust the machine so the blades penetrate the thatch and cut exactly 0.25 inches into the soil surface. Test this on a concrete driveway first; the blades should barely kiss the concrete.
- First Pass: Drive the power rake in straight, overlapping lines, similar to mowing patterns.
- Second Pass: Make a second pass perpendicular to the first (a cross-hatch pattern). This ensures multidirectional extraction of the matted root layer.
Warning for St. Augustine and Centipede Grasses: Never use a standard power rake with flail tines on stoloniferous warm-season grasses like St. Augustine. The tines will rip out the above-ground runners (stolons), devastating the lawn. Use a vertical mower (verticutter) with spaced blades set slightly higher, or rely on aggressive manual raking.
Phase 3: Debris Extraction and Soil Amendment
A severe dethatching session on a 3,000-square-foot lawn can yield up to 15 to 20 cubic feet of dead organic matter. Leaving this debris on the lawn will smother the remaining grass and invite fungal pathogens.
- Clear the Debris: Use a heavy-duty leaf blower (minimum 150 MPH / 600 CFM) or a tow-behind lawn sweeper to remove all extracted thatch. Rake the perimeter edges manually.
- Apply Topdressing Compost: Spread a 0.25-inch layer of finely screened, aged compost over the bare spots. This inoculates the soil with actinomycetes and fungi that accelerate the decomposition of any remaining micro-thatch.
- Fertilize for Recovery: Apply a high-phosphorus starter fertilizer to stimulate rapid root regeneration. A formulation like Scotts Turf Builder Starter Food for New Grass (24-25-4) or Lesco Professional Starter Fertilizer (18-24-12) provides the exact N-P-K ratio required for post-trauma turf recovery.
Timing Framework: Cool-Season vs. Warm-Season Grasses
Dethatching induces massive physiological stress. You must perform this procedure when the grass is entering its peak active growth phase, allowing it to recover before environmental extremes (summer heat or winter freeze) set in.
"Dethatching a lawn during its dormancy or peak stress period is the leading cause of total turf loss in residential renovations. Always align mechanical thatch removal with the grass species' primary root-growth temperature window."
— Adapted from turfgrass management guidelines, Clemson University Home & Garden Information Center
| Grass Type | Common Varieties | Optimal Dethatching Window | Target Soil Temperature |
|---|---|---|---|
| Cool-Season | Kentucky Bluegrass, Tall Fescue, Perennial Ryegrass | Late August to Mid-September | 65°F - 70°F (at 2" depth) |
| Warm-Season | Bermudagrass, Zoysiagrass, Centipedegrass | Late May to Early July | 70°F - 75°F (at 2" depth) |
Critical Failure Modes to Avoid
Even with the right equipment, homeowners frequently make procedural errors that compound lawn damage. Avoid these specific failure modes:
- Failure Mode 1: Dethatching Dry Soil. If the soil moisture is below 15%, the dethatcher tines will shatter the soil structure and rip out living grass crowns. Fix: Always irrigate 48 hours prior and verify moisture with a soil probe.
- Failure Mode 2: Ignoring Pre-Emergent Herbicide Timelines. If you plan to overseed immediately after dethatching, you cannot apply pre-emergent crabgrass preventers (like Prodiamine or Dithiopyr) in the same season, as they will inhibit grass seed germination. Fix: Choose between spring weed control or spring dethatching/overseeding; you cannot do both simultaneously.
- Failure Mode 3: Mowing Too Low Post-Dethatch. After dethatching, the remaining grass is highly vulnerable to desiccation. Fix: Raise your mower deck to 2.5 or 3.0 inches for the next three mowing cycles to allow the exposed crowns to recover and shade the newly exposed soil.
By adhering to strict depth calibrations, timing the procedure to the grass species' biological growth cycle, and immediately following up with targeted phosphorus fertilization, you can successfully renovate a lawn that needs dethatching and restore a dense, resilient turf canopy within 30 to 45 days.

