
Lawn Care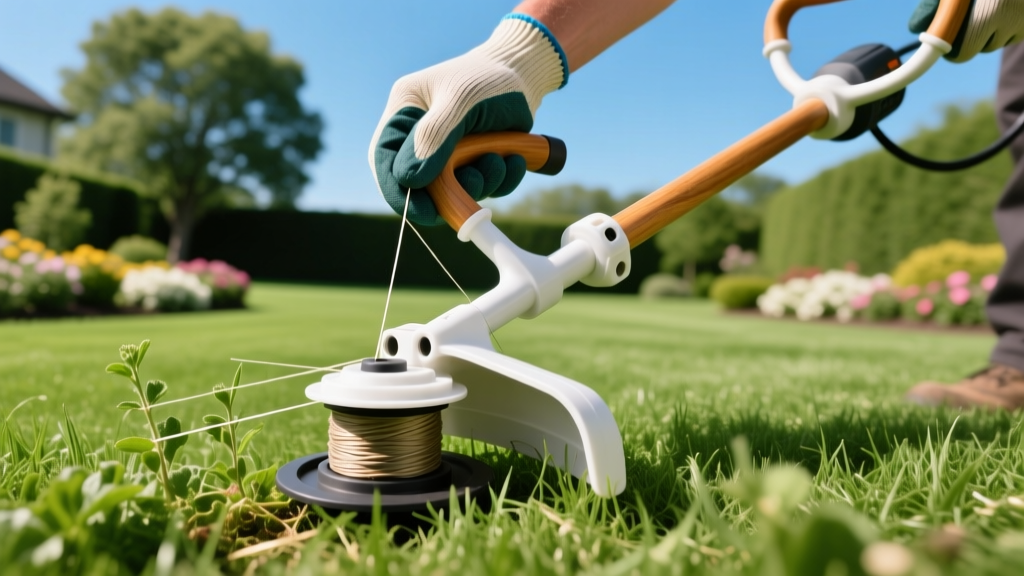
How to Put String in a Weed Wacker for Tough Weed Spot-Treatment
The Role of the Weed Wacker in Targeted Weed Eradication
While broad-spectrum herbicides and pre-emergents form the foundation of most lawn care programs, mechanical spot-treatment remains critical for managing herbicide-resistant or hard-to-reach weed species. Perimeter weeds like mature crabgrass, yellow nutsedge, and field bindweed often thrive along fence lines, concrete curbs, and garden beds where rotary mowers cannot reach. According to the University of Minnesota Extension, string trimmers are essential for precision mechanical control in these micro-environments, preventing weeds from going to seed without damaging adjacent hardscapes.
However, your spot-treatment strategy fails entirely if your equipment is improperly maintained. Knowing how to put string in a weed wacker correctly—and matching the line profile to the specific weed species you are targeting—is the difference between cleanly slicing through thick-stemmed invasives and frustratingly snapping your line against a dandelion stalk.
Identifying Your Trimmer Head: Bump Feed vs. Speed Load
Before restringing, you must identify your trimmer head mechanism. The two most common systems for residential and commercial spot-treatment are:
- Bump Feed (e.g., Stihl AutoCut 40-2, Echo Speed-Feed 400): Requires manual spool removal, winding, and threading. Offers maximum line capacity and is preferred for heavy-duty weed eradication.
- Speed Load / Quick Load (e.g., Husqvarna H30, Ryobi Reel-Easy): Allows you to feed a pre-cut piece of string through the eyelets without opening the spool housing. Ideal for quick mid-job reloads when tackling large perimeter infestations.
⚠️ CRITICAL SAFETY PROTOCOL: Before attempting to restring any weed wacker, you must eliminate all power sources. For gas-powered models (like the Echo SRM-225), disconnect the spark plug boot. For battery-electric models (like the Ryobi 40V HP or EGO 56V), physically remove the battery pack. The CDC NIOSH landscaping safety guidelines emphasize that accidental throttle engagement during maintenance is a leading cause of severe laceration injuries.
Step-by-Step: How to Put String in a Weed Wacker (Bump Feed)
This guide focuses on the standard bump-feed head, which requires the most technical precision to prevent line welding and jamming during high-RPM spot-treatments.
- Access the Spool: Press the spool lock tabs on the side of the trimmer head and pull the bump knob straight off. Remove the inner spool and the heavy metal spring beneath it. Keep the spring safe; losing it renders the bump mechanism useless.
- Clean the Housing: Use a wire brush or compressed air to clear out impacted grass clippings, mud, and melted plastic debris from the inner housing. Friction from debris causes premature line melting.
- Cut the Correct Line Length: Do not guess. For standard 0.080-inch line, cut exactly 15 feet. For heavier 0.095-inch or 0.105-inch line, cut 10 feet. Excess line creates overlapping friction on the spool, leading to severe jamming.
- Anchor the Line: Locate the small anchor hole or notch in the center hub of the spool. Insert one end of the string and lock it into the notch.
- Wind in the Correct Direction: This is the most common failure point. Look for the directional arrow printed on the top or side of the spool. Wind the string tightly and evenly in the direction of the arrow. If winding a dual-line spool, keep the two lines separated by the center divider to prevent cross-tangling.
- Secure and Thread: Leave about 6 inches of line unwound. Snap the loose ends into the temporary retention notches on the spool's outer rim. Reinsert the spool into the housing, ensuring the metal spring is seated correctly. Pull the line from the retention notches and thread it through the metal or reinforced plastic eyelets on the outer housing.
- Lock and Test: Snap the bump knob back onto the housing until you hear a definitive click. Pull the lines sharply to release them from the temporary notches and extend them to the cutting guard's automatic blade.
Matching String Gauge and Shape to Target Weed Species
When executing a weed species spot-treatment guide, the physical geometry of your trimmer line dictates your success. Round line relies on blunt force, while shaped lines utilize sharp edges to slice through fibrous weed stalks. Using a 0.065-inch round line on mature bindweed will result in shredded line and wasted time.
| Target Weed Species | Stem Characteristics | Recommended Line Shape | Optimal Gauge |
|---|---|---|---|
| Crabgrass & Annual Bluegrass | Soft, fleshy, low-lying | Round or Square | 0.065' - 0.080' |
| Yellow Nutsedge & Kyllinga | Tough, triangular, fibrous | Square or Star (Multi-sided) | 0.080' - 0.085' |
| Field Bindweed & Morning Glory | Vining, highly tensile, woody base | Twisted or Serrated | 0.095' - 0.105' |
| Mature Thistle & Burdock | Thick, hollow, heavily armored | Twisted or Heavy Square | 0.105' - 0.130' |
| Kudzu & English Ivy (Edges) | Dense, woody, high-mass foliage | Twisted (Commercial Grade) | 0.130' - 0.155' |
The Aerodynamics of Twisted and Serrated Line
Twisted line (often sold in 0.095-inch or 0.105-inch gauges) features a spiral profile that reduces air drag by up to 20% compared to square line. This reduction in drag means your trimmer's engine or brushless motor doesn't have to work as hard to maintain high RPMs, allowing the sharp edges of the twist to slice cleanly through tough bindweed vines rather than bludgeoning them. Serrated line, which mimics the teeth of a saw blade, is highly effective on woody stalks but generates more noise and vibration.
Troubleshooting Common Restringing Failures
Even when you know how to put string in a weed wacker, environmental and mechanical variables can cause operational failures during spot-treatment. Use this diagnostic framework to resolve issues in the field.
Symptom: Line Welding (Melting Together on the Spool)
Cause: Friction generates intense heat when thick line (0.095'+) rubs against itself inside the spool, especially if wound too loosely or if the trimmer is run at high RPMs without engaging the grass.
Fix: Rewind the spool with high tension. Apply a dry silicone spray or a specialized spool lubricant (like Oregon G-Oil) to the line before winding. Never use WD-40, as it attracts dirt and creates an abrasive paste.
Symptom: Line Snapping at the Eyelet
Cause: Using a line gauge that is too thick for the trimmer's eyelet diameter, or striking concrete curbs while spot-treating perimeter weeds. Additionally, UV degradation makes old nylon string brittle.
Fix: Ensure the line passes through the eyelet with zero resistance. If spot-treating weeds growing directly out of concrete cracks, switch to a heavier, abrasion-resistant co-polymer line and adjust your cutting angle to keep the line tip parallel to the hardscape.
Symptom: Bump Knob Fails to Feed More Line
Cause: The line was wound in the wrong direction (against the rotation of the head), or the inner spool is binding against the metal spring due to impacted mud.
Fix: Disassemble the head. Verify the directional arrow on the spool matches the rotation of the trimmer head (most straight-shaft trimmers rotate counter-clockwise when viewed from the bottom, meaning the spool winds clockwise). Clean the spring and housing thoroughly.
💡 Pro-Tip for Storage: Nylon trimmer line absorbs moisture from the air over time, which actually makes it more flexible and less prone to snapping. If your string has become brittle from sitting in a hot, dry shed, soak the spool in a bucket of warm water for 24 hours before your next heavy spot-treatment session. This restores the nylon's tensile strength and dramatically reduces breakage on tough weed species.
Mastering the mechanical maintenance of your string trimmer ensures that your targeted weed eradication efforts remain efficient, safe, and highly effective. By matching the correct line geometry to the specific invasive species in your landscape, you transform a basic maintenance tool into a precision instrument for lawn health.

