
Lawn Care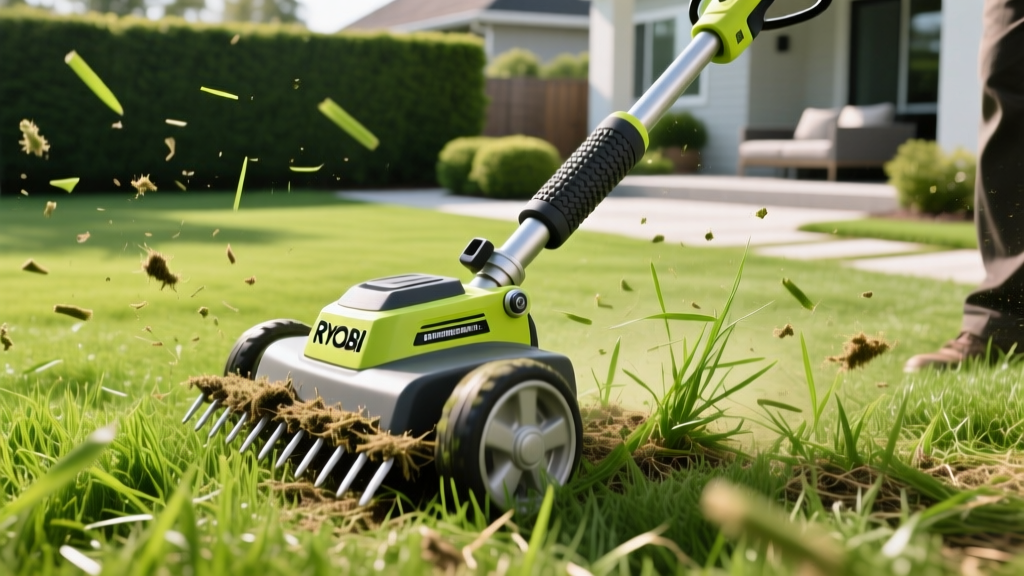
How to Use a Ryobi Dethatcher: Step-by-Step Thatch Removal
A healthy lawn requires a balance of sunlight, water, and nutrients, but an excessive layer of thatch can choke your turfgrass, blocking essential elements from reaching the soil. When thatch exceeds 0.5 inches, mechanical removal is necessary. For residential lawns under 5,000 square feet, the Ryobi 14 in. 10 Amp Corded Dethatcher (Model RY41000) is widely regarded as the most cost-effective and efficient tool on the market, typically retailing between $139 and $149.
This guide provides a precise, step-by-step procedure for preparing your lawn, operating the Ryobi dethatcher, and executing post-dethatching recovery to ensure your turf bounces back stronger.
Identifying Thatch and Understanding Your Equipment
Before plugging in your machine, verify that dethatching is actually required. Use a trowel to cut a 3-inch deep cross-section of your lawn. Measure the spongy, brown layer between the green grass blades and the soil surface. If it measures less than 0.5 inches, your lawn does not need dethatching. If it exceeds 0.5 inches, proceed with the procedure below.
Ryobi RY41000 Specifications at a Glance
| Feature | Specification | Practical Application |
|---|---|---|
| Motor | 10-Amp Corded | Provides consistent torque without battery fade on lawns up to 5,000 sq ft. |
| Cutting Width | 14 Inches | Ideal for navigating tight spaces between garden beds and fences. |
| Depth Adjustment | 3-Position Lever | Allows precise control to target thatch without tearing healthy root systems. |
| Tine Material | Stainless Steel | Resists rust and bends when encountering minor soil compaction. |
| Collection Bag | Not Included | Requires manual raking post-operation for optimal thatch removal. |
Pre-Dethatching Lawn Preparation (The 48-Hour Rule)
Proper preparation prevents turf damage and reduces operator fatigue. Do not skip these steps.
Warning: Always mark your sprinkler heads, shallow utility lines, and invisible dog fences with high-visibility flags before operating any motorized lawn equipment. The Ryobi tines can easily shatter plastic sprinkler casings.
- Moisture Calibration (48 Hours Prior): Water your lawn deeply two days before dethatching. The soil should be moist but not saturated. If the soil is muddy, the tines will gouge the earth and rip out healthy grass roots rather than slicing through thatch.
- Mowing Height Reduction (24 Hours Prior): Mow your lawn to a height of 1.5 to 2 inches. Bag the clippings. Lowering the canopy exposes the thatch layer, allowing the Ryobi tines to penetrate effectively without tangling in long grass blades.
- Clear the Zone: Remove all sticks, rocks, toys, and debris from the lawn. Stones caught in the dethatcher can bend the stainless steel tines or become dangerous projectiles.
Step-by-Step Operating Procedure
Operating a power dethatcher requires a different technique than mowing. The goal is to slice the thatch, not till the soil.
Step 1: Set the Depth Lever to the Shallowest Position
The Ryobi RY41000 features a 3-position depth adjustment lever located near the rear wheels. Always start at Position 1 (the highest/shallowest setting). The tines should barely kiss the soil surface. According to UMass Extension turf specialists, aggressive dethatching that penetrates deeply into the soil can sever the crown of the turfgrass plant, leading to severe lawn thinning and weed invasion.
Step 2: Execute the First Pass
Squeeze the bail bar to engage the tines and push the dethatcher forward in a straight line. Walk at a steady, moderate pace (about 2 miles per hour). Do not pull the machine backward while the tines are engaged, as this will jam the mechanism.
Step 3: Overlap and Assess
On your return pass, overlap the previous swath by 2 to 3 inches. After completing a 10x10 foot test square, stop and inspect the results. You should see a mix of brown thatch and a minimal amount of green grass. If the thatch layer remains largely intact, drop the depth lever to Position 2 and make a second pass over the same area.
Step 4: The Crosshatch Technique (For Severe Thatch)
If your thatch layer exceeds 0.75 inches, a single directional pass will not suffice. Make your first pass horizontally across the lawn, then make a second pass vertically (perpendicular to the first). This crosshatch pattern ensures the tines pull up matted thatch from all angles.
Pro Tip: The 10-amp motor will naturally bog down if you hit a dense patch of thatch or a hidden root. When you hear the motor pitch drop, ease off the forward pressure and let the tines clear the debris before continuing.
Post-Dethatching Cleanup and Lawn Recovery
The Ryobi dethatcher pulls thatch to the surface, but it does not collect it. Leaving the debris on the lawn will smother the remaining grass and invite fungal diseases like brown patch.
- Raking and Removal: Use a flexible leaf rake or a lawn sweeper to gather the pulled thatch. Expect to remove 3 to 5 times more debris than you anticipate. Compost this material, as it breaks down into excellent organic matter.
- Core Aeration Follow-Up: Dethatching removes the horizontal barrier; core aeration resolves vertical compaction. Renting a core aerator immediately after dethatching is the ultimate one-two punch for lawn renovation.
- Overseeding and Fertilization: The grooves left by the dethatcher provide perfect seed-to-soil contact. Overseed your lawn within 48 hours. Apply a starter fertilizer with a high phosphorus content (such as an NPK ratio of 10-18-10 or 20-27-5) to stimulate rapid root development in the newly exposed soil.
For comprehensive recovery protocols, the University of Minnesota Extension recommends keeping the soil consistently moist for the first 14 days following dethatching and overseeding to ensure seed germination.
Troubleshooting and Equipment Maintenance
To maximize the lifespan of your Ryobi RY41000, perform these maintenance checks after every use:
| Issue | Probable Cause | Solution |
|---|---|---|
| Motor stalls repeatedly | Thatch too thick or soil too wet | Raise depth lever to Position 1; allow lawn to dry for 24 hours. |
| Tines are bent or missing | Impact with rocks or sprinkler heads | Replace individual tines using Ryobi replacement part kits; do not operate with missing tines as it causes rotor imbalance. |
| Excessive vibration | Debris wrapped around the tine shaft | Unplug the unit, flip it on its side, and use a wire brush and putty knife to clear wrapped roots and string. |
Before storing the dethatcher for the winter, wipe down the tine shaft with a lightly oiled rag to prevent surface rust. Store the unit in a dry, climate-controlled environment to protect the 10-amp motor housing from UV degradation and moisture ingress.

