
Lawn Care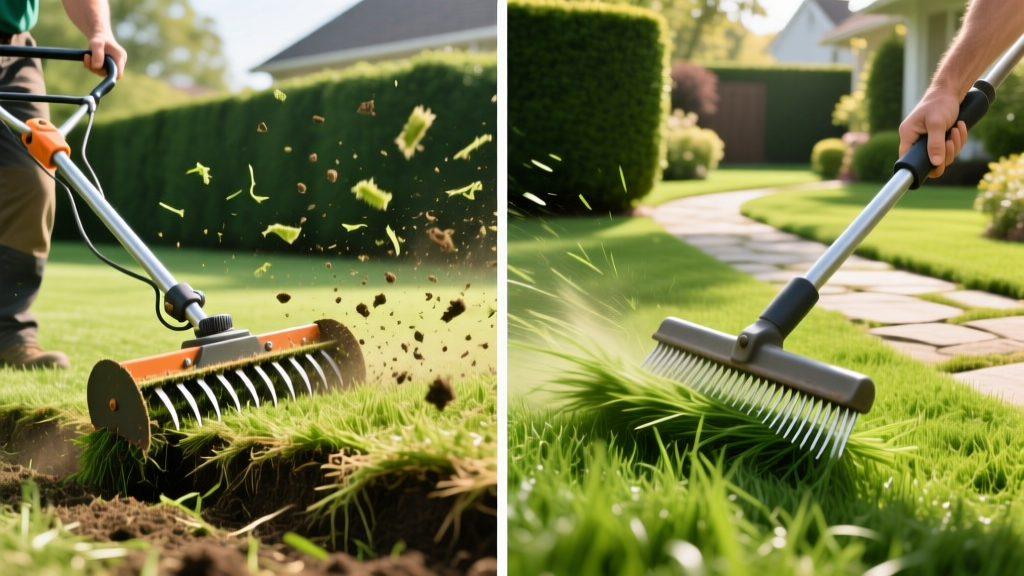
Scarifier vs Dethatcher: Step-by-Step Thatch Removal Guide
The 1/2-Inch Rule: Diagnosing Your Thatch Layer
Before deciding between a scarifier and a dethatcher, you must quantify your thatch layer. Thatch is the intermingled layer of living and dead stems, roots, and rhizomes that accumulates between the green vegetation and the soil surface. While a thin layer (under 0.5 inches) provides insulation and wear tolerance, anything exceeding the 1/2-inch threshold blocks water infiltration, harbors turf diseases like brown patch, and prevents fertilizer from reaching the root zone.
To measure your thatch, use a soil probe or a sharp trowel to extract a 3-inch deep cross-section of your lawn. Measure the spongy, light-brown organic layer sitting directly above the mineral soil. If it measures 0.5 inches or less, your lawn does not need mechanical intervention. If it measures between 0.5 and 0.75 inches, a dethatcher is appropriate. If it exceeds 0.75 inches, or if the soil beneath is heavily compacted, you need a scarifier.
'Thatch accumulation is rarely caused by leaving grass clippings on the lawn. Clippings decompose rapidly. Thatch is primarily composed of tough, lignin-rich stem and root tissues that decompose slowly, especially in soils with low microbial activity or high acidity.'
— Penn State Extension Turfgrass Management
Scarifier vs Dethatcher: The Core Mechanical Differences
The terms are often used interchangeably by consumer brands, but mechanically, they perform entirely different functions. Understanding this distinction is critical to avoiding severe turf damage.
| Feature | Dethatcher (Power Rake) | Scarifier (Verticutter) |
|---|---|---|
| Primary Mechanism | Flexible spring tines or flails that sweep and pull upward. | Rigid, fixed steel knife blades that cut downward into the soil. |
| Target Depth | Surface level to 1/4 inch above soil. | Penetrates 1/8 to 1/2 inch below the soil surface. |
| Best Used For | Light thatch (0.5' - 0.75'), spring cleanup, moss removal. | Severe thatch (>0.75'), breaking up soil compaction, slicing stolons. |
| Turf Impact | Gentle; minimal root disruption. | Aggressive; tears turf, requires significant recovery time. |
| Ideal Grass Types | All cool-season and warm-season grasses. | Cool-season grasses; dormant warm-season (with extreme caution). |
Note on Consumer '2-in-1' Machines: Many electric models, such as the popular Sun Joe AJ801E, market themselves as 'dethatcher and scarifier combos.' In reality, these machines swap a spring-tine drum for a flail-blade drum. While the flail drum is more aggressive than spring tines, it still lacks the heavy, fixed-knife cutting action of a true commercial scarifier like the Classen RS-20H. For lawns with over an inch of thatch, rent a dedicated gas-powered scarifier.
Step-by-Step Dethatching Procedure (Light to Moderate Thatch)
Dethatching is best performed during the active growing season when the grass can quickly recover. For cool-season grasses (Kentucky Bluegrass, Fescue, Ryegrass), target early fall or early spring. For warm-season grasses (Bermuda, Zoysia), target late spring after the second mowing.
Phase 1: Preparation
- Mow Low: Drop your mower deck to 1.5 inches. Bag the clippings to expose the thatch layer.
- Moisture Check: Water the lawn lightly 24 hours prior. The soil should be moist but not saturated; wet soil will cause the tines to tear out healthy grass roots rather than just lifting dead material.
- Mark Obstacles: Flag all shallow sprinkler heads, valve boxes, and hidden dog tie-outs with high-visibility stakes.
Phase 2: Execution
- Set the Depth: Adjust the dethatcher so the spring tines just barely scrape the soil surface. Test on a small patch; you want to pull up brown thatch, not green, living turf.
- Pass Pattern: Push the machine in straight, overlapping lines (like mowing). One pass is usually sufficient for light thatch.
- Cleanup: The machine will leave massive windrows of dead material. Use a heavy-duty leaf rake, a tow-behind lawn sweeper, or a commercial leaf blower to remove all debris. Leaving it on the lawn will smother the grass and invite fungal pathogens.
Step-by-Step Scarifying Protocol (Severe Thatch & Compaction)
Scarifying is a major renovation procedure. It slices through the thatch mat and scores the top layer of soil, creating grooves that improve water penetration and provide ideal seed-to-soil contact for overseeding. Because it is highly aggressive, it should only be done during peak growing seasons.
⚠️ Warning: Warm-Season Grass Limitations
Never use a fixed-blade scarifier on actively growing Bermuda or Zoysia grass during the heat of summer. The blades will sever vital stolons and rhizomes, causing massive dieback. If you must scarify warm-season turf, do so in late spring just as it breaks dormancy, or rely strictly on a dethatcher.
Never use a fixed-blade scarifier on actively growing Bermuda or Zoysia grass during the heat of summer. The blades will sever vital stolons and rhizomes, causing massive dieback. If you must scarify warm-season turf, do so in late spring just as it breaks dormancy, or rely strictly on a dethatcher.
Phase 1: Heavy-Duty Prep
- Mow to 1 Inch: Scalp the lawn slightly lower than you would for dethatching to allow the rigid blades to reach the soil.
- Rent the Right Tool: Reserve a walk-behind gas scarifier (e.g., Billy Goat SR360 or Classen RS-20H) from a local equipment rental yard. Expect to pay between $85 and $120 for a 4-hour rental in 2026.
Phase 2: The Cutting Passes
- Blade Calibration: Set the blades to penetrate exactly 1/8 inch into the soil for cool-season grasses, or 1/4 inch for warm-season grasses. Lowering the blades too deep will destroy the root crown and sever underground irrigation lines.
- Grid Pattern: Make your first pass horizontally across the lawn. Make your second pass diagonally or vertically, creating a cross-hatch grid pattern. This ensures the thatch mat is thoroughly fractured from all angles.
- Debris Extraction: Scarifying produces exponentially more debris than dethatching. Plan to spend 2 to 3 hours raking, or rent a commercial lawn vacuum. The lawn will look completely destroyed and brown immediately after this step—this is normal.
Post-Treatment Recovery: Overseeding and Fertilization
According to University of Minnesota Extension, mechanical thatch removal must be immediately followed by cultural practices to aid recovery and prevent weed invasion in the newly exposed soil.
- Overseeding: The grooves left by a scarifier are perfect seed beds. Apply a premium turf-type tall fescue or Kentucky bluegrass blend at a rate of 4 to 6 lbs per 1,000 square feet.
- Starter Fertilizer: Apply a high-phosphorus starter fertilizer (such as a 18-24-12 N-P-K ratio) at a rate that delivers 1 lb of Nitrogen per 1,000 sq ft. Phosphorus is critical for rapid root establishment in the sliced soil.
- Hydration Protocol: Water the lawn lightly 2 to 3 times a day for the first 14 days to keep the top 1 inch of soil consistently moist. Do not deep-water, as this will wash the seeds out of the scarifier grooves.
2026 Equipment Costs: Rent vs. Buy Breakdown
Deciding whether to purchase an electric consumer unit or rent commercial-grade equipment depends on your lawn size and thatch severity.
| Equipment Type | Estimated Cost (2026) | Best Application |
|---|---|---|
| Electric Dethatcher (e.g., Greenworks 14-inch) | $110 - $160 | Lawns under 5,000 sq ft; annual light maintenance. |
| Electric 2-in-1 Combo (e.g., Sun Joe AJ801E) | $140 - $180 | Small lawns needing moderate thatch lifting and moss removal. |
| Gas Walk-Behind Dethatcher (e.g., Toro Power Rake) | $80 - $110 / day rental | Large cool-season lawns with 0.5' to 1' of thatch. |
| Commercial Gas Scarifier (e.g., Classen RS-20H) | $90 - $130 / day rental | Severe thatch (>1'), compacted soil, pre-overseeding prep. |
Frequently Asked Questions
Can I dethatch my lawn every year?
No. Annual dethatching is unnecessary and stresses the turf. Only dethatch when your cross-section test confirms the thatch layer has exceeded 0.5 inches. For most well-maintained lawns with proper microbial activity, mechanical dethatching is only required every 2 to 3 years.
Will a scarifier level my bumpy lawn?
No. A scarifier cuts vertically; it does not grade or move soil horizontally. If your lawn suffers from uneven terrain, you must address it separately through topdressing with a 70/30 sand-to-compost mix and dragging it level with a landscaping mat.
Should I core aerate before or after scarifying?
Always scarify before core aeration. Scarifying removes the physical barrier of dead organic matter. If you aerate first, the aerator tines will push thatch plugs deep into the soil profile, which defeats the purpose of aeration and introduces anaerobic organic matter into the root zone.

