
Lawn Care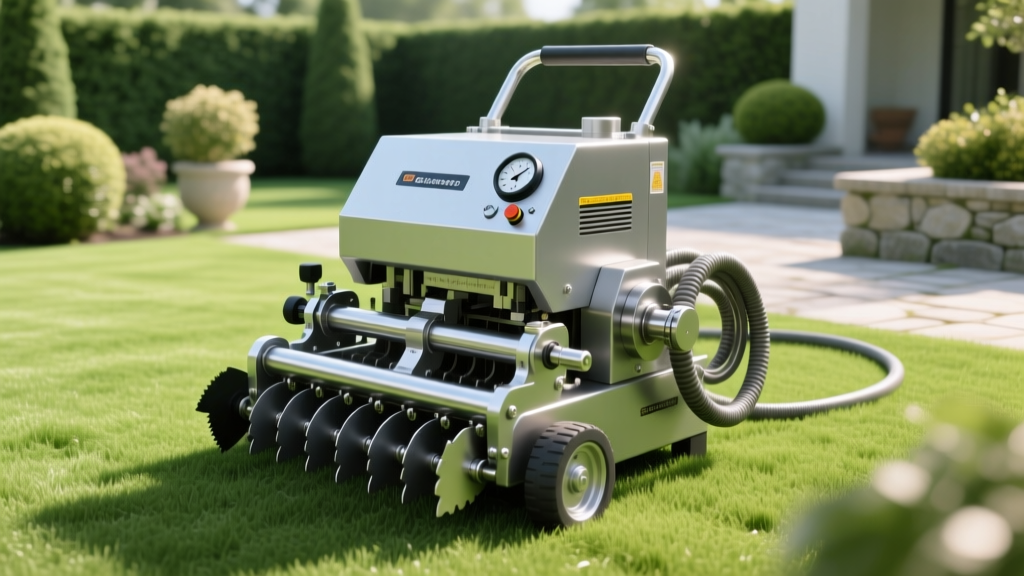
How to Select, Calibrate, and Maintain a Slice Seeder Machine
The Mechanics of Soil-to-Seed Contact
Broadcast spreaders scatter seed across the surface, leaving it vulnerable to wind, birds, and desiccation. A slice seeder machine solves this by using mechanically driven, rotating blades to cut precise furrows into the soil, dropping seed directly into the slit before a trailing roller or chain presses it into the earth. According to Penn State Extension, achieving direct soil-to-seed contact is the single most critical factor in germination success, improving emergence rates by up to 40% compared to surface broadcasting. However, the efficacy of this process relies entirely on proper equipment selection, precise depth calibration, and rigorous mechanical maintenance.
Equipment Selection Framework: Rental vs. Commercial Ownership
Choosing the right slice seeder machine depends on your operational scale. Homeowners tackling a single 5,000-square-foot lawn will find daily rentals economical, while landscaping professionals managing dozens of fall renovations require commercial-grade durability. The 2026 equipment market shows a clear divide between consumer rental units and prosumer/commercial models.
| Model / Category | Target User | Approx. Cost (2026) | Drive System | Blade Configuration |
|---|---|---|---|---|
| Classen RS-20 (Rental) | DIY Homeowner | $85 - $120 / day | Front-wheel gear drive | Flail blades (standard) |
| Ryan Renovation Overseeder 20" | Prosumer / Small Pro | $3,200 - $3,600 | Rear-wheel chain drive | Slice or Flail (swappable) |
| Billy Goat S500H | Commercial Landscaper | $4,500 - $5,200 | Hydrostatic drive | Heavy-duty slicing blades |
Expert Insight: Flail vs. Slicing Blades
Rental machines almost exclusively ship with flail blades (flat, rectangular paddles). Flail blades are aggressive and excellent for tearing through thick thatch layers over 1/2-inch deep. However, for standard overseeding on relatively healthy lawns, true slicing blades (shaped like stars or curved knives) create a cleaner, narrower slit that heals faster and requires less topdressing to cover the seed. If you own a Ryan or Billy Goat machine, invest in a dedicated slicing blade shaft for fall overseeding.
Rental machines almost exclusively ship with flail blades (flat, rectangular paddles). Flail blades are aggressive and excellent for tearing through thick thatch layers over 1/2-inch deep. However, for standard overseeding on relatively healthy lawns, true slicing blades (shaped like stars or curved knives) create a cleaner, narrower slit that heals faster and requires less topdressing to cover the seed. If you own a Ryan or Billy Goat machine, invest in a dedicated slicing blade shaft for fall overseeding.
The Concrete Kiss Test: Calibrating Cutting Depth
The most common failure in lawn renovation is setting the slice seeder machine too deep, which buries the seed beyond its energy reserves, or too shallow, leaving it exposed. According to University of Minnesota Turf Science, cool-season grasses like Kentucky Bluegrass and Tall Fescue require a planting depth of exactly 1/4 to 1/2 inch. To achieve this, professionals use the "Concrete Kiss Test" before entering the turf.
Step-by-Step Calibration Protocol
- Find a Flat Surface: Move the machine onto a clean, level concrete driveway or sidewalk.
- Zero the Depth: Lower the blade depth lever completely until the blades rest flat against the concrete.
- Listen for the Kiss: Slowly raise the depth lever one notch at a time. Manually rotate the blade shaft by hand (with the spark plug disconnected for safety). Stop raising the lever the exact moment you hear the blades lightly "kiss" or scrape the concrete.
- Adjust for Thatch: This zero-point represents the soil surface. If your lawn has 1/4-inch of thatch, lower the blades one additional notch to cut through the thatch and reach the actual soil. If the lawn is dethatched or bare dirt, keep the machine at the zero-point or raise it one notch to achieve a shallow 1/4-inch slit.
- Verify in the Field: Run the machine for 10 feet on the lawn, stop, and use a ruler to measure the depth of the slit. Adjust as necessary based on soil compaction.
Blade Metallurgy and Replacement Intervals
Slice seeder blades endure immense friction, striking rocks, roots, and compacted clay. Standard carbon steel blades on rental units will dull after 4 to 6 hours of continuous operation in rocky soil, resulting in torn, jagged furrows rather than clean slices. Commercial operators should upgrade to heat-treated, high-carbon steel or tungsten-carbide tipped blades.
For the industry-standard Ryan Renovation Overseeder, the standard slicing blade is part number 546106. When inspecting blades, look for rounding on the leading edge. If the blade tip has lost its sharp taper and resembles a flat chisel, it is pushing soil rather than cutting it. This increases the load on the drive belt and engine. Replace slicing blades every 40 to 50 hours of operation, or at the end of every fall season. Always replace blades in complete sets to maintain shaft balance; replacing only one or two damaged blades will cause severe vibration that destroys the shaft bearings.
Post-Operation Maintenance and Bearing Preservation
The number one cause of catastrophic failure in slice seeder machines is post-use neglect. Soil moisture, combined with grass sap and fertilizer residue, creates a highly corrosive environment that seizes the blade shaft and hopper agitator within weeks if left untreated.
Warning: Protect the Hopper Bearings
Never use a high-pressure washer to clean the seed hopper or the blade shaft housing. Forcing water past the seals into the pillow block bearings will wash out the grease and introduce rust. Instead, use a stiff bristle brush and compressed air to remove dry seed and soil. If you must use water, rinse the blades only, and immediately run the machine dry for 3 minutes to spin off moisture.
Never use a high-pressure washer to clean the seed hopper or the blade shaft housing. Forcing water past the seals into the pillow block bearings will wash out the grease and introduce rust. Instead, use a stiff bristle brush and compressed air to remove dry seed and soil. If you must use water, rinse the blades only, and immediately run the machine dry for 3 minutes to spin off moisture.
The 15-Minute End-of-Day Protocol
- Clear the Hopper: Empty all remaining seed. Vacuum the hopper floor to remove seed dust, which absorbs moisture and turns into a cement-like paste that jams the agitator wheel.
- Blade Coating: Spray the entire blade shaft and individual blades with a heavy-duty fluid film or silicone-based rust inhibitor. Avoid standard WD-40, as it evaporates too quickly to provide long-term storage protection.
- Grease the Zerks: Most commercial machines feature zerk fittings on the blade shaft pillow blocks. Pump exactly two strokes of lithium-complex grease into each fitting. Over-greasing will blow out the bearing seals, allowing dirt to enter.
- Inspect the Drive Belt: Check the V-belt connecting the engine to the blade shaft for fraying or glazing. A slipping belt will cause the blades to stall in thick turf, leaving unseeded patches.
Troubleshooting Common Field Failures
Even well-maintained equipment encounters field issues. Use this diagnostic matrix to resolve problems without returning to the shop.
- Symptom: Seed is piling up on the soil surface rather than falling into the slits.
Cause: The seed drop tubes are clogged, or the hopper agitator bridge has snapped.
Fix: Clear debris from the corrugated rubber drop tubes. Inspect the metal agitator wheel inside the hopper; if the fins are bent or broken, the seed will "bridge" (arch over the opening) and fail to drop. Replace the agitator wheel immediately. - Symptom: The machine pulls heavily to the left or right during operation.
Cause: Uneven tire pressure or worn traction treads on the drive wheels.
Fix: Check pneumatic tire pressures (typically 20-25 PSI). If using solid turf tires, inspect the chevron treads. Worn treads on one side will cause a speed differential, pulling the machine off a straight line and creating overlapping seed rows. - Symptom: Engine bogs down and blades stall in dense turf.
Cause: Cutting depth is set too aggressively, or the thatch layer is too thick for the machine's torque curve.
Fix: Raise the depth lever by one notch. If the problem persists, you must core aerate or use a dedicated dethatcher to remove the bulk of the thatch before running the slice seeder machine. As noted by Billy Goat Industries, hydrostatic drive models handle dense thatch better than gear-driven models due to continuous torque delivery.
Mastering the slice seeder machine requires moving beyond basic operation. By selecting the correct blade configuration for your specific turf type, rigorously calibrating depth via the concrete test, and executing disciplined post-use maintenance, you transform a simple rental tool into a precision renovation instrument capable of delivering professional, golf-course-quality turf density.

