
Lawn Care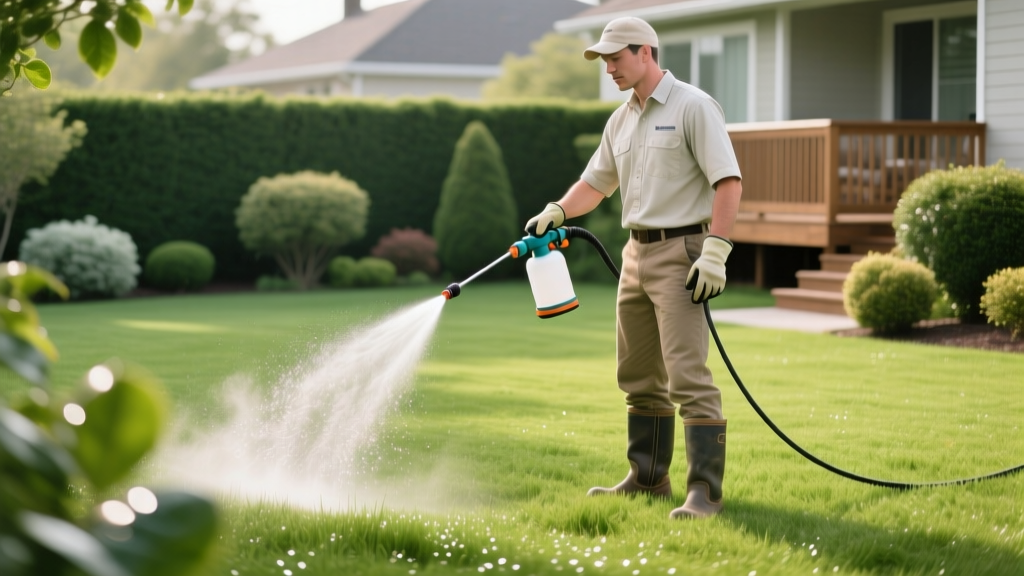
How to Safely Spray on Lawn: Step-by-Step Liquid Care Guide
Liquid lawn care products—ranging from chelated iron and humic acid to water-soluble NPK fertilizers—offer immediate foliar absorption. When you spray on lawn surfaces, nutrients bypass the slow soil breakdown process required by granular alternatives, greening turf in 48 to 72 hours. However, improper mixing, poor calibration, or incorrect nozzle selection leads to chemical burn, streaking, or wasted product. This guide details the exact procedures for executing professional-grade liquid applications on residential turf.
Equipment Selection: Matching Sprayer to Application
The success of a liquid application depends heavily on delivering a uniform volume across the target area. Hose-end sprayers lack the precision required for concentrated iron or herbicide applications, making pump or backpack sprayers the standard for serious turf management.
| Sprayer Type | Best Use Case | Average Cost | Precision Level |
|---|---|---|---|
| Hose-End Dial Sprayer | Broad application of soil conditioners (e.g., liquid humic acid, kelp) | $15 - $30 | Low (Highly dependent on water pressure) |
| Handheld Pump (1-2 Gal) | Spot treatments for weeds or small patch repairs under 500 sq ft | $20 - $45 | Medium (Pressure drops as tank empties) |
| Backpack Sprayer (4 Gal) | Full-yard liquid fertilizers, pre-emergents, and post-emergents | $60 - $150 | High (Consistent PSI via internal piston) |
For standard 1/4 to 1/2 acre lawns, a 4-gallon backpack sprayer like the Chapin Premier 4-Gallon or Solo 418 provides the necessary volume to complete a full application without mid-job refills, ensuring consistent chemical dilution throughout the process.
Step 1: The W-A-L-E-S Mixing Protocol
When combining multiple liquid products (e.g., a liquid fertilizer, a micro-nutrient package, and a surfactant), adding them in the wrong order causes chemical binding, precipitation, and clogged nozzles. Professional applicators use the W-A-L-E-S acronym to ensure stable tank mixes.
The W-A-L-E-S Mixing Order
- W - Wettable Powders: Add dry flowables or wettable powders first. Pre-mix in a separate jar of water to create a slurry before pouring into the main tank.
- A - Agitate: Stir the tank or add a portion of your water carrier to begin agitation.
- L - Liquid Flowables: Add suspension concentrates or liquid flowables.
- E - Emulsifiable Concentrates: Add oil-based liquid products (common in certain herbicides).
- S - Surfactants and Solutions: Add water-soluble liquids (like liquid NPK fertilizers) and non-ionic surfactants last.
Why Surfactants are Non-Negotiable
Water has a high surface tension (roughly 73 mN/m). When sprayed on hydrophobic turf leaves (common in drought-stressed or waxy grasses like Zoysia), water beads up and rolls into the soil. Adding a Non-Ionic Surfactant (NIS), such as Southern Ag Surfactant or Dyne-Amic, reduces surface tension to ~30 mN/m. This allows the spray on lawn droplets to flatten, spread across the leaf cuticle, and maximize foliar uptake. Standard application rate for NIS is 1 to 2 teaspoons per gallon of mixed solution.
Step 2: Calibrating Your Sprayer
Guessing your walking speed or spray volume leads to severe turf burn or ineffective treatments. According to Penn State Extension, calibrating your equipment ensures you apply the exact ounces of product required per 1,000 square feet. Follow this simplified time-and-distance calibration method:
- Mark a Test Area: Measure out exactly 1,000 square feet in your driveway or a non-turf area (e.g., a 20 ft x 50 ft rectangle).
- Fill with Water: Fill your sprayer with clean water only. Pump it to your target operating pressure (usually 40 PSI for backpack sprayers).
- Spray the Area: Walk the 1,000 sq ft area at your normal, comfortable application pace, maintaining a consistent nozzle height of 18 to 24 inches.
- Measure the Output: Use a measuring cup to determine exactly how many fluid ounces of water it takes to refill the sprayer back to its original level.
- Calculate the Mix: The number of ounces used equals the gallons per acre (GPA) equivalent, but for residential math, simply use this volume as your carrier rate per 1,000 sq ft. If you used 32 ounces (1 quart) of water to cover 1,000 sq ft, you will mix your product concentrate into 1 quart of water for every 1,000 sq ft of lawn.
Step 3: Nozzle Selection and Spray Technique
The nozzle dictates droplet size and spray pattern. Using the wrong nozzle is the most common cause of uneven application.
- Flat Fan Nozzles (e.g., TeeJet XR11004VS): Produces a uniform, flat sheet of liquid. Ideal for liquid fertilizers, soil drenches, and systemic herbicides. Provides excellent overlap when sweeping side-to-side.
- Air Induction Nozzles (e.g., TeeJet AIXR11004): Injects air into the droplet, creating larger, heavier drops. Essential when spraying volatile post-emergent herbicides (like 2,4-D or Trimec) on windy days to prevent chemical drift onto ornamental beds.
- Cone Nozzles: Creates a circular, hollow or solid cone pattern. Best reserved for targeted spot-spraying of weeds or insecticides in shrub beds, not broad turf applications.
Execution on the Turf
Maintain a walking speed of roughly 3 miles per hour (approximately two seconds per normal stride). Keep the nozzle 18 to 24 inches above the turf canopy. If you are using a handheld wand rather than a boom sprayer, use a pendulum sweeping motion, ensuring the edges of your spray pattern overlap the previous pass by 30% to prevent visible striping.
Step 4: Weather Constraints and Post-Application
Liquid applications are highly sensitive to environmental conditions. Applying liquid iron or fast-release nitrogen during peak heat will cause rapid moisture evaporation, leaving concentrated salts on the leaf blade that will burn the tissue within hours.
Critical Weather Thresholds
- Temperature: Never spray when ambient temperatures are above 85°F or expected to exceed 85°F within 4 hours of application.
- Wind: Suspend application if wind speeds exceed 5 mph to prevent drift.
- Rainfast Period: Most liquid fertilizers and systemic herbicides require 2 to 4 hours to absorb into the leaf tissue. Check the product label for specific rainfast windows before spraying.
After application, allow the product to dry completely on the leaf blade before initiating irrigation. Once the rainfast period has passed, a light watering (0.1 to 0.2 inches) helps wash any remaining soil-active chemicals (like pre-emergents) off the leaf and into the soil profile where they establish their barrier. As noted by the EPA's guidelines on pesticide application, proper equipment cleanup immediately after use prevents cross-contamination and extends the life of your sprayer seals and O-rings. Triple-rinse the tank and flush the wand with clean water before storing.
Troubleshooting Common Spray Errors
| Symptom | Probable Cause | Corrective Action |
|---|---|---|
| Alternating light and dark green stripes | Insufficient overlap during sweeping passes or walking too fast. | Use marking dye in your tank mix to track coverage; slow pace to 3 mph; overlap by 30%. |
| Yellow/brown necrotic leaf tips | Chemical burn from spraying in high heat or double-passing without closing the nozzle. | Apply only in early morning; always shut off sprayer valve when turning around at the end of a pass. |
| Clogged nozzle filter mid-application | Incorrect mixing order or failure to pre-slurry wettable powders. | Follow W-A-L-E-S protocol; install a 50-mesh inline strainer between the wand and nozzle. |
Mastering the technique to spray on lawn surfaces transforms your maintenance program. By focusing on precise calibration, utilizing surfactants for maximum foliar penetration, and respecting weather thresholds, you can achieve the deep, uniform green characteristic of professionally managed turf without the heavy equipment costs.

