
Lawn Care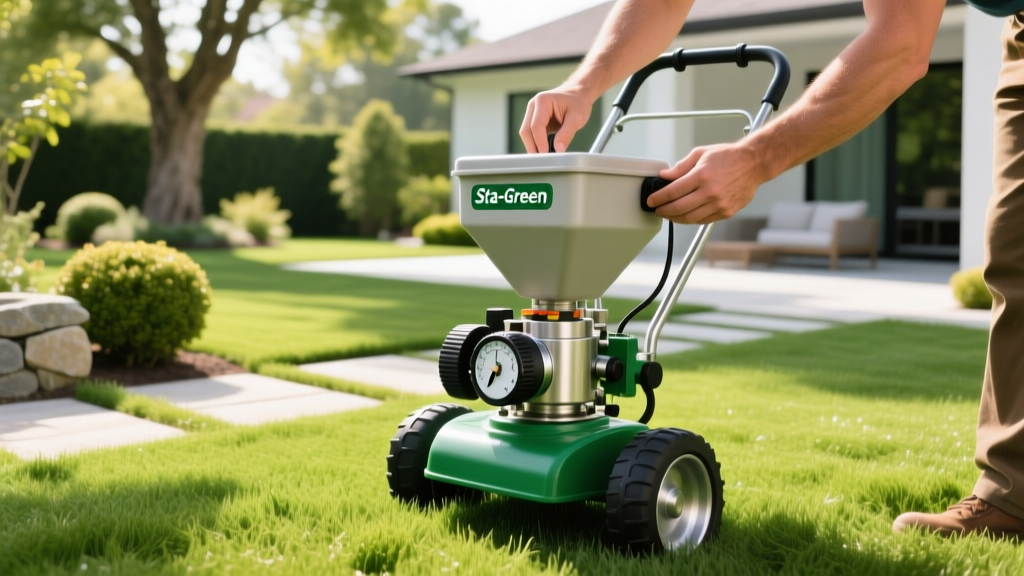
Mastering Your Sta-Green Spreader: Calibration and Maintenance
The Mechanics of the Sta-Green Spreader Lineup
Achieving a uniform, dark green lawn relies entirely on the precision of your application equipment. The Sta-Green spreader lineup, sold primarily through Lowe's, serves as the delivery mechanism for some of the most popular residential lawn inputs on the market. As of 2026, the standard Sta-Green 50 lb. Broadcast Spreader retails in the $70 to $85 range, offering a cost-effective alternative to premium commercial models while utilizing similar OEM (Original Equipment Manufacturer) drivetrain architectures.
At the core of the Sta-Green rotary spreader is a worm-gear gearbox driven by the main axle. As the pneumatic or semi-pneumatic tires rotate, the axle turns the gearbox, which spins the horizontal impeller beneath the hopper. The rate dial on the handle adjusts a metal baffle plate that restricts or opens the hopper throat, dictating how much granular product falls onto the spinning impeller. Understanding this mechanical relationship is critical: if your tire tread is worn, or if your tire pressure fluctuates, the axle speed changes, directly altering your application rate.
Broadcast vs. Drop: Choosing the Right Chassis
Sta-Green offers both broadcast (rotary) and drop spreader configurations, though the broadcast models dominate the residential sector due to their wider swath width and tolerance for minor walking speed variations.
Broadcast Spreaders (Rotary)
The flagship Sta-Green broadcast spreaders feature an integrated deflector shield (similar to EdgeGuard technology) that blocks granules from scattering to the left side of the spreader. This prevents fertilizer from landing on concrete driveways, flower beds, or water features, reducing the risk of phosphorus runoff and concrete staining. The 50 lb. model is ideal for lawns up to 15,000 square feet, while the 75 lb. high-capacity model is recommended for larger properties to minimize refill trips.
Drop Spreaders
Sta-Green drop spreaders release product directly downward between the wheels. While they offer pinpoint accuracy for small, geometrically complex yards, they require strict overlapping precision. A 2-inch gap in your wheel track will result in visible green and yellow striping in your turf within 14 days of application.
Calibration Matrix: Matching Settings to Sta-Green Inputs
Granule size and density vary wildly between weed-and-feed products, pre-emergents, and grass seed. Using a generic setting will result in either product starvation or severe fertilizer burn. Below is a baseline calibration matrix for common Sta-Green products. Always verify these against the specific bag's label, as formulation changes can alter the required gate opening.
| Sta-Green Product | Granule Type | Recommended Dial Setting | Application Rate (lbs/1,000 sq ft) |
|---|---|---|---|
| Sta-Green Weed & Feed | Coated Granular | 5.5 | 3.5 lbs |
| Sta-Green Starter Fertilizer | Prilled Urea | 4.0 | 2.8 lbs |
| Sta-Green Crabgrass Preventer | Fine Granular | 3.25 | 2.0 lbs |
| Sta-Green Tall Fescue Seed | Raw Seed | 8.5 | 7.0 lbs |
The 100-Foot Catch Test: Precision Calibration Protocol
Relying solely on the manufacturer's dial setting assumes your walking speed is exactly 3.0 mph and your spreader's linkage is factory-perfect. To guarantee accuracy, turfgrass scientists recommend a physical catch test. According to the University of Minnesota Turfgrass Science program, physical calibration accounts for user-specific walking pace and equipment wear.
- Measure a 100-foot distance on your driveway or a flat section of your lawn.
- Calculate the catch area: Measure the effective spread width (e.g., 10 feet). Multiply 10 ft by 100 ft = 1,000 square feet.
- Attach a catch container: Tape a lightweight plastic bucket or heavy-duty bag directly beneath the impeller, ensuring it catches all ejected product without interfering with the impeller's spin.
- Walk the distance: Fill the hopper with your product, set the dial, and walk the 100-foot line at your normal, comfortable pace.
- Weigh the catch: Pour the caught product onto a digital kitchen scale. If you caught 1.4 lbs over 1,000 sq ft, but your target rate is 2.8 lbs/1,000 sq ft, you need to increase the dial setting and repeat the test.
Corrosion Prevention and Drivetrain Maintenance
The most common cause of premature spreader failure is not mechanical breakdown, but chemical corrosion. Modern fertilizers rely heavily on urea and ammonium sulfate. When these compounds mix with ambient humidity, they form a highly corrosive acidic sludge that will eat through painted steel hopper bottoms and seize metal linkage rods within a single season.
The 15-Minute Post-Use Washdown Protocol
- Dry Clean First: Never add water to a hopper full of dry fertilizer dust; it creates a concrete-like paste. Use a leaf blower or stiff bristle brush to remove all dry residue.
- Warm Water Rinse: Use a garden hose with a spray nozzle to rinse the hopper, impeller, and undercarriage. Avoid high-pressure washers, which can force water into the sealed gearbox bearings.
- Air Dry Completely: Store the spreader in direct sunlight or use a leaf blower to force water out of the linkage crevices. Storing a damp spreader guarantees rust.
- Lubricate Correctly: Apply a generous coat of CRC Heavy Duty Silicone or Fluid Film to the metal baffle plate, linkage rod, and impeller shaft. Never use standard petroleum-based WD-40, as it degrades the nylon bushings and plastic hopper components over time.
Troubleshooting Common Spreader Failures
Even with rigorous maintenance, mechanical wear will eventually impact performance. The Scotts calibration and maintenance guides (the primary OEM for many private-label spreaders) highlight several frequent failure modes that homeowners can easily diagnose and repair.
Symptom: Product Drops When the Spreader is Stopped
Cause: The shutoff plate linkage has stretched, or the return spring has lost tension, preventing the baffle from fully closing when you release the handle lever.
Fix: Locate the turnbuckle or threaded rod connecting the handle lever to the hopper gate. Tighten the adjustment nut by 2-3 threads to shorten the linkage. Test the closure by looking up into the hopper throat; the metal plate must sit completely flush against the plastic seal.
Symptom: Severe Striping (Alternating Green and Yellow Bands)
Cause: The impeller fins are worn unevenly, or the shear pin connecting the gearbox to the impeller is partially sheared, causing the impeller to wobble rather than spin flat.
Fix: Flip the spreader on its side and inspect the impeller. If the plastic fins are chipped or rounded off, order a replacement impeller assembly. Check the 1/8-inch shear pin; if it shows stress fractures, replace it with a standard stainless steel cotter pin of the same diameter. Do not use a hardened steel nail, as it will destroy the gearbox output shaft if the impeller hits a root or rock.
Symptom: Spreader Pulls to the Left or Right
Cause: Unequal tire pressure (on pneumatic models) or uneven tread wear on solid tires, causing one wheel to rotate faster than the other and skewing the chassis.
Fix: Check tire pressure with a digital gauge; both tires should be inflated to exactly 15 PSI. For solid tire models, inspect the tread depth. If one tire is visibly smoother than the other, replace both tires simultaneously to maintain a balanced axle speed.

