
Lawn Care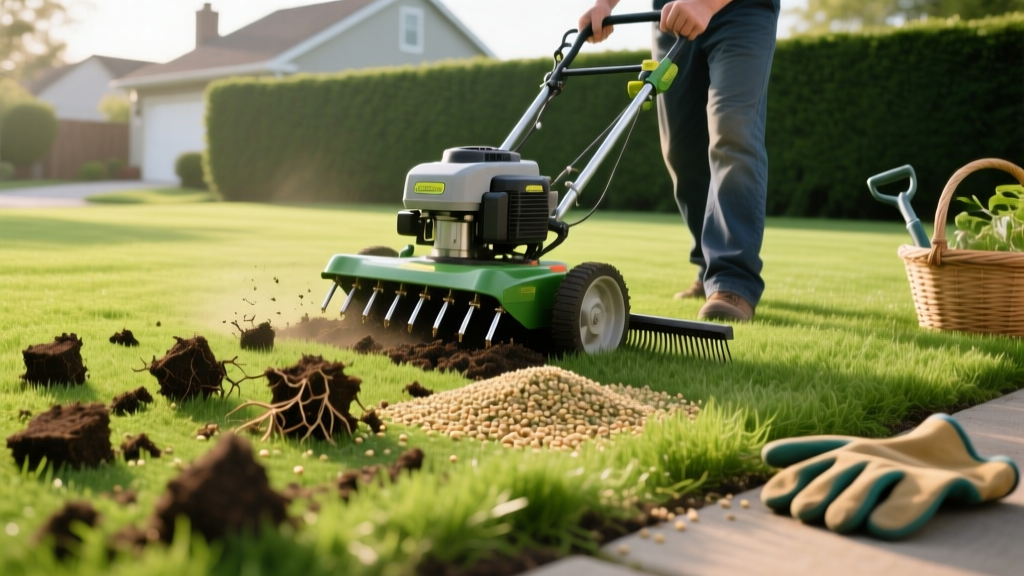
Aerating Lawn Step-by-Step: Core Aeration & Overseeding Guide
The Science of Soil Compaction: Why Aerating Lawn Turf Matters
Soil compaction is the silent killer of residential lawns. When foot traffic, heavy mowing equipment, and natural settling compress your soil, the bulk density increases. Once soil bulk density exceeds 1.6 g/cm³, oxygen diffusion drops dramatically, and turfgrass roots physically cannot penetrate the hardened earth. According to turfgrass researchers at Penn State Extension, a soil penetrometer reading above 300 psi indicates severe compaction that restricts root growth and water infiltration. Mechanical core aeration is the only proven method to physically fracture this compacted layer, relieve soil pressure, and create permanent macropores for air, water, and nutrients.
While liquid aeration products (surfactants) have gained popularity for breaking surface tension, they cannot replace the physical soil displacement required to fix deep subsurface compaction. For a genuinely step-by-step lawn maintenance procedure that yields long-term results, mechanical core aeration remains the gold standard.
Equipment Selection Matrix: Choosing the Right Aerator
Renting the wrong machine is the most common reason DIY aeration fails. You need a machine heavy enough to drive the tines into the soil, extracting plugs 2 to 3 inches deep. Below is a comparison of the primary aeration methods and specific equipment models available at most 2026 hardware rental centers.
| Aeration Type | Equipment Model Examples | Avg. Rental Cost (2026) | Best Use Case | Effectiveness |
|---|---|---|---|---|
| Core / Plug (Walk-Behind) | Billy Goat PL1300H, Classen CP-18 | $85 - $150 / day | Severe compaction, clay soils, pre-overseeding | Excellent (Physical soil removal) |
| Core / Plug (Tow-Behind) | Agri-Fab 45-0299 (48-inch) | $150 - $250 (Purchase) | Large properties (1+ acres) with ATV/tractor | Good (Requires added weights) |
| Spike (Manual / Push) | Yard Butler LTS-1000, Agri-Fab Push Spike | $40 - $80 (Purchase) | Sandy soils, minor surface crusting | Poor (Causes lateral compaction) |
| Liquid (Surfactant) | N-EXT Air-8, Simple Lawn Solutions Liquid Aerating | $30 - $50 (Purchase) | Maintenance between mechanical aerations | Fair (Chemical, no physical fracturing) |
Pro Tip: When renting a walk-behind core aerator like the Billy Goat PL1300H, always rent the transport ramp and ensure your truck or trailer can handle the machine's 250+ lb weight. Never attempt to lift a commercial core aerator without a ramp.
Pre-Aeration Preparation Protocol
Proper preparation dictates whether your aerator tines will penetrate deeply or simply bounce off the surface. Follow this exact sequence 48 hours before executing the aeration.
- Mark Underground Utilities: Call 811 to have public utility lines marked for free. Crucially, you must manually flag private shallow irrigation lines, invisible dog fences, and low-voltage landscape lighting with high-visibility spray paint. Aerator tines can easily sever 4-inch PVC irrigation pipes.
- Mow the Turf Low: Drop your mower deck to 1.5 to 2 inches. Bag the clippings to remove excess thatch. Shorter grass allows the extracted soil cores to make direct contact with the soil surface and prevents the machine from clogging.
- Hydrate the Soil Profile: Apply exactly 1 inch of water 24 to 48 hours before aerating. The soil should be moist, not saturated. Perform the screwdriver test: push a 6-inch flathead screwdriver into the ground. It should slide in with moderate resistance. If it bends or won't penetrate, water more. If it slides in effortlessly and pulls out muddy, wait 24 hours for the soil to dry slightly.
Warning: Never aerate soaking wet soil. Wet clay will smear inside the hollow tines, clogging the machine and creating muddy ruts that destroy the turf canopy. If mud sticks to your boots in thick clumps, the soil is too wet for aeration.
The Step-by-Step Aerating Lawn Execution
Operating a walk-behind core aerator requires physical effort and a strategic pattern to ensure uniform coverage. The NC State TurfFiles program recommends extracting cores that are 2 to 3 inches deep and spaced no more than 2 to 3 inches apart.
- The Perimeter Pass: Start by driving the aerator along the outer edges of your lawn. This creates a clean turning zone and prevents you from having to make sharp, turf-tearing turns near flower beds or fences.
- First Directional Pass (North-South): Drive the machine in straight, parallel lines across the entire lawn. Keep a steady walking pace; moving too fast prevents the tines from fully penetrating and ejecting the soil cores.
- Second Directional Pass (East-West): Make a second pass perpendicular to your first. This grid pattern guarantees the 2-to-3-inch spacing requirement and fractures the soil in multiple directions, maximizing water infiltration.
- Double-Pass High-Traffic Zones: Areas near driveways, mailboxes, and primary walkways suffer from extreme compaction (often exceeding 400 psi). Make a third, diagonal pass over these specific zones to heavily fracture the hardened earth.
- Leave the Plugs: Do not rake up or bag the extracted soil cores. They contain beneficial microorganisms and will break down naturally within 2 to 3 weeks, top-dressing your lawn and helping to decompose the thatch layer.
Post-Aeration Care: Overseeding and Fertilization
Aerating lawn turf is rarely a standalone procedure; it is the critical first step in a renovation sequence. The open holes provide direct seed-to-soil contact, which is mandatory for high germination rates.
Seed Selection and Application Rates
Apply seed immediately after aeration while the holes are open. Use a broadcast spreader and split your application into two perpendicular passes for even coverage.
- Turf-Type Tall Fescue (TTTF): Apply 8 to 10 lbs per 1,000 sq ft. Look for blends containing endophytes for natural drought and insect resistance.
- Kentucky Bluegrass (KBG): Apply 1.5 to 2 lbs per 1,000 sq ft. KBG seeds are much smaller and require less volume.
- Bermudagrass (Warm-Season): Apply 1 to 2 lbs of hulled seed per 1,000 sq ft. Note that warm-season grasses should be aerated and seeded in late spring to early summer, not fall.
Starter Fertilizer Application
Newly germinated seeds require high phosphorus for rapid root development. Apply a starter fertilizer with an N-P-K ratio similar to 24-25-4 (e.g., Scotts Turf Builder Starter Food) or 12-18-8 (e.g., Jonathan Green Green-Up for Seeding). Apply at a rate that delivers exactly 1.0 lb of nitrogen per 1,000 sq ft. Water immediately after application to dissolve the prills and wash nutrients into the aeration holes.
'The success of an overseeding project is 80% dependent on soil preparation. Core aeration provides the physical architecture necessary for seedling survival, turning a thin, weedy lawn into a dense, competitive turf canopy within a single season.' - Turfgrass Management Field Guide
Troubleshooting Common Aeration Failures
Even with the right equipment, environmental variables can cause aeration to fail. Use this decision framework to diagnose and correct issues on the fly.
- Symptom: Tines bounce off the surface, extracting no plugs.
Cause: Soil is too dry and compacted.
Fix: Stop immediately. Water the lawn deeply (1.5 inches) and wait 48 hours for moisture to penetrate the subsoil before resuming. - Symptom: Tines penetrate, but holes are only 1 inch deep.
Cause: Insufficient machine weight or extreme clay density.
Fix: Add concrete weights or sandbags to the aerator's weight tray. Make a slow preliminary pass to break the crust, followed by a standard-speed second pass. - Symptom: Machine clogs continuously, leaving muddy streaks.
Cause: Soil moisture is too high; clay is smearing.
Fix: Halt operations. Allow the lawn to dry for 2 to 3 days. Operating in mud will destroy soil structure and tear turf roots. - Symptom: Extracted plugs are mostly thatch, very little soil.
Cause: Thatch layer exceeds 0.75 inches, preventing tines from reaching the soil.
Fix: You must rent a powered dethatcher (power rake) to remove the thatch layer first, then aerate the exposed soil the following weekend.
By adhering to these precise measurements, equipment specifications, and environmental checks, you transform a basic weekend chore into a professional-grade agronomic procedure. Proper core aeration fundamentally alters your soil's physical structure, setting the stage for a drought-resilient, deeply rooted lawn for years to come.

