
Lawn Care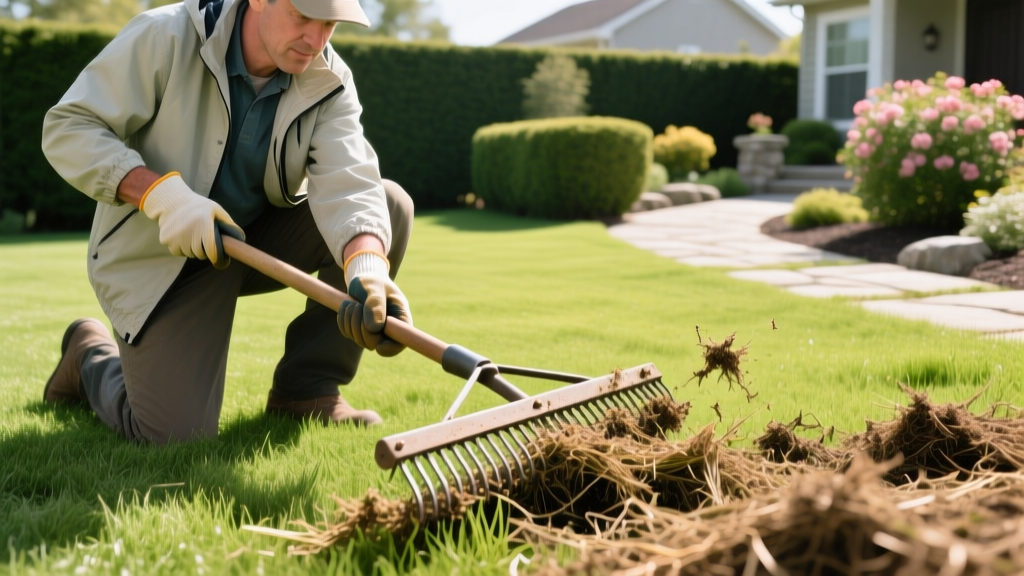
How to Dethatch a Grass Lawn: Step-by-Step Guide
The 0.5-Inch Rule: Diagnosing Your Thatch Layer
Thatch is a tightly intermingled layer of living and dead stems, roots, and rhizomes that accumulates between the green vegetation and the soil surface. While a thin layer (under 0.25 inches) provides insulation and moisture retention, excessive thatch blocks water, oxygen, and nutrients from reaching the root zone. Contrary to popular belief, thatch is not primarily caused by leaving grass clippings on the lawn; it is driven by the accumulation of high-lignin plant tissues that soil microbes struggle to break down.
To determine if you need to dethatch, perform a core sample test. Use a flat spade or a soil probe to extract a 3-inch deep wedge of your lawn. Measure the spongy, brown organic layer sitting directly above the mineral soil. According to the University of Minnesota Extension, if this layer exceeds 0.5 inches in thickness, mechanical dethatching is required to prevent shallow rooting and increased susceptibility to drought stress.
Expert Insight: The pH Factor
If your lawn chronically accumulates thatch despite proper mowing, test your soil pH. Microbial activity—the natural engine that decomposes thatch—plummets when soil pH drops below 6.0. Applying pelletized lime to raise the pH to the 6.2–6.8 range is a critical long-term preventative measure.
If your lawn chronically accumulates thatch despite proper mowing, test your soil pH. Microbial activity—the natural engine that decomposes thatch—plummets when soil pH drops below 6.0. Applying pelletized lime to raise the pH to the 6.2–6.8 range is a critical long-term preventative measure.
Timing Matrix: When to Dethatch Based on Grass Type
Dethatching is highly stressful to turfgrass. It must be timed to coincide with your grass's peak growth window so the lawn can rapidly recover and fill in bare spots before weeds invade. Never dethatch a dormant or heat-stressed lawn.
| Grass Category | Common Varieties | Optimal Dethatch Window | Recovery Time |
|---|---|---|---|
| Cool-Season | Tall Fescue, Kentucky Bluegrass, Perennial Ryegrass | Early Fall (Late Aug – Mid Sept) | 3 to 4 weeks |
| Warm-Season | Bermuda, Zoysia, St. Augustine, Centipede | Late Spring (Mid May – June) | 2 to 3 weeks |
Equipment Selection: Matching Tools to Yard Size
Selecting the wrong equipment is the most common cause of dethatching failure. Using a manual rake on a 5,000-square-foot yard leads to fatigue and inconsistent depth penetration, while renting a commercial power rake for a tiny urban patch will scalp the lawn to the dirt.
Manual Dethatching Rakes
- Best for: Lawns under 500 sq. ft. or isolated thatch patches.
- Top Model: Ames True Temper 15-Tine Dethatching Rake (~$45).
- Technique: Requires vigorous pulling to penetrate the thatch layer. The curved tines must reach the soil surface to lift the dead matter.
Electric Dethatchers (Power Rakes)
- Best for: Lawns between 500 and 5,000 sq. ft.
- Top Model: Sun Joe TJ600E 15-Inch Electric Dethatcher (~$189 in 2026).
- Technique: Features stainless steel spring tines. Set the depth adjustment so the tines barely scratch the soil surface. Going too deep will rip out healthy, living roots.
Gas-Powered Commercial Rakes
- Best for: Lawns over 5,000 sq. ft. or severely compacted thatch over 1 inch thick.
- Top Model: Billy Goat PR550 Power Rake (Available at most equipment rental yards for ~$95/day).
- Technique: Uses fixed flail blades. Requires careful height calibration; start high and lower the blade housing incrementally to avoid severe turf tearing.
The 6-Step Dethatching Procedure
Follow this exact sequence to minimize turf shock and maximize debris removal.
- Mow Low: Drop your mower deck by 50% compared to your normal height. For Tall Fescue, mow down to 1.5 inches. For Bermuda, drop to 1 inch. This exposes the thatch layer and prevents the machine from bogging down in long grass.
- Hydrate the Soil: Water the lawn deeply 48 hours before dethatching. The soil should be moist but not saturated. If the soil is muddy, the dethatcher tines will clump the dirt and tear out healthy root systems. If the soil is bone dry, the tines will bounce off the hard surface.
- Mark Infrastructure: Flag all shallow irrigation heads, valve boxes, and invisible dog fence lines with high-visibility spray paint. Dethatcher tines will easily shatter plastic sprinkler housings.
- Execute Pass One (North-South): Run the dethatcher in straight, overlapping lines. Overlap each pass by 2 inches to ensure no strips are missed. Walk at a steady, moderate pace—walking too fast reduces the agitation needed to lift the thatch.
- Execute Pass Two (East-West): For thatch layers thicker than 0.75 inches, make a second set of passes perpendicular to the first. This cross-hatching breaks up stubborn, matted rhizomes.
- Rake and Remove: The lawn will look devastated, covered in massive windrows of brown debris. Use a heavy-duty leaf rake or a lawn sweeper to remove all organic matter. Leaving the debris on the lawn will smother the remaining grass and invite fungal pathogens.
Post-Dethatch Recovery and Overseeding Protocol
Once the thatch is removed, the soil surface is exposed and primed for seed-to-soil contact. According to the University of California Integrated Pest Management program, combining dethatching with core aeration and overseeding yields the highest turf density recovery.
Recovery Fertilizer Matrix
Immediately after dethatching and overseeding, apply a starter fertilizer high in phosphorus to stimulate root growth. Look for an N-P-K ratio similar to 18-24-6 or 24-25-4. Apply at a rate of 1 lb of Nitrogen per 1,000 sq. ft. Avoid high-nitrogen, quick-release weed-and-feed products, which will burn the exposed turf crowns and prevent new seed germination.
Immediately after dethatching and overseeding, apply a starter fertilizer high in phosphorus to stimulate root growth. Look for an N-P-K ratio similar to 18-24-6 or 24-25-4. Apply at a rate of 1 lb of Nitrogen per 1,000 sq. ft. Avoid high-nitrogen, quick-release weed-and-feed products, which will burn the exposed turf crowns and prevent new seed germination.
Water the newly exposed lawn lightly twice a day for the first 10 days to keep the top inch of soil consistently damp. Once the new grass reaches 2 inches, transition back to deep, infrequent watering cycles to encourage deep root penetration.
Critical Edge Cases and Common Mistakes
Mistake 1: Dethatching St. Augustine Grass
St. Augustine grass spreads via thick, above-ground stolons. Aggressive mechanical dethatching with a power rake will rip these stolons out, effectively destroying the lawn. For St. Augustine, rely on manual dethatching rakes, aggressive core aeration, and topdressing with compost to manage thatch organically.
Mistake 2: Scalping the Lawn
Many homeowners set their dethatcher blades too deep, believing they need to 'till' the soil. The tines should only penetrate the thatch layer and lightly scratch the soil surface. If you are pulling up clumps of dark dirt and living green roots, raise the blade housing immediately.
Mistake 3: Ignoring the Thatch Cause
Dethatching is a symptom treatment, not a cure. If you do not address the underlying cause—such as over-application of synthetic nitrogen fertilizers, excessive watering, or compacted soil—the thatch will return within 24 months. Transitioning to slow-release organic nitrogen sources and annual core aeration breaks the thatch accumulation cycle permanently.

