
Lawn Care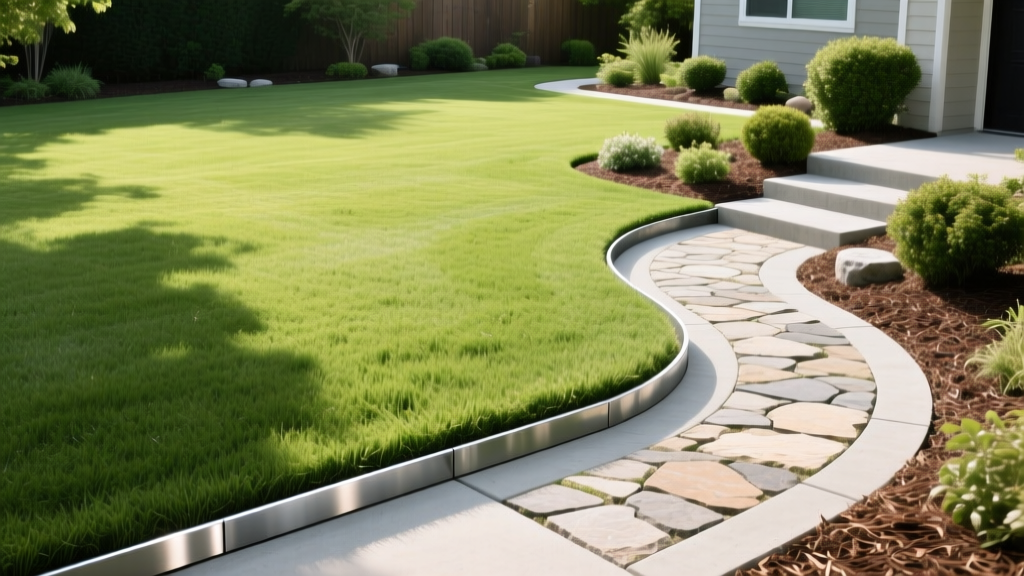
Step-by-Step Guide: Top Grass Edging Ideas for Clean Lawn Lines
The Anatomy of a Permanent Lawn Edge
A pristine lawn boundary serves two critical functions: it halts the aggressive subsurface spread of turfgrass rhizomes, and it provides a physical guide for mower wheels to eliminate manual string trimming. When evaluating grass edging ideas, homeowners often prioritize aesthetics over subterranean performance, leading to borders that fail within a single growing season. The most effective edging solutions combine deep physical barriers with durable, UV- and impact-resistant materials.
According to turfgrass management guidelines from NC State TurfFiles, warm-season grasses like Bermuda and Zoysia spread via both above-ground stolons and below-ground rhizomes. A shallow decorative border will not stop a Bermuda rhizome, which can easily tunnel 4 to 6 inches beneath the soil surface to invade adjacent flower beds. Therefore, the installation depth of your chosen material is just as critical as the material itself.
Material Selection Matrix: Performance vs. Cost
Before breaking ground, select a material that matches your soil type, grass species, and budget. The matrix below breaks down the top professional-grade edging materials.
| Material | Avg. Cost (Per Linear Ft.) | Lifespan | Installation Depth | Best For Grass Type |
|---|---|---|---|---|
| 14-Gauge Powder-Coated Steel | $4.50 - $8.00 | 20+ Years | 4.5 - 6 inches | Bermuda, Zoysia, St. Augustine |
| Mortarless Brick Paver | $6.00 - $12.00 | 25+ Years | 4 - 5 inches (base) | Tall Fescue, Kentucky Bluegrass |
| 6-inch Heavy-Duty HDPE (Plastic) | $1.50 - $3.00 | 5 - 8 Years | 4.5 inches | Budget installs, Bunchgrasses |
| Extruded Aluminum (1/4-inch) | $5.00 - $9.00 | 15+ Years | 4 - 5 inches | Highly curved beds, Coastal areas |
Expert Tip: Never use 16-gauge or thinner steel for lawn edging. String trimmers operating at 7,000 RPM will quickly chew through thinner metal, creating sharp burrs and compromising the powder coating. Always specify 14-gauge (0.0747 inches thick) for commercial-grade durability.
Step-by-Step Procedure: Installing 14-Gauge Steel Edging
Flexible steel edging is the industry standard for creating sweeping, continuous curves that block aggressive rhizomes while remaining virtually invisible from a standing height.
Phase 1: Trenching and Preparation
- Mark the Boundary: Lay a standard garden hose along the desired edge line. Allow it to rest in the sun for an hour to relax the plastic memory, ensuring smooth, natural curves without sharp kinks.
- Cut the Trench: Using a half-moon edger or a motorized trencher, cut a trench exactly 4.5 inches deep and 2 inches wide along the hose line. For a 6-inch tall steel edging panel, a 4.5-inch trench leaves 1.5 inches exposed above grade—enough to block stolons while allowing mower decks to pass over without scalping.
- Clear the Debris: Remove all loose soil, rocks, and root masses from the trench floor to ensure the steel sits flat and level.
Phase 2: Placement and Securing
- Position the Panels: Drop the 14-gauge steel panels into the trench. Overlap each joint by exactly 6 inches to prevent soil from washing through the seams.
- Drive the Stakes: Insert the manufacturer-provided steel stakes through the pre-punched holes on the overlapping joints. Use a rubber mallet or a dead-blow hammer to drive the stakes until the top of the stake is flush with the top of the edging. Never use a steel hammer directly on the powder-coated edging or stakes, as this will chip the finish and invite rust.
- Backfill and Tamp: Shovel the excavated soil back into the trench on the lawn side. Use a hand tamper to compact the soil tightly against the steel, locking it in place.
Step-by-Step Procedure: Laying Mortarless Paver Edging
For cool-season lawns like Tall Fescue, where rhizome escape is less aggressive, a hardscape paver border provides a stunning visual transition and a wide track for zero-turn mower wheels. Research from the University of Minnesota Extension highlights that proper base preparation is the primary factor in preventing frost-heave displacement in hardscape borders.
Phase 1: Excavation and Base Layer
- Excavate the Trench: Dig a trench that is 2 inches wider than your chosen paver and 5 inches deep. Ensure the trench floor is sloped slightly (1/8 inch per foot) away from the lawn to promote drainage into the bed.
- Lay the Aggregate Base: Fill the trench with 3 inches of 3/4-inch crushed angular gravel (not round river rock). Compact this layer using a mechanical plate compactor until it is rock-solid. This base prevents frost heave in freezing climates.
- Add the Sand Bed: Spread a 1-inch layer of coarse, washed concrete sand over the compacted gravel. Use a 2x4 screed board to level the sand perfectly.
Phase 2: Paver Placement and Jointing
- Lay the Pavers: Place the concrete or clay pavers tightly together on the sand bed. Use a rubber mallet to tap them flush, checking level every 4 feet.
- Apply Polymeric Sand: Sweep polymeric sand over the pavers, forcing it deep into the joints. Polymeric sand contains a binding agent that hardens when misted with water, creating a flexible seal that prevents weed seeds from germinating and stops ants from mining the joints.
- Activate the Binder: Mist the edging with a gentle shower nozzle for 2 to 3 minutes. Allow 24 hours for the sand to cure before running equipment over it.
Failure Mode Alert: If you skip the polymeric sand and use standard masonry sand, the vibration from lawn mowers and string trimmers will gradually vibrate the sand out of the joints. Within one season, the pavers will shift, and crabgrass will exploit the gaps.
Seasonal Edge Maintenance Protocol
Even the best grass edging ideas require seasonal maintenance to maintain their structural integrity and visual sharpness.
- Early Spring (Post-Thaw): Inspect steel edging for frost-heaved stakes. If a stake has pushed upward, remove it, clear the soil from the hole, and drive a new 12-inch galvanized spike at a 45-degree angle through the edging hole to anchor it deeper into the subsoil.
- Mid-Summer (Peak Growth): Warm-season grasses will attempt to grow over the top of the edging. Use a manual rotary edger or a stick edger with an 8-inch blade to vertically slice the turf right against the barrier every 14 days. Do not rely solely on a string trimmer, as it cuts horizontally and leaves a ragged, uneven edge.
- Late Fall (Pre-Dormancy): Clear all leaf litter and mulch away from the paver joints. Trapped organic matter holds moisture against the polymeric sand, which can lead to algae growth and premature degradation of the sand binder.
Troubleshooting Common Edging Failures
Problem: Grass is creeping under the steel edging.
Cause: The trench was not dug deep enough, or the soil on the bed side was not tamped, leaving an air gap beneath the steel.
Fix: Excavate a 2-inch wide strip on the bed side of the edging down to the bottom of the steel. Fill this gap with a fast-setting concrete mix or heavily compacted clay to create a subterranean seal that rhizomes cannot penetrate.
Problem: Paver edging is sinking in specific spots.
Cause: Inadequate gravel base compaction or water pooling from improper grading.
Fix: Lift the sunken pavers. Add additional 3/4-inch crushed gravel to the base and compact it with a hand tamper. Re-screed the sand layer and relay the pavers. Ensure the surrounding soil is graded to divert runoff away from the trench.
Problem: String trimmer is destroying the lawn edge.
Cause: The edging material is installed too low, forcing the operator to tilt the trimmer head into the soil to catch the stolons.
Fix: Adjust the edging height. The top of your edging should sit exactly 0.5 inches below the top of the soil grade. This allows the mower wheel to ride on the soil while the trimmer line cleanly cuts the grass without striking the edging material or gouging the dirt.

