
Lawn Care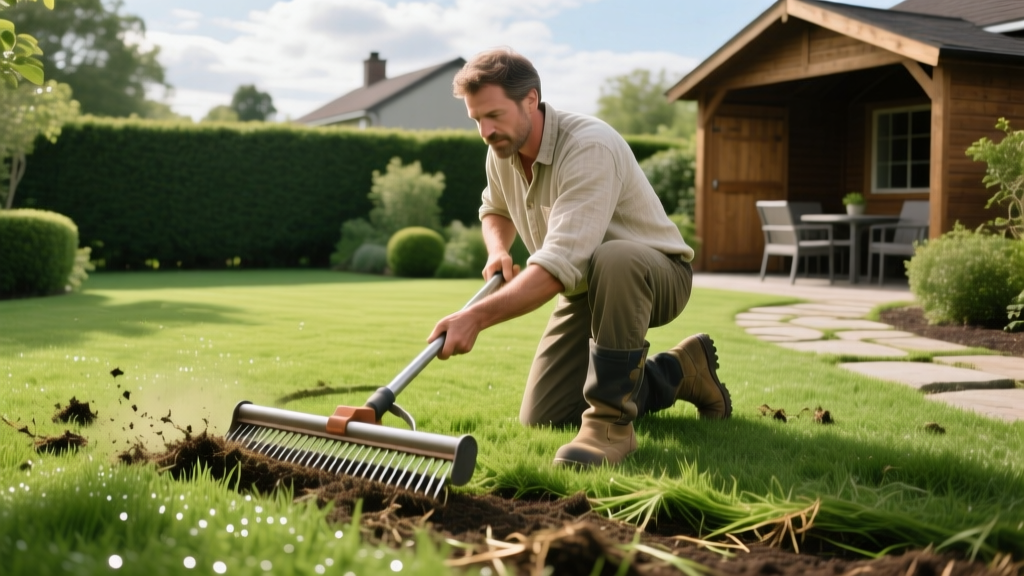
Lawn Dethatching Guide: Step-by-Step Thatch Removal Process
Thatch is a tightly intermingled layer of living and dead stems, roots, and crowns that forms between the green vegetation and the soil surface. While a thin layer (under 0.5 inches) acts as an organic mulch that retains moisture and buffers soil temperature, excessive thatch blocks water infiltration, traps fertilizer, and harbors turf diseases. Contrary to popular belief, grass clippings do not cause thatch; the primary culprits are lignin-rich tissues from rhizomes and stolons that decompose slowly.
This guide details the exact step-by-step dethatching procedures required to safely remove excess organic buildup without destroying your turf's root system, utilizing current 2026 equipment standards and agronomic recovery protocols.
The 1/2-Inch Threshold: Diagnosing Thatch Buildup
Before renting equipment, you must verify that your lawn actually requires dethatching. Many homeowners mistake compacted soil or dormant grass for thatch. To measure accurately, use a sharp spade or a dedicated soil probe to extract a 3-inch deep cross-section of your turf.
Pro Measurement Tip: Look for the distinct spongy, brown layer sitting directly above the mineral soil but below the green grass blades. Press it with your thumb; if it feels like a dense foam pad and measures thicker than 0.5 inches, mechanical dethatching is required.
| Thatch Depth | Turf Condition | Required Action |
|---|---|---|
| Less than 0.25" | Healthy, optimal moisture retention | Maintain current mowing and aeration schedule |
| 0.25" to 0.5" | Slightly spongy, minor water runoff | Core aeration and topdressing with compost |
| 0.5" to 0.75" | Spongy, fertilizer inefficiency, shallow roots | Power rake dethatching (spring tines) |
| Over 0.75" | Severe hydrophobic layer, high disease risk | Aggressive verticutting (flail blades) or sod replacement |
Equipment Selection: Spring Tines vs. Flail Blades
Choosing the wrong dethatching machine is the most common cause of turf destruction. As of 2026, rental centers typically offer two primary walk-behind machines, alongside manual tools for micro-lawns.
1. Manual Thatch Rake (Under 500 sq. ft.)
Features heavy-duty, curved steel tines designed to dig into the soil. This is highly labor-intensive and only viable for small patch repairs. Expect to pay $45 to $70 for a professional-grade manual rake (e.g., the Bully Tools 54-inch model).
2. Power Rake with Spring Tines (500 to 5,000 sq. ft.)
The standard for residential cool-season grasses (Kentucky Bluegrass, Tall Fescue, Perennial Ryegrass). The rapidly spinning spring-steel tines flick the thatch upward without severely slicing the healthy rhizomes. Rental costs average $75 to $95 for a 4-hour window at major hardware chains.
3. Verticutter with Flail Blades (Over 5,000 sq. ft. or Warm-Season)
Uses rigid, fixed steel blades that slice vertically into the soil and thatch. This is mandatory for thick-stolon warm-season grasses like Bermuda and Zoysia, which require aggressive stolon pruning to promote lateral spread. According to Clemson University Extension, verticutting is the only effective mechanical removal method for dense Zoysia thatch exceeding 0.5 inches.
Step-by-Step Dethatching Procedure
Timing is critical. Dethatch cool-season grasses in late summer to early fall (late August through September) when the grass is entering its peak growth cycle. Dethatch warm-season grasses in late spring (May to June) immediately after complete green-up.
Step 1: Mow and Hydrate
Mow your lawn 30% lower than your standard maintenance height. For Tall Fescue normally kept at 3 inches, mow down to 1.5 inches. This exposes the thatch layer to the machine's tines. Water the lawn lightly 24 hours prior; the soil should be moist but not saturated. Dethatching muddy soil will cause severe compaction and rutting.
Step 2: Calibrate the Dethatcher Depth
This is the most critical technical step. Place the machine on a flat concrete driveway. Adjust the wheel height so the tines just barely scrape the concrete. When moved to the lawn, the tines should penetrate the thatch and scratch the top 1/8-inch of the soil surface.
Warning: If the tines dig deeper than 1/4-inch into the mineral soil, you will rip out healthy grassroots and tear living rhizomes, causing massive turf thinning that will take months to recover.
Step 3: Execute Cross-Hatch Passes
Run the dethatcher in straight, parallel lines across the lawn, similar to mowing patterns. For thatch layers over 0.5 inches, make a second pass perpendicular to the first (a cross-hatch pattern). Keep the machine moving at a steady walking pace; lingering in one spot will scalp the lawn down to bare dirt.
Step 4: Debris Extraction
Dethatching generates a massive volume of dead organic material. Leaving it on the lawn will smother the remaining grass. Use a motorized lawn sweeper or a standard push mower equipped with a bagging attachment to vacuum up the loosened thatch. Expect to haul away 2 to 4 times the volume of debris you would during a standard fall leaf cleanup.
Post-Dethatching Recovery Protocol
Dethatching is a traumatic event for your turf. The lawn will look severely scalped and brown immediately following the process. Proper post-care is non-negotiable to ensure rapid recovery and prevent weed invasion.
- Core Aeration: Because dethatching removes the organic buffer, follow up immediately with core aeration to relieve any soil compaction caused by the heavy rental machine.
- Overseeding: The exposed soil and open canopy create the ideal seed-to-soil contact environment. Broadcast a premium, weed-free turf seed blend at a rate of 4 to 6 lbs per 1,000 sq. ft. for cool-season lawns.
- Apply Starter Fertilizer: Apply a phosphorus-rich starter fertilizer (such as a 10-18-10 NPK ratio) to stimulate rapid root development in both the existing grass and the new seed. As noted by Penn State Extension, phosphorus is critical for seedling establishment in newly exposed soil profiles.
- Targeted Watering: Shift from deep, infrequent watering to light, frequent irrigation. Water the lawn 2 to 3 times daily for 10 minutes to keep the top 1 inch of soil consistently moist until the new seed germinates (typically 10 to 14 days).
Common Dethatching Mistakes to Avoid
Avoid these frequent errors that lead to long-term turf damage:
- Dethatching Dormant Grass: Never dethatch a brown, dormant lawn. The grass lacks the active cellular growth required to heal the micro-tears caused by the tines, leading to permanent dead patches.
- Confusing Aeration with Dethatching: Core aeration pulls soil plugs to relieve compaction; it does not remove thatch. If your soil is hard but the thatch layer is under 0.5 inches, skip the power rake and only aerate.
- Using a Power Rake on Centipede Grass: Centipede grass has a shallow, delicate root system and spreads via above-ground stolons. Aggressive mechanical dethatching can easily destroy the entire turf mat. Use a manual rake or aggressive vertimowing at a very high setting instead.
"Thatch management is not just about removal; it is about balancing the biological decomposition rate with the turf's growth rate. Proper nitrogen management and avoiding excessive quick-release fertilizers are the best long-term defenses against thatch accumulation." — University of Minnesota Extension
By adhering to these precise calibration and recovery steps, you will eliminate the hydrophobic thatch barrier, restore nutrient uptake to the root zone, and establish a denser, more drought-resilient lawn for the upcoming season.

