
Lawn Care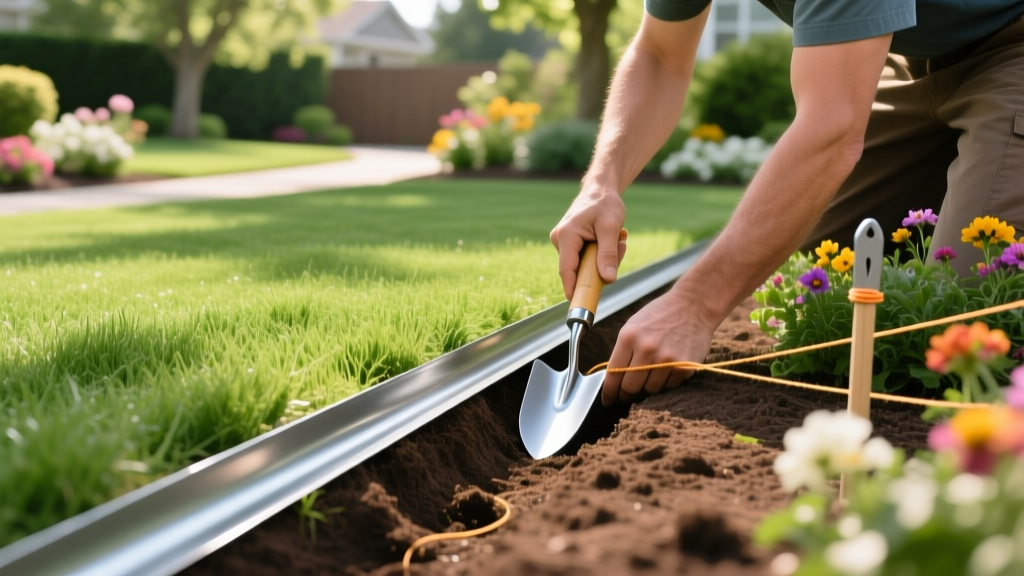
How to Install Landscape Edging Material: Step-by-Step Guide
Why Proper Edging Material is Critical for Lawn Maintenance
Maintaining a sharp boundary between your turfgrass and landscape beds is one of the most time-consuming aspects of lawn care. Without a physical barrier, aggressive warm-season grasses like Bermuda and Zoysia will rapidly invade mulched beds via underground rhizomes, while cool-season grasses like Kentucky Bluegrass will spread through surface stolons. Installing the correct edging material is not just a cosmetic upgrade; it is a fundamental structural maintenance procedure that reduces weekly string-trimming time by up to 40% and prevents turf encroachment.
This guide details the exact procedures for selecting, trenching, and installing landscape edging material, utilizing industry-standard measurements and current 2026 material pricing.
Comparing Landscape Edging Material Types
Choosing the wrong edging material leads to frost heave, rhizome escape, and premature degradation. The table below breaks down the four primary commercial and residential edging materials based on current market costs, lifespan, and blocking efficacy.
| Edging Material | Cost per Linear Ft | Lifespan | Required Trench Depth | Best Application |
|---|---|---|---|---|
| Heavy-Duty Polyethylene (e.g., Dimex) | $1.50 - $2.50 | 5 - 8 years | 4 - 6 inches | Cool-season grasses; curved garden beds |
| Extruded Aluminum (e.g., Permaloc) | $4.00 - $6.00 | 20+ years | 6 inches | Warm-season aggressive grasses; straight lines |
| Corten Steel | $7.00 - $10.00 | 30+ years | 6 - 8 inches | Modern landscapes; heavy clay soils |
| Natural Stone / Brick | $8.00 - $15.00 | Lifetime | N/A (Requires concrete footer) | Decorative borders; high-budget renovations |
Expert Insight: If you are managing a Zoysia or Bermuda lawn, skip the polyethylene entirely. The rhizomes of these grasses can easily penetrate the seams of plastic edging or push it upward during freeze-thaw cycles. Extruded aluminum with interlocking stakes is mandatory for these species.
Phase 1: Site Preparation and Trenching
The longevity of your edging material is determined entirely by the trenching phase. A poorly dug trench will result in leaning barriers and soil washout.
Step 1: Utility Clearance and Layout
Before breaking ground, you must identify underground utilities. Contact your local utility locator service via Call 811 at least 72 hours before digging. Once cleared, use a garden hose to lay out curved borders or a mason's line for straight edges. Mark the line with inverted marking paint.
Step 2: Cutting the Trench
Use a manual half-moon edger for small projects or a motorized gas trencher for runs exceeding 100 linear feet. The trench dimensions must be precise:
- Depth: 6 inches minimum for warm-season grasses; 4 inches for cool-season grasses.
- Width: 4 to 6 inches wide to allow for backfill compaction.
- Wall Angles: The lawn-side wall must be cut at a strict 90-degree angle to prevent turf undermining. The bed-side wall should be sloped at a 45-degree angle to allow for easy backfilling and mulch retention.
Warning: The 'Lip' Measurement
Do not bury the top lip of the edging material flush with the soil grade. If mulch or soil washes over the top lip, grass stolons will bridge the gap and invade the bed. Always leave exactly 0.5 inches of the edging material exposed above the final soil grade to act as a physical dam.
Phase 2: Installing and Securing the Edging Material
Installation techniques vary significantly between flexible plastics and rigid metals.
Step 3: Placement and Alignment
Unroll polyethylene edging and let it sit in direct sunlight for two hours before installation; the UV heat will relax the material's memory, preventing it from kinking in the trench. For aluminum or steel, slide the interlocking joints together and secure them with the provided steel pins before lowering the continuous run into the trench.
Step 4: Staking and Anchoring
Secure the material using heavy-duty steel stakes (plastic stakes will snap in compacted clay soils).
- Drive stakes at a 15-degree angle away from the lawn, pointing toward the garden bed. This leverages the soil mass of the bed to resist the outward pressure of the growing turf.
- Place stakes every 24 inches for straight runs, and every 12 inches for curves with a radius tighter than 4 feet.
- Hammer stakes until the top is flush with the top lip of the edging material. Protruding stakes will shatter string-trimmer lines and pose a laceration hazard.
Phase 3: Backfilling and Soil Compaction
Do not simply push the excavated native soil back into the trench. Native soil shrinks and cracks when dry, creating gaps that rhizomes will exploit.
Instead, use a 50/50 mix of crushed angular gravel (3/8-inch size) and native soil for the first 3 inches of backfill on the lawn side. The angular gravel locks together, creating a subterranean physical barrier that deters root penetration. Tamp the backfill aggressively with a hand tamper. On the bed side, backfill with native soil and cap with 2 to 3 inches of hardwood mulch.
Long-Term Edge Maintenance Procedures
Even the best-installed edging material requires seasonal maintenance to remain effective. According to turf management guidelines from University of Minnesota Extension, edge degradation is the primary cause of landscape bed weed infestations.
String Trimming Technique
When maintaining the edge with a string trimmer, use a 0.095-inch diameter nylon line. Hold the trimmer head perfectly parallel to the edging material, maintaining a 1-inch gap. Striking aluminum or steel edging with a trimmer will fray the line instantly and dull the cutting edge of the string, resulting in torn grass tips that invite fungal pathogens.
Annual Resetting
In regions with deep winter freezes, frost heave will push edging material upward by 1 to 2 inches over the winter. Every early spring, walk your perimeter with a rubber mallet and tap any heaved sections back down to the original 0.5-inch exposed lip depth.
Troubleshooting Common Edging Failures
When your edging fails, it is almost always due to one of three specific installation errors. Use this diagnostic framework to fix failing borders.
- Failure Mode: Rhizome Escalation (Grass growing over the top)
- Cause: Mulch in the garden bed has built up above the top lip of the edging material, creating a 'bridge' for grass stolons.
- Fix: Rake mulch back 6 inches from the edge. Install a secondary 2-inch wide aluminum baffle on top of the existing edging using self-tapping metal screws.
- Failure Mode: Mower Scalping (Mower blades striking the edging)
- Cause: The edging was installed too high, or the lawn soil has settled away from the barrier.
- Fix: Lower the edging so the top lip is exactly 0.25 inches below your mower's lowest deck setting. Topdress the lawn side of the trench with coarse sand to level the turf grade.
- Failure Mode: Polyethylene Bowing and Kinking
- Cause: Plastic edging was installed in soil with high clay content without adequate gravel backfill, causing the clay's expansion to crush the flexible material.
- Fix: Extract the bowed plastic. Upgrade to 14-gauge Corten steel or extruded aluminum, which possess the tensile strength to resist clay expansion pressures. For more on managing heavy clay soils, refer to NC State Turfgrass Science resources on soil amendment.
Properly installed edging material transforms lawn maintenance from a weekly battle into a simple perimeter sweep. By matching the material to your specific turfgrass species and adhering to exact trenching dimensions, you will secure a permanent, clean boundary that protects your landscape investments.

