
Lawn Care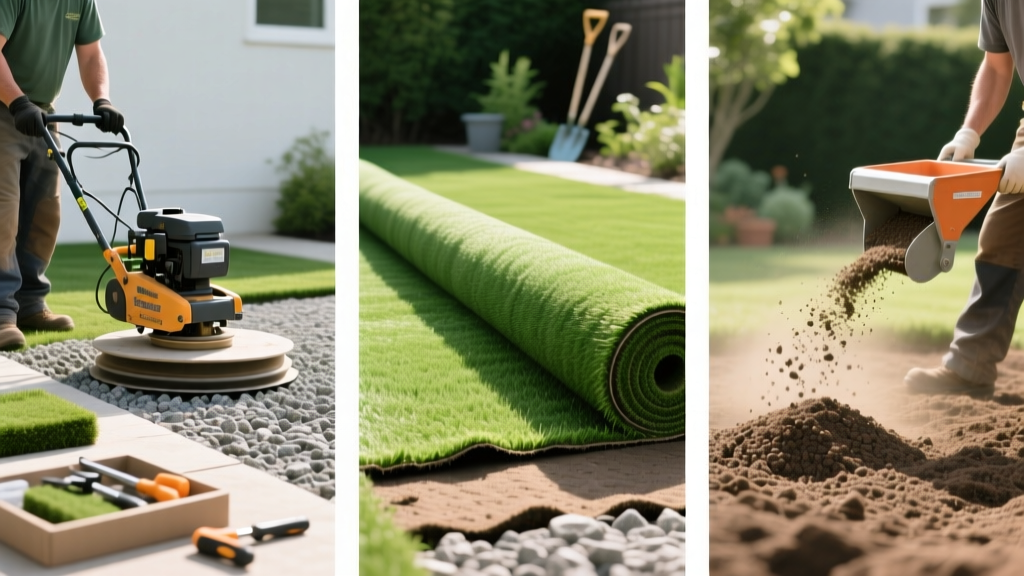
Pro Steps to Install Artificial Grass: Base, Turf, and Infill
The Foundation Dictates the Finish
When mapping out the steps to install artificial grass, most homeowners fixate on the turf's blade height or color. However, professional installers know that 85% of synthetic turf failures—including surface wrinkling, seam separation, and sub-surface water pooling—stem directly from improper base preparation. Artificial turf is not a carpet you simply roll over existing dirt; it is a permeable, multi-layered drainage system that requires precise engineering. According to the EPA WaterSense landscaping guidelines, replacing natural sod with synthetic alternatives significantly reduces outdoor water use, but only if the underlying soil matrix is graded and compacted to handle sudden precipitation without eroding.
This guide details the professional-grade steps to install artificial grass, focusing on the structural mechanics of base compaction, polyurethane seaming chemistry, and thermal-managing infills.
Phase 1: Excavation and the Capillary Break
The first critical step is removing the organic topsoil. You must excavate to a depth of 3.5 to 4 inches for standard applications, or 4.5 to 5 inches if your native soil is heavy clay with poor percolation rates. Leaving organic matter beneath the base will result in decomposition, leading to uneven settling and surface depressions over time.
Warning: Tree Root Intrusion
If installing near mature trees, lay a heavy-duty root barrier (minimum 24-inch depth) along the excavation perimeter. Tree roots seeking moisture will push upward through the aggregate base, creating severe ridges in your turf that cannot be fixed without a full tear-out.
If installing near mature trees, lay a heavy-duty root barrier (minimum 24-inch depth) along the excavation perimeter. Tree roots seeking moisture will push upward through the aggregate base, creating severe ridges in your turf that cannot be fixed without a full tear-out.
Once excavated, score the native soil with a garden rake to create a mechanical bond for the aggregate layer. If your native soil is highly expansive clay, lay a non-woven geotextile fabric directly on the subgrade before adding rock. This acts as a capillary break, preventing the clay from wicking moisture upward and turning your base into mud during heavy rains.
Phase 2: Building and Compacting the Aggregate Base
The base material provides the structural integrity and drainage pathway for the entire system. The industry standard is Class II Road Base (a mix of 3/4-inch crushed rock and fine dust). The fine dust is crucial; it fills the voids between the larger rocks, allowing the layer to lock together like concrete when compacted.
| Base Material | Drainage Rate | Compaction Quality | Best Use Case |
|---|---|---|---|
| Class II Road Base (3/4" Minus) | Moderate-High | Excellent (Locks tight) | Standard yards, high traffic |
| Decomposed Granite (DG) | Low-Moderate | Good (Can wash out) | Arid climates, light foot traffic |
| Clean 3/8" Crushed Drain Rock | Very High | Poor (Shifts underfoot) | French drains, base underlayment |
The 95% Proctor Density Rule
Spread the Class II road base in 2-inch lifts (layers). Lightly mist each layer with a garden hose—moisture is required for the fine dust to activate and bind. Run a vibrating plate compactor (minimum 5,000 lbs of centrifugal force) over each lift in overlapping passes. Your goal is to achieve 95% modified Proctor density. If you can leave a footprint in the compacted base, it is not ready. The final grade should slope away from structures at a minimum 2% grade (1/4 inch drop per foot) to ensure positive drainage.
Phase 3: Turf Acclimation, Layout, and Seaming
Synthetic turf backing is typically made of polyurethane or latex, which expands and contracts with temperature fluctuations. Before cutting or securing, unroll the turf and let it acclimate in direct sunlight for 2 to 4 hours. This relaxes the backing, preventing future wrinkling when temperatures drop.
Cutting and Grain Direction
Always cut turf from the backing side using a sharp utility knife, counting three stitches in from the edge to avoid slicing the face fibers. Crucially, ensure the grass grain (the direction the blades naturally lean) points toward the primary viewing area, such as the back patio or the street. If the grain points away from the viewer, the turf will look pale and washed out due to light reflection.
Polyurethane Seaming Chemistry
For seams, use a 12-inch wide woven seaming tape and a high-quality polyurethane adhesive (such as SGW SuperSeam Pro). Polyurethane glues are moisture-curing, meaning they rely on atmospheric humidity to cross-link and harden.
- Application: Use a 1/4-inch notched trowel to spread the glue evenly on the tape.
- Alignment: Bring the two turf edges together, ensuring no fibers are trapped in the glue. The gap between backing edges should be exactly 1/8 inch to allow for thermal expansion.
- Curing: Keep all foot traffic off the seam for a minimum of 24 hours. If it rains during the curing window, the glue will foam and fail, requiring a complete seam tear-out and redo.
Phase 4: Perimeter Securing and Infill Selection
Secure the perimeter using 5-inch or 6-inch galvanized landscape spikes (40d nails). Place them every 4 to 6 inches along all edges. Avoid using staples in the field of the turf, as they can trap the backing and cause localized dimpling.
The Thermal Impact of Infill
Infill serves three purposes: it weighs the turf down, keeps the blades standing upright, and protects the primary backing from UV degradation. However, it also drastically affects surface temperature. According to research published by the University of Florida IFAS Extension, synthetic turf surfaces can reach temperatures 30°F to 50°F higher than natural grass in direct sunlight, sometimes exceeding 150°F.
To mitigate this, select your infill carefully:
- 20-Mesh Silica Sand: The most economical choice ($12-$18 per 50lb bag). Provides excellent ballast but offers zero cooling properties. Apply at a rate of 1.5 to 2 lbs per square foot.
- Envirofill (Acrylic Coated Sand): Infused with Microban antimicrobial protection, making it ideal for pet turf. It resists compaction and washout but retains heat similarly to standard sand.
- HydroChill / Zeolite Blends: These porous minerals absorb water during irrigation and release it via evaporative cooling, which can drop surface temperatures by 20°F to 30°F. Highly recommended for south-facing yards in arid climates.
Distribute the infill using a mechanical drop spreader, followed immediately by a power broom with stiff nylon bristles. Brooming drives the sand down to the backing and stands the face fibers upright.
Troubleshooting Common Installation Failures
Diagnostic Guide for Post-Install Issues
- Surface Wrinkling: Caused by skipping the sun-acclimation phase or failing to stretch the turf taut during perimeter nailing. Fix: Cut the perimeter nails, stretch the turf using a carpet kicker, and re-nail.
- Water Pooling: Indicates the base was not compacted to 95% density or lacks a 2% slope. Fix: Injecting a polyurethane foam beneath the turf can temporarily level minor depressions, but severe pooling requires base reconstruction.
- Visible Seams: Usually the result of cutting too close to the stitch line or failing to maintain the 1/8-inch expansion gap. Fix: Visible seams cannot be hidden; the section must be cut out and re-seamed with fresh tape.
2026 Material and Labor Cost Breakdown
For homeowners budgeting this project, expect mid-grade polyethylene turf to cost between $4.50 and $7.00 per square foot in 2026. Base materials (Class II road base, geotextile fabric, and nails) will add $0.75 to $1.25 per square foot. If hiring a licensed contractor, professional installation labor typically ranges from $8.00 to $14.00 per square foot, bringing the total turnkey cost to $13.00 to $22.00 per square foot depending on site accessibility and excavation complexity.
By strictly adhering to these structural and chemical protocols, your synthetic lawn will remain flat, drain flawlessly during heavy storms, and maintain its aesthetic integrity for 15 years or more.

