
Lawn Care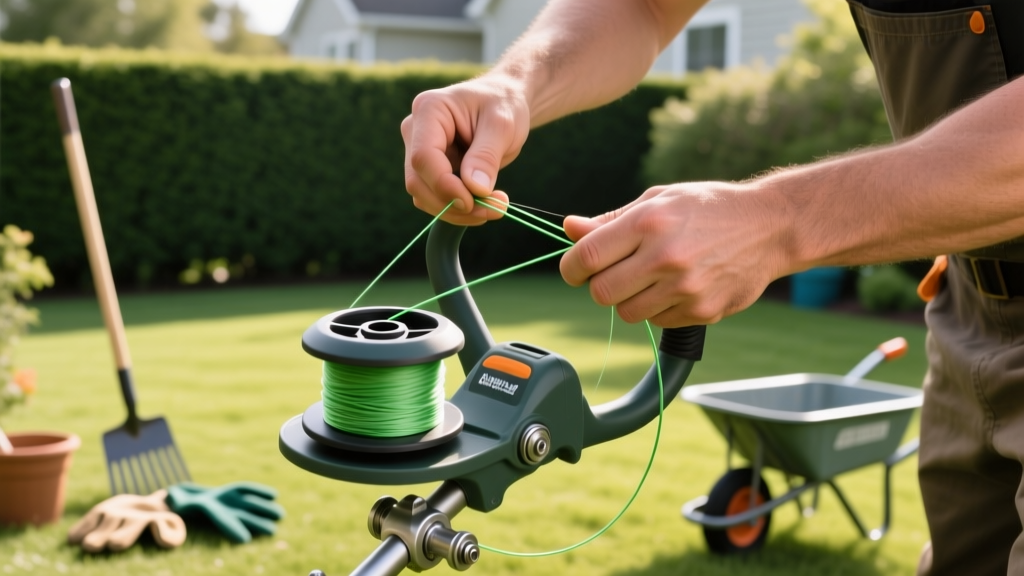
String Trimmer How to Restring: Bump Feed & Fixed Spool Guide
The Hidden Cost of Improper Trimmer Line Maintenance
A dull or improperly spooled trimmer line doesn't just tear your grass—it shreds the cellular structure of the turf blade, leaving ragged edges that turn brown and invite fungal pathogens like Rhizoctonia solani (brown patch). If you have ever found yourself frustrated, searching for string trimmer how to restring after your line snapped for the fourth time in ten minutes, the issue rarely lies with the machine itself. It almost always traces back to incorrect line geometry, poor spooling tension, or mismatched head types.
Proper equipment maintenance requires matching the line diameter and shape to your specific grass type and the trimmer head's mechanical design. In this guide, we break down the exact specifications, step-by-step spooling techniques, and failure-mode troubleshooting required to keep your edging crisp and your equipment running at peak RPM.
Selecting the Right Trimmer Line: Diameter and Geometry
Before you can restring, you must select the correct line. Using a 0.065-inch round line on a 30cc commercial trimmer to cut thick St. Augustine grass will result in immediate line welding and breakage. Conversely, running a 0.105-inch multi-sided line on a lightweight 20V battery trimmer will overwork the motor and drain the battery in minutes.
| Line Diameter | Best Use Case | Recommended Grass Types | Trimmer Class |
|---|---|---|---|
| 0.065" - 0.080" | Light weeding, standard edging | Fine Fescue, Kentucky Bluegrass, Bermuda | Electric / Battery (18V-40V) |
| 0.080" - 0.095" | Thick grass, light brush, heavy edging | St. Augustine, Zoysia, Tall Fescue | Residential Gas (21cc-25cc) |
| 0.105" - 0.130" | Heavy brush, fence lines, commercial use | Overgrown Bahiagrass, thick weeds, saplings | Commercial Gas (30cc+) |
Line Geometry Matters
Standard round line is the cheapest but offers the least cutting efficiency because it lacks a sharp edge. Twisted line (like Oregon Gatorline) reduces air resistance, lowering the decibel output while maintaining a sharp cutting edge. Multi-sided (square or star) line acts like a serrated knife, slicing through thick, fibrous weeds rather than bludgeoning them. For heavy-duty residential maintenance, a 0.085-inch twisted copolymer line offers the best balance of durability and motor preservation.
Identifying Your Trimmer Head Mechanism
The restringing process is entirely dependent on the mechanical feed system of your trimmer head. According to equipment maintenance guidelines from STIHL USA Support, forcing line into an incompatible head or misaligning the internal spring will destroy the spool mechanism.
- Bump Feed (e.g., Husqvarna T25, Stihl AutoCut 25-2): Requires manual winding onto a removable or fixed inner reel. You advance the line by tapping the spool on the ground while the engine is at high RPM.
- Speed-Feed / Quick-Load (e.g., Echo Speed-Feed 400): Features a split-spool design that allows you to feed a single folded length of line through the eyelets and crank the knob, eliminating the need to remove the spool.
- Fixed Line / Manual Feed: Common on commercial brushcutters. You cut individual 12-inch pieces of heavy line and manually lock them into the head's metal retaining slots.
Step-by-Step: How to Restring a Bump Feed Spool
Bump feed heads are the most common and the most prone to user error. Cross-winding or incorrect tensioning will cause the line to fuse together inside the spool—a failure mode known as 'line welding.' Follow these exact steps for dual-line bump feed heads.
Pro-Tip: The Anchor Hole
Most modern spools feature a small anchor hole in the center divider. Before winding, insert one end of your line into this hole to lock it in place. This prevents the line from slipping and losing tension while you wind the spool.
Most modern spools feature a small anchor hole in the center divider. Before winding, insert one end of your line into this hole to lock it in place. This prevents the line from slipping and losing tension while you wind the spool.
- Remove the Spool: Depress the two side tabs on the spool cover and pull it away from the base. Note the orientation of the heavy metal spring and the friction washer. Do not lose the spring.
- Cut the Line: Cut exactly 15 to 20 feet of trimmer line. Cutting more than 20 feet increases the risk of overlapping and cross-winding on smaller residential spools.
- Locate the Winding Direction: Look for the molded arrows on the inner reel. Never guess the direction. Winding backward will cause the line to jam when you bump the head.
- Wind with Tension: Anchor the line and wind it tightly and evenly side-by-side. Do not let the line overlap itself. Maintain firm, manual tension on the free end of the spool as you turn it.
- Lock the Tails: Leave exactly 6 inches of line extending from the spool. Snap these tails into the designated retention notches on the outer rim of the spool.
- Reassemble and Feed: Thread the 6-inch tails through the metal eyelets on the outer housing. Align the spool back onto the base, ensuring the friction washer sits flat. Pull the tails sharply to release them from the retention notches, then snap the cover back on.
Step-by-Step: Restringing a Speed-Feed Head
Speed-feed heads, such as the Echo Speed-Feed 400, are engineered to reduce maintenance time from five minutes to under sixty seconds. You do not need to disassemble these heads.
- Cut a single 14-foot length of trimmer line and fold it exactly in half.
- Rotate the top knob of the trimmer head until the two opposing eyelets align perfectly with the inner spool channel (you will feel a slight click or see an alignment mark).
- Insert the folded loop of the line into one eyelet and push it through until it exits the opposite eyelet.
- Pull both ends until you have an equal 7-foot length extending from each side.
- Rotate the top knob clockwise (or as indicated by the arrows on the head) to crank the line tightly into the spool.
Troubleshooting Common Restringing Failures
Even with the correct technique, environmental factors and material degradation can cause feed issues. Here is how to diagnose and fix the three most common string trimmer maintenance failures.
Failure Mode 1: Line Welding (Melting)
Symptom: The line won't advance when bumped; it feels like it is glued together inside the spool.
Cause: High RPM friction combined with bumping the head on hot concrete or asphalt melts the nylon, fusing the spooled layers together.
Fix: Switch from standard nylon to a copolymer blend or twisted line, which has a higher melting point and reduced surface-area contact inside the spool. Never 'bump' the head on pavement; bump only on soft soil or grass.
Failure Mode 2: Immediate Line Retraction
Symptom: You bump the head, line feeds out, but immediately snaps back inside the housing when you lift the trimmer.
Cause: The internal metal spring is installed upside down, or the friction washer is missing, causing the spool to spin backward.
Fix: Disassemble the head. Ensure the spring's wider base sits against the bottom of the spool cavity, and verify the friction washer is placed between the spool and the cover.
Failure Mode 3: Eyelet Wear and Shredding
Symptom: The line breaks exactly at the exit point of the trimmer head, even when cutting soft grass.
Cause: The metal or plastic eyelets on the spool cover have worn down, creating sharp burrs that slice the line under centrifugal force.
Fix: Inspect the exit holes. If you feel sharp edges, replace the spool cover. Replacement covers for models like the Husqvarna T25 or Stihl AutoCut typically cost between $12 and $18 and should be swapped every 3 to 4 seasons.
Final Maintenance Best Practices
To maximize the lifespan of your trimmer line and reduce the frequency of restringing, store your bulk line spools in a cool, dark, and dry environment. UV radiation and extreme heat degrade the plasticizers in nylon and copolymer lines, making them brittle and prone to shattering upon impact with hard surfaces. By matching the correct line geometry to your specific grass density and adhering to precise winding tensions, you will achieve cleaner cuts, healthier turf, and significantly less downtime in the field.

