
Lawn Care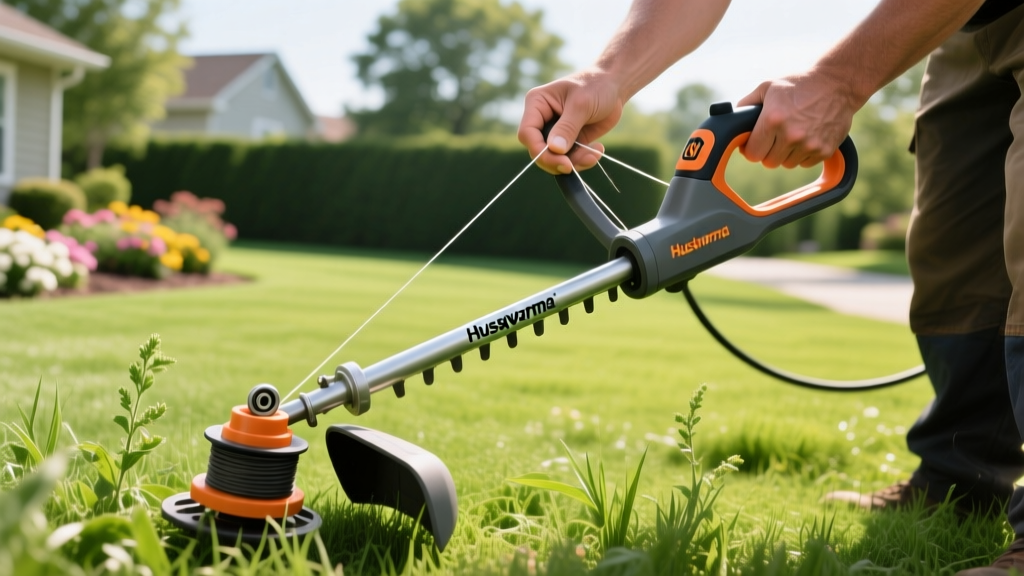
How to String a Weed Eater Husqvarna for Precision Weed Spot-Treatment
The Role of Mechanical Trimming in Weed Spot-Treatment
Effective weed management along fence lines, hardscapes, and delicate garden beds rarely relies on chemical herbicides alone. When spot-treating aggressive species like yellow nutsedge, dallisgrass, or creeping charlie, mechanical disruption is often required to clear thatch, expose the weed's crown, and prepare the foliage for targeted systemic herbicide application. A properly calibrated trimmer is your primary tool for this mechanical prep. If your trimmer line is too thin, it will shred against concrete and fail to slice through fibrous weed stolons. If the spool is wound incorrectly, it will jam mid-treatment, leaving weeds cut at the wrong height for optimal chemical absorption.
Understanding exactly how to string a weed eater Husqvarna model—specifically matching the spool type and line gauge to the target weed species—is a foundational skill for integrated landscape management. According to Penn State Extension, mechanical removal and precise mowing heights are critical first steps in disrupting the life cycle of perennial weeds before applying spot-treatments.
Matching Trimmer Line Gauge to Target Weed Species
Before removing your spool, you must select the correct trimmer line. Husqvarna trimmers (such as the gas-powered 128LD, 324L, or the battery-powered 535iL) utilize different line gauges depending on the cutting head. Using a 0.065-inch line on tough bermudagrass runners will result in immediate line weld and breakage, while a 0.105-inch line on a lightweight residential spool will cause excessive vibration and feed failure.
| Line Gauge | Husqvarna Line Type | Target Weed Species & Terrain | Compatible Spool Heads |
|---|---|---|---|
| 0.080-inch | Whisper / Standard Round | Soft annual weeds (chickweed, spurge), light grass edging | T25, T15 (Residential) |
| 0.095-inch | Titanium Force / Square | Tough perennials (nutsedge, dallisgrass), fence-line clearing | T25, T35 (Prosumer) |
| 0.105-inch | Commercial / Multi-Sided | Woody-stemmed weeds, thick brush, heavy stolon runners | T35, T40 (Commercial) |
For most residential spot-treatment scenarios involving stubborn broadleaf and grassy weeds, the 0.095-inch Husqvarna Titanium Force line offers the ideal balance of cutting aggression and spool feed reliability. The square or multi-sided profile slices through fibrous weed stems cleanly rather than tearing them, which is vital if you plan to apply a systemic herbicide like fluazifop or glyphosate to the freshly cut tissue.
Step-by-Step: How to String a Weed Eater Husqvarna (T25 & T35 Bump Spools)
The T25 and T35 bump-feed heads are the most common on Husqvarna straight-shaft trimmers. Follow this precise sequence to ensure smooth line deployment when you are navigating tight weed-infested corners.
Pro-Tip: Safety First
Always disconnect the spark plug wire on gas models (like the 324L) or remove the battery on cordless models (like the 115iL) before handling the cutting head. The spindle can retain tension and spin unexpectedly.
Always disconnect the spark plug wire on gas models (like the 324L) or remove the battery on cordless models (like the 115iL) before handling the cutting head. The spindle can retain tension and spin unexpectedly.
- Remove the Spool: Push the spool down and turn it counterclockwise (or align the arrow on the spool with the hole on the hub and insert a locking pin, depending on your exact model year). Lift the spool out of the housing.
- Clean the Housing: Use a wire brush or compressed air to clear out compacted grass clippings and weed sap from the inner hub. Buildup here is the number one cause of line feed jams during heavy weed clearing.
- Measure and Cut: Cut exactly 15 to 18 feet of 0.095-inch line. Exceeding 20 feet per side creates excessive friction inside the spool, leading to line welding (melting).
- Anchor the Line: Find the small anchor hole in the center divider of the spool. Thread one end of the line through the hole to lock it in place.
- Wind Clockwise: Look for the directional arrows printed on the underside of the spool. Wind the line tightly and evenly in the direction of the arrows. Do not overlap the line; lay it flat in the grooves. Leave about 6 inches of line unwound at the end.
- Lock in the Notches: Snap the remaining 6 inches of line into the side retention notches on the spool's flange. This prevents the line from unspooling while you reassemble the head.
- Thread the Eyelets and Reassemble: Feed the two loose ends through the metal exit eyelets on the outer trimmer housing. Push the spool back into the hub, ensuring the notches align with the eyelets, and turn clockwise to tighten.
- Release the Line: Squeeze the sides of the spool and pull the line out of the retention notches, then pull the line outward to engage the bump-feed mechanism.
Troubleshooting Spool Failures During Weed Eradication
When spot-treating dense patches of weeds, your trimmer works harder than during routine lawn edging. Hitting thick weed crowns, hidden rocks, and concrete curbs generates immense friction. Here is how to diagnose and fix common Husqvarna spool failures in the field.
Line Welding (Melting Inside the Spool)
The Symptom: You bump the head, but no new line feeds out. When you open the spool, the line is fused into a solid plastic block. The Cause: Friction from cutting thick, woody weed stems or operating at full throttle without engaging the material generates excess heat. Overfilling the spool with more than 18 feet of line also restricts airflow. The Fix: Reduce line capacity to 15 feet per side. Switch to a multi-sided or twisted line profile, which cuts through dense weeds faster, reducing the time the head spends rubbing against the material. Never store your trimmer in direct sunlight or a hot truck bed, as this softens the line inside the spool.
Feed Jams and Uneven Extension
The Symptom: One side of the line extends perfectly, but the other side remains short, causing severe vibration. The Cause: The line was wound unevenly, or debris is blocking one of the exit eyelets. The Fix: Remove the spool and inspect the metal eyelets. Weed sap and dirt frequently bake onto the inside of the eyelets, creating a rough surface that snags the line. Use a small round file to smooth the inside of the eyelets, and ensure you wind both sides with equal tension.
Warning: The Nutsedge Hazard
Yellow and purple nutsedge produce sharp, underground tubers and tough, triangular above-ground stems. According to the UC IPM Nutsedge Guide, simply cutting the tops off is insufficient for eradication. When using your Husqvarna trimmer to prep a nutsedge patch, do not scalp the weed down to the soil. Trim it to exactly 2 inches above the soil line to maximize the leaf surface area available for subsequent systemic herbicide absorption.
Yellow and purple nutsedge produce sharp, underground tubers and tough, triangular above-ground stems. According to the UC IPM Nutsedge Guide, simply cutting the tops off is insufficient for eradication. When using your Husqvarna trimmer to prep a nutsedge patch, do not scalp the weed down to the soil. Trim it to exactly 2 inches above the soil line to maximize the leaf surface area available for subsequent systemic herbicide absorption.
The Mechanical-to-Chemical Spot-Treatment Protocol
Stringing your weed eater correctly is only half the battle; using it as part of a calculated weed eradication workflow yields professional results. Follow this protocol for stubborn landscape weeds:
- Step 1: Mechanical Clearing (Day 1): Use your freshly strung Husqvarna with 0.095-inch line to clear away dead thatch and surrounding desirable turf. Cut the target weed patch down to a uniform 2-inch height. The square-profile line will create clean, open wounds on the weed stems.
- Step 2: The Recovery Window (Day 2-3): Do not spray immediately. Allow the weeds 48 hours to begin pushing new, tender growth from the crown. This new growth is highly susceptible to herbicides and will actively pull the chemical down into the root system.
- Step 3: Targeted Application (Day 4): Apply your chosen spot-treatment herbicide (e.g., a selective grassy weed killer like fluazifop, or a non-selective glyphosate gel for precise broadleaf application) directly to the freshly cut and regrowing foliage. Avoid spraying on windy days to protect the surrounding lawn you just trimmed.
By mastering the maintenance of your equipment and understanding the biological response of weeds to mechanical cutting, you transform a simple string trimmer into a highly effective tool for precision landscape management.

