
Lawn Care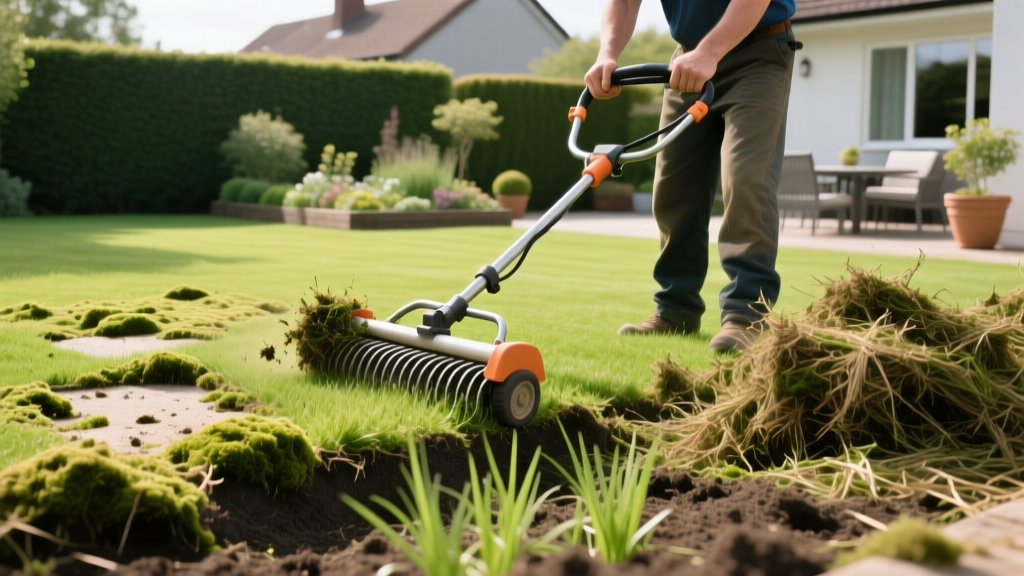
Thatching Lawn Repair: Step-by-Step Dethatching Procedure
The Science of Thatch and the "Thatching" Misconception
When homeowners search for thatching lawn solutions, they are almost always referring to dethatching—the process of removing excess thatch. Thatch itself is not inherently bad; it is a tightly woven layer of dead and living shoots, stems, and roots that sits between the green grass blades and the soil surface. A thin layer (under 0.5 inches) acts as an insulator, regulating soil temperature and retaining moisture. However, when thatch exceeds half an inch, it becomes a hydrophobic barrier that blocks water, oxygen, and nutrients from reaching the root zone, leading to shallow roots and increased susceptibility to drought and disease.
A common myth is that grass clippings cause thatch. According to turfgrass researchers at the University of Minnesota Extension, clippings decompose rapidly due to their high water content. True thatch is primarily composed of lignin-rich tissues like rhizomes, stolons, and crowns that resist rapid decay. Understanding this biological distinction is the first step in executing a proper lawn maintenance procedure.
Diagnostic Protocol: The 1/2-Inch Threshold Test
Before renting equipment, verify that your lawn actually requires dethatching. Use a flat-head screwdriver or a dedicated soil probe to extract a core sample. Measure the spongy, brown layer situated directly above the dark topsoil. If this layer measures greater than 0.5 inches when compressed, proceed with the dethatching procedure below. If it is less than 0.5 inches, focus on core aeration and microbial soil amendments instead.
Equipment Selection Matrix: Choosing Your Dethatcher
Selecting the wrong tool is the most common cause of lawn scalping and root tearing. Match your equipment to your lawn's square footage and grass type. Pricing below reflects average retail and rental market rates for 2026.
| Equipment Type | Recommended Model / Brand | Best For (Lawn Size) | Est. Cost (2026) | Blade Action |
|---|---|---|---|---|
| Manual Thatching Rake | Ames True Temper 15" Steel | Under 500 sq. ft. | $35 - $55 | Curved tines pull upward |
| Electric Dethatcher | Sun Joe AJ801E 12-Amp | 1,000 - 5,000 sq. ft. | $160 - $190 | Spring tines flick out |
| Gas-Powered Verticutter | Billy Goat H802H | Over 5,000 sq. ft. | $1,100+ / $65 rental | Fixed blades slice soil |
Professional Service Note: Hiring a landscaping crew to dethatch typically costs between $0.15 and $0.35 per square foot. For a standard 5,000 sq. ft. lawn, expect quotes ranging from $750 to $1,750, often bundled with core aeration and overseeding.
Step-by-Step Dethatching Procedure
Executing this procedure requires precision. Aggressive dethatching can severely damage the turf crown, leading to weeks of stunted growth or total lawn loss if performed during environmental stress.
- Preparation (Mowing and Hydration): Mow your lawn to half its normal height (approximately 1.5 inches for cool-season grasses). This exposes the thatch layer and prevents the machine from bogging down. Water the lawn deeply 24 to 48 hours before dethatching. The soil should be moist but not saturated; working on muddy soil will cause severe compaction and tear the roots out entirely.
- Calibrate Blade Depth: This is the most critical step. For cool-season grasses (Kentucky Bluegrass, Tall Fescue, Perennial Ryegrass), set the dethatcher blades or tines to penetrate the soil by exactly 1/8 to 1/4 inch. For warm-season grasses (Bermuda, Zoysia), which have aggressive rhizome networks, set the blades slightly deeper, penetrating 1/4 to 1/2 inch into the soil. Test your settings on a small, inconspicuous patch first.
- Execute the Grid Pattern: Push the dethatcher across the lawn in straight, overlapping lines, similar to mowing. Once the first pass is complete, make a second pass perpendicular to the first (creating a cross-hatch or grid pattern). This ensures complete thatch extraction from all angles.
- Debris Extraction: Dethatching will leave your lawn looking destroyed, covered in thick brown mats of debris. Use a sturdy leaf rake or a lawn vacuum to remove 100% of the pulled thatch. Leaving the debris on the lawn will smother the remaining grass and invite fungal pathogens like Pythium blight.
Seasonal Timing Framework by Grass Type
Dethatching must align with your grass's peak growth cycle to ensure rapid recovery. Performing this procedure during dormancy or summer heat stress is a primary cause of turf failure.
- Cool-Season Grasses (Fescue, Bluegrass, Ryegrass): Perform dethatching in late August to early September. Soil temperatures should be dropping into the 60°F–70°F range. Fall recovery allows the grass to rebuild root mass before winter and avoids the peak weed germination window of spring.
- Warm-Season Grasses (Bermuda, Zoysia, St. Augustine): Dethatch in late May to early June, immediately after the lawn has fully greened up and entered its rapid summer growth phase. Soil temperatures must be consistently above 70°F. Warning: Never dethatch St. Augustine grass aggressively, as it relies heavily on above-ground stolons that are easily destroyed by verticutters.
Post-Thatching Soil Recovery Protocol
Once the thatch is removed, the soil surface is exposed and highly receptive to amendments. Capitalize on this window to maximize lawn density.
"Dethatching without subsequent core aeration and overseeding is a missed opportunity. The physical removal of thatch opens the soil profile, making it the exact right moment to relieve deep-soil compaction and introduce new turfgrass cultivars directly to the seedbed."
— Turfgrass Management Best Practices, Penn State Extension
The 48-Hour Recovery Plan:
- Core Aeration: Run a core aerator over the lawn to pull 3-inch soil plugs, further breaking up compaction caused by the dethatching equipment.
- Fertilization: Apply a starter fertilizer with a 3-1-2 or 4-1-2 N-P-K ratio at a rate of 1.0 lb of Nitrogen per 1,000 square feet. This fuels the rapid leaf and root regeneration required to heal the damaged crowns.
- Overseeding (Cool-Season Only): Broadcast shade-tolerant or drought-resistant seed at a rate of 4 to 6 lbs per 1,000 sq. ft. The grooves left by the dethatcher act as natural seed furrows, improving soil-to-seed contact.
- Irrigation: Water lightly 2 to 3 times a day for the first 14 days to keep the top inch of soil consistently moist, preventing the exposed roots from desiccating.
Troubleshooting Common Dethatching Failures
Symptom: Severe Scalping
Cause: Dethatcher blades were set too deep, cutting into the soil base rather than just the thatch layer, or the lawn was mowed too short prior to the procedure.
Fix: Raise the blade height by 1/4 inch. If scalping has already occurred, apply a quick-release nitrogen fertilizer and increase irrigation to force immediate push-growth.
Symptom: Tearing and Uprooting
Cause: The soil was overly saturated (muddy) during dethatching, or the equipment's tines/blades were dull, causing them to grab and rip the root system instead of slicing cleanly.
Fix: Sharpen or replace verticutter blades annually. Always allow the lawn to dry for 24 hours after heavy rain before operating heavy dethatching machinery.
Frequently Asked Questions
Can I use a standard leaf rake to dethatch my lawn?
No. Standard leaf rakes lack the tensile strength and tine geometry to penetrate the thatch layer. Attempting to do so will only remove surface debris and dead grass blades, leaving the hydrophobic thatch mat intact. You must use a specialized thatching rake with curved, sharp steel tines or a motorized dethatcher.
Will dethatching remove weeds from my lawn?
Dethatching will uproot some shallow-annual weeds (like crabgrass or poa annua) that are anchored primarily in the thatch layer. However, it will not remove deep-rooted perennial weeds like dandelions or bindweed. In fact, dethatching can expose bare soil, which may trigger a flush of new weed seeds if you do not immediately overseed and apply a pre-emergent herbicide (note: do not apply pre-emergents if you plan to overseed, as they will prevent grass seed germination).
How often should I dethatch my lawn?
Most lawns only require dethatching every 2 to 4 years. If you find yourself needing to dethatch annually, your lawn care program is likely flawed. Over-application of synthetic nitrogen fertilizers, excessive watering, and a lack of soil microbial activity are the primary drivers of rapid thatch accumulation. Transitioning to organic soil amendments and introducing compost tea can help naturally decompose thatch between mechanical interventions.

