
Lawn Care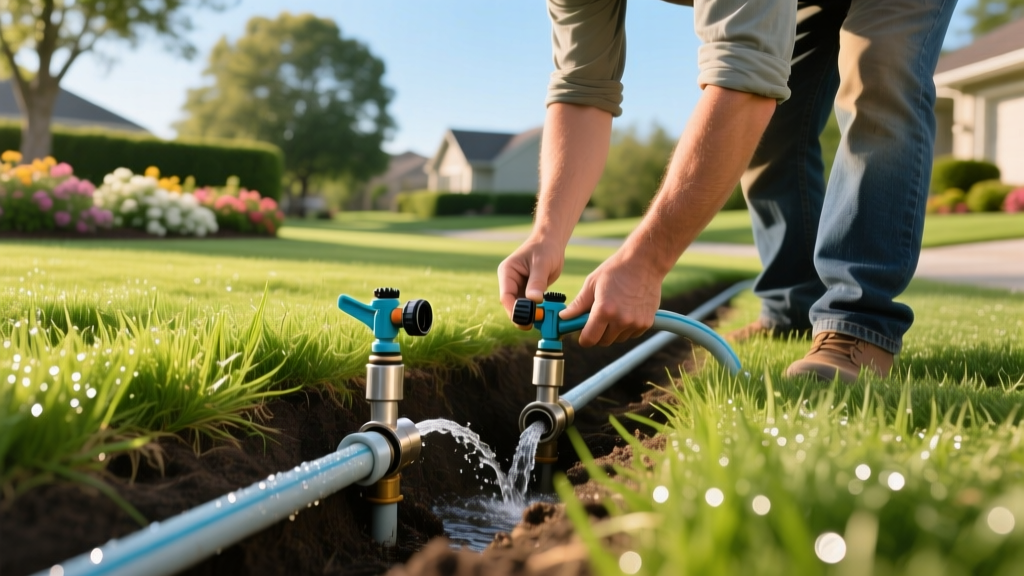
Underground Grass Sprinklers Installation: Step-by-Step DIY Guide
The Pre-Installation Audit: Pressure and Flow Mathematics
Successful underground grass sprinklers installation begins long before you dig a single trench. It starts with calculating your property's static water pressure (PSI) and maximum flow rate (Gallons Per Minute, or GPM). Ignoring these metrics guarantees dry spots, misting heads, and premature pump failure.
To measure static pressure, attach a standard 0-100 PSI water pressure gauge with a 3/4-inch female hose thread to your exterior hose bib. Turn the water on fully; a reading between 45 and 65 PSI is ideal for residential rotors and spray heads. If your pressure exceeds 75 PSI, you must install a pressure-reducing valve (such as the Watts LF25AUB-Z3) at the point of connection to prevent blown seals and pipe ruptures.
Next, determine your available GPM using the bucket test. Place a 5-gallon bucket under a fully open hose bib and time how many seconds it takes to fill. Divide 300 by the number of seconds to get your GPM. For example, if it takes 30 seconds to fill the bucket, your available flow is 10 GPM. This number dictates your zone design: the total GPM of all sprinkler heads on a single valve must never exceed 80% of your available flow rate to account for friction loss in the pipes.
Material Selection: PVC vs. Polyethylene Pipe Matrix
Choosing the right lateral and mainline pipe is the most critical material decision in grass sprinklers installation. The two dominant options are Schedule 40 PVC and Polyethylene (Poly) pipe. Your choice depends heavily on your local climate, soil type, and budget.
| Feature | Schedule 40 PVC (1-inch) | Polyethylene SIDR-15 (1-inch) |
|---|---|---|
| Average Cost (2026) | $0.75 - $0.90 per linear foot | $0.45 - $0.60 per linear foot |
| Fitting Method | Solvent-weld (Primer + PVC Cement) | Barbed insert fittings with stainless steel clamps |
| Freeze Tolerance | Low (Shatters if water freezes inside) | High (Expands slightly without rupturing) |
| Best Application | Mainlines, high-traffic areas, warm climates | Lateral lines, rocky soil, freezing climates |
For a hybrid approach that maximizes durability and cost-efficiency, run a rigid Schedule 40 PVC mainline from the backflow preventer to your valve manifolds, then transition to Poly pipe for the lateral lines extending into the lawn zones.
Trenching Specifications and Pipe Laying
Proper trench depth protects your investment from aeration equipment, deep-rooted trees, and seasonal frost heaves. Before breaking ground, call 811 to have local utility lines marked. Hitting a buried fiber-optic or gas line turns a weekend DIY project into a massive financial liability.
- Mainline Trench Depth: 12 to 18 inches. This line is under constant pressure and must be buried below the local frost line to prevent catastrophic winter bursts.
- Lateral Line Trench Depth: 8 to 12 inches. These lines are only pressurized when the zone valve is open, allowing for slightly shallower trenches.
- Equipment: Rent a walk-behind Ditch Witch trencher (typically $85 to $110 per day at major equipment rental yards). For tight spaces near garden beds, use a manual trenching shovel.
When solvent-welding PVC joints, cleanliness is non-negotiable. Apply Oatey Purple Primer to both the pipe exterior and fitting interior to soften the plastic, followed immediately by Oatey Medium-Bod Clear PVC cement. Push the pipe into the fitting with a slight quarter-turn to distribute the cement, and hold it firm for 30 seconds. Failing to hold the joint allows the hydraulic pressure of the curing cement to push the pipe back out, creating a slow leak underground.
Sprinkler Head Placement and Head-to-Head Coverage
The most common failure in grass sprinklers installation is spacing heads based on their maximum throw radius rather than utilizing head-to-head coverage. Wind, evaporation, and pressure fluctuations reduce the effective radius of any sprinkler head by 15% to 20%.
The Head-to-Head Rule: The water thrown from one sprinkler head must physically reach the base of the adjacent sprinkler head. If a rotor is rated for a 30-foot throw, the heads must be spaced exactly 30 feet apart, not 45 or 50 feet.
Never mix rotor heads and spray heads on the same zone valve. Rotors (like the Hunter PGP-Ultra) apply water at roughly 0.4 to 0.6 inches per hour, while standard spray heads (like the Rain Bird 1800 series) apply water at 1.5 to 1.8 inches per hour. Mixing them results in either flooded spray zones or drought-stressed rotor zones. If you have narrow strips between a sidewalk and the street, use Matched Precipitation Rate (MPR) nozzles, which equalize the output across quarter, half, and full-circle patterns.
Smart Controller Integration and EPA WaterSense Standards
Modernizing your system with a Wi-Fi-enabled smart controller is the highest ROI upgrade in any irrigation setup. According to the EPA WaterSense program, weather-based smart controllers reduce outdoor water use by up to 15% compared to traditional clock timers by automatically adjusting run times based on local evapotranspiration (ET) data.
For a standard 8-zone residential system, the Rachio 3 Smart Sprinkler Controller (retailing around $229) offers excellent user-friendly integration and local weather skips. For larger properties requiring flow monitoring, the Hunter Hydrawise PRO-HC controller paired with a Hunter HC Flow Meter is the professional standard. The flow meter tracks exact gallon usage per zone; if a pipe breaks or a head is sheared off by a lawnmower, the controller detects the abnormal flow spike and automatically shuts off the master valve, preventing thousands of gallons of wasted water and landscape erosion.
Winterization Warning: The Blow-Out Protocol
If you live in a climate where temperatures drop below 32°F, your underground grass sprinklers installation must include a winterization blow-out port. You cannot rely on manual drain valves to empty the lateral lines due to soil settling and pipe sagging. In late autumn, connect an air compressor capable of delivering 25 to 50 Cubic Feet per Minute (CFM) at a maximum of 50 PSI to the blow-out port. Never exceed 80 PSI with compressed air, as the friction heat can melt poly pipe and shatter PVC fittings.
Frequently Asked Edge Cases
Can I connect the sprinkler system directly to my well pump?
Yes, but you must install a dedicated irrigation relay and a pressure tank bypass. Drawing 12 GPM directly from a standard residential well pump will cause rapid short-cycling, burning out the pump motor within a single season. Consult a well specialist to ensure your pump's sustained GPM output matches your largest irrigation zone.
What is the purpose of a master valve?
A master valve is installed on the mainline immediately after the backflow preventer. It remains closed until the controller signals a zone to run. This protects your entire property from flooding if a downstream lateral pipe develops a leak, as the master valve cuts off the water supply to the entire sprinkler network when the system is idle.
For comprehensive regional design parameters, including local precipitation rates and soil intake rates, refer to the Texas A&M AgriLife Extension landscape irrigation resources, which provide excellent baseline data applicable to various soil types across the country.

