
Lawn Care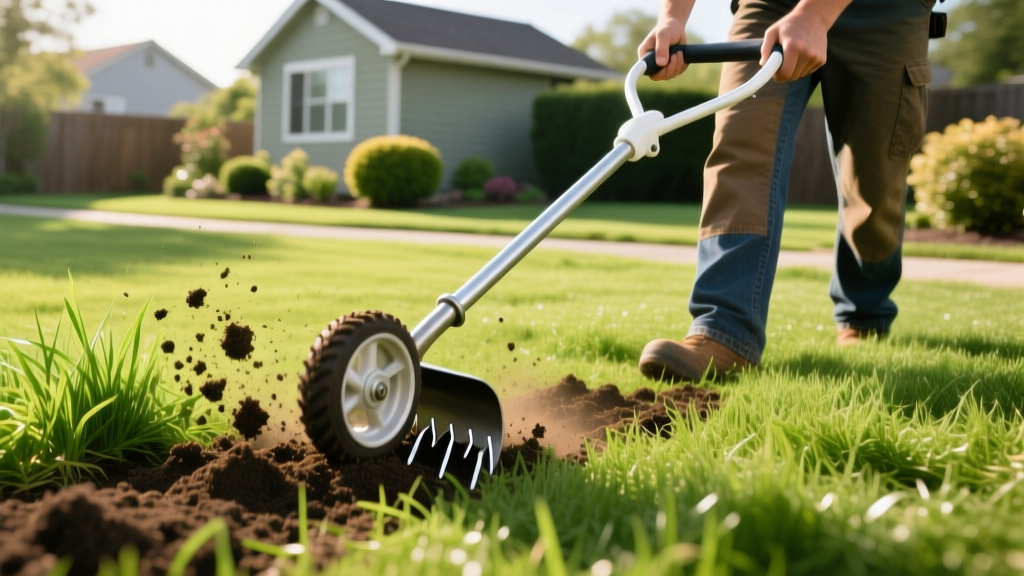
How to Safely Use a Cultivator on Grass for Overseeding
Applying a standard garden cultivator to an existing lawn is one of the most common and destructive mistakes in DIY turf management. While deep tilling is appropriate for breaking new ground or completely killing off an old lawn for total renovation, using a deep-tine cultivator on grass you intend to keep will sever the root zone, destroy rhizomes, and invite massive weed infiltration. However, when properly calibrated and utilized as a shallow scarifier or power rake, a cultivator is an elite tool for preparing an existing lawn for overseeding, breaking up thatch, and creating the vital seed-to-soil contact required for high germination rates.
The Terminology Trap: Tiller vs. Lawn Cultivator
Before starting any maintenance procedure, it is critical to distinguish between the tools in your shed or at the rental yard. The machinery dictates the outcome of your lawn renovation.
| Tool Type | Tine Design & Depth | Primary Use Case | Impact on Existing Grass |
|---|---|---|---|
| Standard Rear-Tine Tiller | Heavy curved tines, 6–10 inches deep | New garden beds, total lawn kill-and-replace | Destroys existing turf; rips out root systems entirely. |
| Lawn Cultivator / Power Rake | Spring steel flails or straight tines, 1/8–1/4 inch deep | Thatch removal, shallow soil scoring for overseeding | Preserves established crowns while opening soil for seed. |
| Slit-Seeder | Rotary blades that cut 1/2 inch grooves and drop seed | Direct seeding into existing turf without prior aeration | Highly effective but requires precise calibration to avoid scalping. |
For the purposes of this guide, we are focusing on the lawn cultivator (often rented as a power rake or dethatcher with rigid tines). According to the University of Minnesota Extension, achieving direct seed-to-soil contact is the single most important factor in overseeding success, and shallow cultivation is a premier method to achieve this without chemical herbicides.
Step-by-Step: Calibrating and Running a Cultivator on Grass
Step 1: Mowing and the "Screwdriver" Moisture Test
Do not run a cultivator on overgrown or soggy grass. Two days before your planned cultivation, mow the lawn significantly shorter than your normal maintenance height. For cool-season grasses like Tall Fescue or Kentucky Bluegrass, drop the mower deck to 1.5 inches. For warm-season grasses like Bermuda or Zoysia, drop it to 1 inch. This prevents the cultivator tines from wrapping in long grass blades and clogging the machine.
Next, test your soil moisture. Drive a standard 6-inch flathead screwdriver into the soil. If it slides in with moderate resistance and comes out with slightly damp soil clinging to the shaft, your moisture level is perfect. If it requires your full body weight to penetrate, the soil is too hard and the cultivator will simply bounce off the surface. If it slides in effortlessly and pulls up mud, the soil is too wet; running a cultivator on mud will cause severe sub-surface compaction and tear the turf into muddy clumps.
Step 2: Depth Calibration (The 1/4-Inch Rule)
This is the most critical step in the procedure. Place the cultivator on a flat, hard surface like a concrete driveway. Lower the tines until they just barely scrape the concrete, then adjust the depth gauge or wheel height so the tines will penetrate exactly 1/8 to 1/4 of an inch below the soil surface when on the lawn.
⚠️ WARNING: The Root Zone Threshold
Most established turfgrass crowns and primary lateral roots sit in the top 1/2 inch of soil. Setting your cultivator deeper than 1/4 inch will rip out the living crowns of your existing grass, creating bare patches that will be immediately colonized by crabgrass and spurge. The goal is to score the soil surface and fracture the thatch layer, not to aerate or till the deep subsoil.
Most established turfgrass crowns and primary lateral roots sit in the top 1/2 inch of soil. Setting your cultivator deeper than 1/4 inch will rip out the living crowns of your existing grass, creating bare patches that will be immediately colonized by crabgrass and spurge. The goal is to score the soil surface and fracture the thatch layer, not to aerate or till the deep subsoil.
Step 3: The Cultivation Pass
Run the cultivator across the lawn in straight, overlapping lines, similar to mowing patterns. Keep your walking pace steady at about 2 to 3 miles per hour. Moving too fast will result in shallow, ineffective scratching; moving too slow will cause the tines to chew up and scalp the existing grass.
For lawns with a heavy thatch layer (exceeding 1/2 inch thick), make a second pass in a diagonal direction to the first pass. This cross-hatching technique effectively pulls up dead organic matter and opens up multidirectional micro-trenches for your new seed to settle into.
Step 4: Debris Extraction and Seeding
A thorough cultivation pass will pull up a surprising amount of dead thatch, stolons, and debris. You must remove this material before seeding. Use a stiff-tined leaf rake or a lawn vacuum to extract the debris. Leaving the pulled thatch on the lawn will create a physical barrier that prevents new seed from reaching the soil trenches you just created.
Once the lawn is clean, apply your seed. Use a broadcast spreader for even distribution. The Purdue University Turfgrass Science program recommends specific seeding rates based on species: apply 5 to 6 lbs per 1,000 square feet for Tall Fescue, and 1.5 to 2 lbs per 1,000 square feet for Kentucky Bluegrass. The shallow grooves left by the cultivator will protect the seed from wind and bird predation while maintaining the moisture necessary for germination.
Equipment Specifications and Pricing
Selecting the right equipment prevents turf damage and reduces physical fatigue. Here is a breakdown of standard options for residential lawn cultivation:
- Rental Power Rakes (e.g., Billy Goat PR900H or Classen PR-18H): These are heavy-duty, walk-behind machines with adjustable flail blades. They are ideal for large lawns (over 5,000 sq ft) and severe thatch buildup. Expect to pay between $75 and $110 per day at local equipment rental yards.
- Electric Lawn Cultivators/Dethatchers (e.g., Sun Joe TJ604E or Greenworks 14-Amp): Best for small to medium suburban lawns (under 4,000 sq ft). These use spring-tine cylinders and are much lighter, though they require multiple passes for heavy thatch. Retail pricing ranges from $160 to $220.
- Manual Thatching Rakes: Featuring curved, sharp steel blades designed to slice into the soil. Only viable for spot-treating bare patches or lawns under 1,000 sq ft. Cost: $40 to $60.
Post-Cultivation Maintenance Protocol
The cultivation and seeding process is only half the battle. The newly exposed soil and germinating seed require a strict 21-day maintenance protocol to ensure survival.
- Apply Starter Fertilizer: Immediately after seeding, apply a high-phosphorus starter fertilizer (such as a 10-18-10 or 24-25-4 NPK ratio). Phosphorus is critical for rapid root development in newly germinated seedlings. Apply at a rate of 1 lb of nitrogen per 1,000 sq ft.
- Implement Micro-Watering: Do not water deeply. The goal is to keep the top 1/4 inch of soil consistently damp. Set your irrigation system or sprinklers to run 2 to 3 times daily for 5 to 10 minutes per zone. If the seed dries out for even a few hours during the first 14 days, the germination process will abort and the seed will die.
- Delay the First Mow: Wait until the new grass reaches 3 to 3.5 inches in height before mowing. Ensure your mower blade is freshly sharpened; a dull blade will rip the shallow-rooted seedlings completely out of the freshly cultivated soil.
- Hold Pre-Emergent Herbicides: Do not apply pre-emergent crabgrass preventers (like Prodiamine or Dithiopyr) for at least 60 days after cultivation and seeding, as these chemicals will inhibit the germination of your new turfgrass seed just as effectively as they stop weeds.
By treating the cultivator as a precision soil-scoring tool rather than a deep-tilling implement, you bridge the gap between a thin, thatch-choked lawn and a dense, disease-resistant turf canopy. Proper depth calibration and strict post-care watering will yield germination rates exceeding 85% within the first three weeks.

