
Lawn Care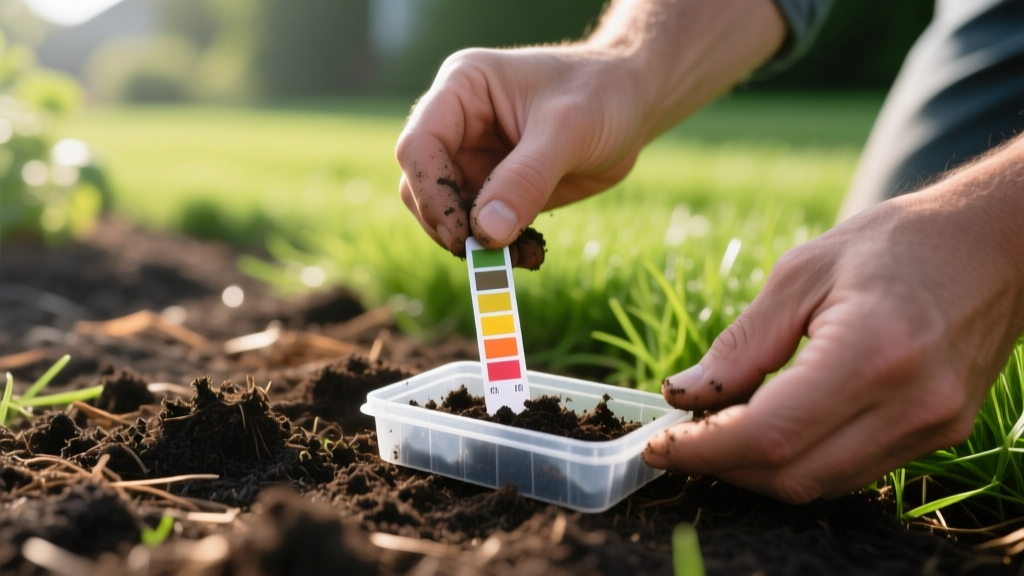
Using pH Strips to Test Soil for Lawn and Mulch Beds
Why Soil pH Dictates Mulch and Amendment Success
Before dropping hundreds of dollars on organic compost, pelletized lime, or premium hardwood mulch, verifying your soil's baseline chemistry is non-negotiable. Soil pH directly controls the Cation Exchange Capacity (CEC)—the soil's ability to hold and release nutrients. When pH drops below 5.5 or spikes above 7.5, essential macronutrients like phosphorus and potassium bind to aluminum or calcium, becoming completely unavailable to turfgrass roots.
Furthermore, soil pH governs microbial activity. The bacteria responsible for breaking down organic mulch and thatch thrive in a slightly acidic to neutral range (6.0 to 7.0). According to the University of Minnesota Extension, soils with a pH below 5.5 shift toward fungal dominance, which drastically slows mulch decomposition and leads to nitrogen tie-up, starving your lawn in the process. Using pH strips to test soil provides a rapid, cost-effective baseline to ensure your amendments actually work.
Step-by-Step Protocol: Using pH Strips to Test Soil
Colorimetric pH strips (such as the Luster Leaf 1612 Rapitest or generic universal indicator paper) rely on chemical dyes that change color when exposed to hydrogen ions. To get a reliable reading, you must control the variables in your testing environment.
- Core Sampling: Use a soil probe or trowel to extract cores from 4 inches deep. Take 5 to 7 samples in a zig-zag pattern across your lawn or mulch bed. Avoid the top 1 inch of surface mulch or thatch, as decaying organic matter skews the reading artificially acidic.
- Homogenize the Sample: Mix the cores in a clean plastic bucket. Remove rocks, roots, and earthworms.
- Create the Slurry: Place 2 tablespoons of the mixed soil into a clean glass jar. Add 4 tablespoons of distilled water (a 1:2 soil-to-water ratio).
- Agitate and Settle: Stir vigorously with a plastic or wooden spoon (avoid metal, which can react with acidic soils). Let the mixture settle for exactly 15 minutes until the soil particles sink and a relatively clear liquid forms at the top.
- Dip and Read: Dip the pH strip into the liquid for 2 seconds. Remove it and wait 15 seconds before comparing the color to the manufacturer's chart. Do not wait longer than 30 seconds, as the dye will oxidize and darken, yielding a false alkaline reading.
⚠️ Warning: The Tap Water Trap
Never use tap water to create your soil slurry. Municipal water is often treated with lime or contains high dissolved calcium carbonate, which can skew your pH reading upward by 0.5 to 1.0 points. Always use distilled water (available for ~$1.50 a gallon at grocery stores) to ensure the liquid's baseline pH is a neutral 7.0 before mixing.
Never use tap water to create your soil slurry. Municipal water is often treated with lime or contains high dissolved calcium carbonate, which can skew your pH reading upward by 0.5 to 1.0 points. Always use distilled water (available for ~$1.50 a gallon at grocery stores) to ensure the liquid's baseline pH is a neutral 7.0 before mixing.
Accuracy Matrix: pH Strips vs. Digital Meters vs. Lab Tests
While using pH strips to test soil is excellent for quick seasonal checks, it is important to understand the limitations of colorimetric testing compared to digital probes and professional laboratory analysis. The Michigan State University Extension recommends lab testing for precise amendment calculations, but strips serve as a vital first-line diagnostic tool.
| Testing Method | Estimated Cost | Accuracy Range | Best Use Case |
|---|---|---|---|
| Colorimetric pH Strips | $0.15 per test | ± 0.5 pH | Quick spring/fall screening; identifying extreme acidity/alkalinity |
| Digital Probe (e.g., Milwaukee MW102) | $40 - $60 | ± 0.1 pH | Frequent monitoring of hydroponics, compost teas, or precise garden beds |
| University Extension Lab | $20 - $35 | ± 0.01 pH | Pre-renovation baseline; calculating exact lime/sulfur tonnage for large lawns |
Interpreting Strip Colors for Lawn and Mulch Amendments
Once you have matched your strip to the color chart, you must translate that data into actionable amendment strategies. The color indicates your hydrogen ion concentration, dictating which chemical compounds you need to introduce to reach the optimal turfgrass range of 6.2 to 6.8.
If the Strip Turns Red/Orange (pH 4.5 - 5.5): Highly Acidic
Your soil is severely locking out phosphorus and calcium. This is common in the Pacific Northwest and areas with heavy pine needle mulch.
- Action: Apply pelletized calcitic lime (calcium carbonate). If your soil also lacks magnesium, use dolomitic lime.
- Rate: Apply 50 lbs of pelletized lime per 1,000 sq. ft. to raise the pH by approximately 1.0 point in heavy clay soils, or 30 lbs per 1,000 sq. ft. in sandy soils.
- Timing: Apply in the fall. Lime takes 3 to 6 months to fully react with the soil profile.
If the Strip Turns Yellow/Green (pH 6.0 - 6.8): Optimal Range
Your soil chemistry is primed for maximum nutrient uptake and rapid mulch decomposition.
- Action: No pH amendments are required. Focus on nitrogen, potassium, and organic matter top-dressing.
If the Strip Turns Dark Blue/Purple (pH 7.5 - 8.5): Alkaline
Iron chlorosis is likely occurring, turning your lawn yellow while the veins remain green. Micronutrients are locked up by excess calcium.
- Action: Apply 90% pure elemental sulfur or iron sulfate. Avoid using aluminum sulfate, which can lead to heavy metal toxicity in the root zone.
- Rate: Apply 15 lbs of elemental sulfur per 1,000 sq. ft. to lower the pH by 1.0 point in clay soils.
- Timing: Apply in early spring. Soil bacteria must oxidize the sulfur into sulfuric acid to lower the pH, a process that requires warm, moist soil conditions.
💡 Pro-Tip: Mulch Selection as a Passive Amendment
You can use mulch to gently buffer soil pH over time. If your strip shows a slightly alkaline reading (pH 7.2 - 7.5), switch to acidic mulches like pine bark or aged oak leaves. Conversely, if your soil is slightly acidic (pH 5.8), use composted hardwood mulch, which naturally buffers soils toward a neutral pH as it breaks down.
You can use mulch to gently buffer soil pH over time. If your strip shows a slightly alkaline reading (pH 7.2 - 7.5), switch to acidic mulches like pine bark or aged oak leaves. Conversely, if your soil is slightly acidic (pH 5.8), use composted hardwood mulch, which naturally buffers soils toward a neutral pH as it breaks down.
Common Mistakes and Troubleshooting
When using pH strips to test soil, environmental and procedural errors can easily invalidate your results. Watch out for these specific failure modes:
- The 'Purple' Anomaly: If your strip immediately turns dark purple or black, your soil may be highly alkaline (pH 8.5+), or your distilled water was contaminated with baking soda or soap residue. Retest with a fresh jar and verified distilled water.
- Testing Wet Mulch: Decaying wood mulch produces tannic and humic acids. If you test the mulch layer directly, you will get a reading of pH 4.0 to 5.0, which does not reflect the mineral soil below where the grass roots live. Always brush aside the mulch and test the mineral soil.
- Ignoring Soil Texture: A pH strip tells you the current acidity, but it does not tell you the soil's buffering capacity. Clay soils resist pH changes much more stubbornly than sandy soils. A strip reading of 5.5 in sand might only require 20 lbs of lime to fix, while the exact same strip reading in heavy clay will require 60 lbs of lime to achieve the same shift.
Final Verification
Using pH strips to test soil is a highly effective, low-cost method for maintaining your lawn's chemical balance and ensuring your mulch breaks down efficiently. By strictly controlling your water source, sampling depth, and reading times, you can confidently make amendment decisions that keep your turf thick and your landscape beds biologically active.

