
Lawn Care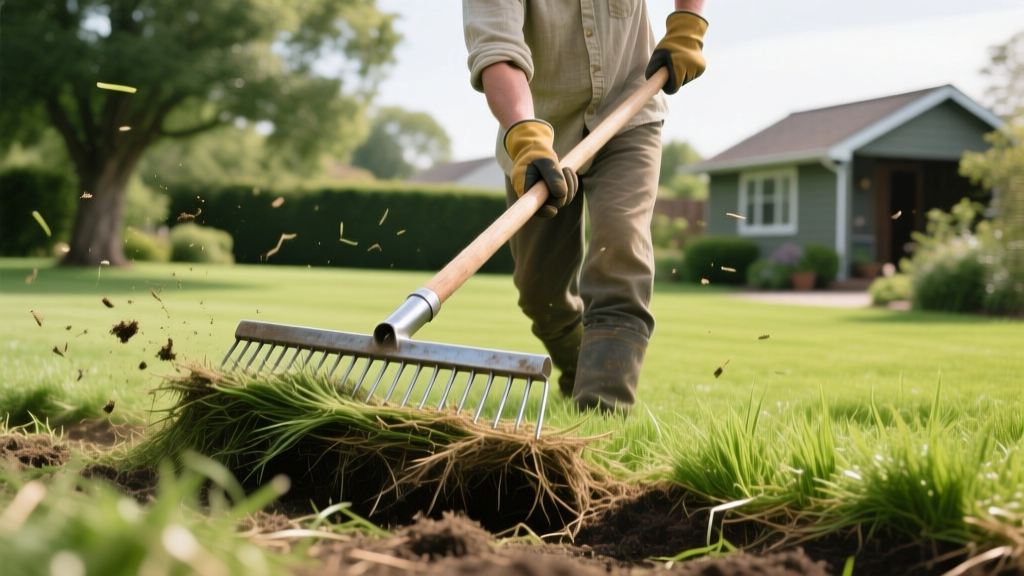
How to Use a Thatcher for Grass: Step-by-Step Dethatching Guide
Diagnosing Thatch: Do You Actually Need a Thatcher?
Thatch is a tightly woven layer of living and dead organic matter—primarily stems, crowns, and roots—that accumulates between the green vegetation and the soil surface. While a thin layer (under 0.25 inches) provides insulation and moisture retention, excessive thatch blocks water infiltration, harbors fungal pathogens, and prevents fertilizer from reaching the root zone. According to University of Minnesota Extension, cool-season grasses like Kentucky Bluegrass and Perennial Ryegrass require dethatching when the layer exceeds 0.5 inches, whereas warm-season grasses like Bermuda and Zoysia should be treated at 0.25 to 0.5 inches.
The Shovel Plug Test: Before renting or buying a thatcher for grass, cut a 3-inch deep, wedge-shaped plug from your lawn using a sharp spade. Measure the brown, spongy layer above the dark topsoil. If it exceeds the thresholds mentioned above, mechanical dethatching is required.
Choosing the Right Thatcher for Grass
Selecting the correct equipment depends entirely on your lawn's square footage, grass species, and the severity of the thatch buildup. Using an overly aggressive machine on a delicate lawn can destroy the crown tissue, while using a manual rake on a 5,000-square-foot yard will result in severe physical fatigue and inconsistent results.
| Equipment Type | Specific Model / Brand | Estimated Cost (2026) | Best Application |
|---|---|---|---|
| Manual Thatching Rake | Fiskars 15-Inch Steel Tine | $45 - $60 | Lawns under 1,000 sq ft; light thatch. |
| Electric Dethatcher | Sun Joe AJ801E (15-inch) | $140 - $170 | Lawns 1,000 - 4,000 sq ft; moderate thatch. |
| Gas Power Rake (Rental) | Billy Goat PR900HD | $75 - $95 / day | Lawns over 4,000 sq ft; severe compaction/thatch. |
Pre-Dethatching Preparation Checklist
Proper preparation ensures the thatcher for grass penetrates effectively without tearing out healthy root systems.
- Mow Low: Lower your mower deck to 1.5 inches. Bag the clippings. Shorter grass allows the thatcher tines to reach the soil surface without tangling in long foliage.
- Moisture Calibration: Water the lawn deeply 48 hours before dethatching. The soil should be moist but not saturated. Dethatching bone-dry soil will result in shallow penetration and dust clouds; dethatching mud will rip out entire grass plants by the roots.
- Mark Obstacles: Use high-visibility survey flags to mark shallow irrigation heads, valve boxes, and invisible dog fence lines. A power rake will obliterate plastic sprinkler heads on impact.
Step-by-Step Thatching Procedure
Operating a motorized thatcher requires a strategic, overlapping pattern to ensure uniform thatch extraction. Follow this precise operational flow.
Step 1: Calibrate Blade Depth on Hardscape
Never guess the blade depth on the grass. Move the thatcher to a flat concrete driveway or sidewalk. Lower the tines until they just barely scratch the concrete surface. This is your 'zero' baseline. For cool-season grasses (Fescue, Bluegrass), adjust the depth dial so the tines penetrate approximately 1/4 inch below the soil surface. For warm-season grasses, set the tines to merely graze the soil line.
Step 2: The First Pass (Parallel)
Start along a straight edge (like a driveway or fence line). Engage the tines and walk at a steady, moderate pace (about 2 to 3 mph). Walking too slowly will scalp the lawn; walking too fast will leave gaps in thatch extraction. Overlap each pass by 2 inches to prevent missed strips.
Step 3: The Cross-Hatch Pass (Perpendicular)
Once the entire lawn is covered in one direction, make a second set of passes perpendicular to the first (creating a cross-hatch or checkerboard pattern). This is critical for lifting matted, horizontal thatch layers that a single-direction pass will simply flatten back down.
Warning: Debris Volume. A healthy 5,000-square-foot lawn can yield 10 to 15 cubic yards of thatch debris after a cross-hatch pass. Have heavy-duty contractor bags or a rented lawn sweeper (e.g., Agri-Fab 45-0492) ready. Leaving the debris on the lawn will smother the remaining grass and invite Pythium blight.
Step 4: Debris Extraction and Surface Leveling
Rake the pulled thatch into windrows and remove it entirely. If you plan to overseed immediately, leave a very thin, scattered layer of fine debris to act as a mulch for the new seeds, but ensure the soil is visibly exposed in at least 70% of the lawn area.
Post-Dethatching Recovery Protocol
Dethatching is highly stressful on turf. The recovery phase dictates whether your lawn will thrive or succumb to weed invasion. The UMass Amherst Extension emphasizes that dethatching must be paired with aggressive cultural practices to promote rapid lateral growth.
- Day 1 (Overseeding & Fertilization): Apply a high-phosphorus starter fertilizer (such as Scotts Turf Builder Starter Food 24-25-4) at a rate of 3.5 lbs per 1,000 sq ft. Broadcast compatible grass seed directly into the freshly opened soil grooves.
- Weeks 1-2 (Hydration): Water lightly 2 to 3 times daily for 10 minutes to keep the top inch of soil consistently moist. Do not allow the seedbed to dry out, but avoid puddling which will wash seeds into low spots.
- Week 4 (First Post-Dethatch Mow): Wait until the new grass reaches 3 inches. Mow down to 2.5 inches using sharp mulching blades to avoid tearing the young, vulnerable tillers.
Critical Edge Cases and Warm-Season Warnings
While a thatcher for grass is highly effective on bunch-type and rhizomatous cool-season grasses, it can be devastating to certain warm-season species.
St. Augustine and Zoysia Alert: These grasses rely heavily on above-ground stolons and shallow rhizomes for lateral spread. An aggressive power rake with rigid flail tines will rip these stolons entirely out of the ground, leaving bare dirt patches that will take months to recover. For St. Augustine, use a manual thatching rake with flexible bamboo tines, or rent a verticutter (vertical mower) with solid steel blades spaced 2 inches apart to slice the thatch without entangling and tearing the stolons.
By accurately diagnosing your thatch layer, calibrating your equipment to the specific grass species, and executing a rigorous post-dethatching recovery plan, you will restore vital air and water exchange to your soil profile, resulting in a denser, more drought-resilient lawn.

