
Lawn Care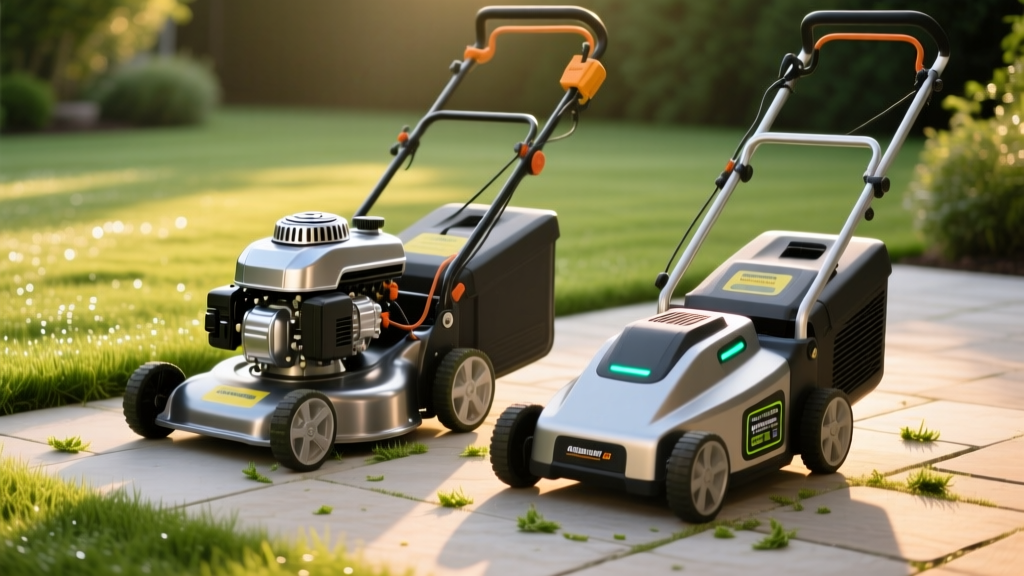
Winterizing a Push Mower: Gas vs. Battery Storage Guide
Leaving a push mower unprepared for a four-to-six-month winter dormancy is the leading cause of spring starting failures. For gas-powered models, ethanol-blended fuels absorb moisture and destroy carburetor internals through phase separation. For modern cordless models, improper lithium-ion cell storage leads to irreversible capacity loss or complete battery management system (BMS) lockouts. Proper winterization requires distinct, chemistry-specific protocols depending on your mower's power source.
Equipment Decision Matrix: What Actually Needs Winterizing?
Not all push mowers require the same level of intervention. Use this matrix to identify the critical failure points for your specific equipment type before beginning the storage process.
| Mower Type | Primary Winter Threat | Critical Winterization Step | Estimated Time |
|---|---|---|---|
| Gas Push Mower (Carbureted) | Ethanol phase separation & varnish buildup | Fuel stabilization or complete carburetor drain | 45 minutes |
| Gas Push Mower (EFI) | Fuel line corrosion & battery drain | Non-ethanol fuel top-off & battery disconnect | 30 minutes |
| Cordless Lithium-Ion (40V-80V) | Deep discharge bricking & calendar aging | Charge to 50% SOC & climate-controlled storage | 15 minutes |
| Corded Electric | Wire insulation cracking & switch oxidation | Coil without kinks & apply dielectric grease | 10 minutes |
Step-by-Step Gas Push Mower Winterization
The majority of gas push mower engine failures in May are directly traceable to fuel system neglect in November. Modern E10 (10% ethanol) gasoline is highly hydrophilic, meaning it actively pulls water from the ambient air inside your fuel tank.
1. The Fuel System Protocol
You have two acceptable paths for small engine fuel storage: stabilization or complete evacuation. Do not simply leave a half-tank of month-old gas in the mower.
- The Stabilization Method (Recommended): Fill the tank to 95% capacity with fresh, ethanol-free gasoline (E0). Leaving minimal air space prevents condensation. Add a fuel stabilizer (e.g., STA-BIL 22207) at the exact ratio specified on the bottle—typically 1 ounce per 2.5 gallons. Run the engine for 10 minutes to ensure the treated fuel cycles entirely through the fuel lines and carburetor jets.
- The Evacuation Method: If you cannot source ethanol-free fuel, run the tank completely dry. Use a hand siphon to remove the bulk liquid, then restart the engine and let it idle until it stalls. Finally, open the carburetor float bowl drain screw (usually a 10mm or flathead brass screw at the base of the carb) to release the final 2 ounces of trapped fuel.
⚠️ Warning: Ethanol Phase Separation Timeline
Standard E10 fuel begins phase separation in as little as 30 days in high-humidity environments. Once the water-ethanol mixture sinks to the bottom of the tank and enters the carburetor, it will cause severe internal corrosion that requires a $45-$65 carburetor replacement. Never store a gas mower with untreated E10 fuel.
Standard E10 fuel begins phase separation in as little as 30 days in high-humidity environments. Once the water-ethanol mixture sinks to the bottom of the tank and enters the carburetor, it will cause severe internal corrosion that requires a $45-$65 carburetor replacement. Never store a gas mower with untreated E10 fuel.
2. Engine Fogging and Oil Cycling
After addressing the fuel, protect the cylinder walls. Remove the spark plug (common sizes include NGK BPR5ES or Champion RC12YC). Spray 1 to 2 tablespoons of aerosol fogging oil (such as CRC Engine Stor) directly into the spark plug hole. Pull the starter cord slowly three times to coat the piston rings and cylinder walls, preventing rust pitting over the winter. Reinstall the spark plug, but wait until spring to reconnect the spark plug wire to prevent accidental starting during storage.
Change the engine oil while the block is still warm from your 10-minute stabilization run. Most push mowers require 15 to 18 ounces of SAE 30 or 10W-30 small engine oil. Draining warm oil ensures that suspended metallic particulates and acidic combustion byproducts are removed rather than settling into the crankcase.
Lithium-Ion Battery Push Mower Storage Protocol
Cordless push mowers from brands like EGO, Toro, and Greenworks rely on high-density lithium-ion cells. The Battery Management System (BMS) will permanently disable the battery if the voltage drops below a critical threshold during storage, turning a $250 battery into an unchargeable brick.
State of Charge (SOC) Targets
Never store a lithium-ion battery at 100% capacity; high voltage accelerates calendar aging and degrades the cathode. Never store it at 0%, as natural self-discharge will push it below the BMS safety cutoff. Target a 40% to 60% State of Charge.
| Battery System Max Voltage | Nominal Voltage | Ideal Winter Storage Voltage | Approximate Charge Level Indicator |
|---|---|---|---|
| 40V Max (e.g., Ryobi, Craftsman) | 36V | 37.5V - 38.5V | 2 out of 4 LED bars |
| 56V Max (e.g., EGO Power+) | 52V | 53.0V - 55.0V | 3 out of 5 LED bars |
| 60V Max (e.g., Toro Flex-Force) | 54V | 55.0V - 57.0V | 2 or 3 out of 4 LED bars |
| 80V Max (e.g., Greenworks Pro) | 72V | 74.0V - 76.0V | 2 out of 4 LED bars |
Thermal Management and Terminal Care
Lithium-ion batteries must be stored in a climate-controlled environment. According to the Outdoor Power Equipment Institute (OPEI), batteries should never be exposed to freezing temperatures, which can cause the electrolyte to crystallize and tear the internal separator. Store batteries indoors between 50°F and 70°F. Wipe the battery contacts with a dry microfiber cloth and apply a micro-thin layer of dielectric grease to the terminals to prevent copper oxidation.
Undercarriage and Blade Preservation
Regardless of the power source, the mower deck requires physical winterization to prevent structural degradation.
- Deck Scraping: Tilt the mower on its side (always tilt gas mowers with the carburetor facing UP to prevent oil from soaking the air filter). Use a rigid putty knife to scrape away compacted, damp clippings. This organic matter holds moisture against the steel deck, accelerating rust.
- Blade Maintenance: Remove the blade using a socket wrench and a block of wood to secure it. Sharpen the cutting edge maintaining the factory 30-degree bevel. Crucially, balance the blade on a nail through the center hole. An unbalanced blade will destroy the engine crankshaft bearings or mower spindle over time.
- Corrosion Inhibition: Coat the underside of the deck and the sharpened blade with a lanolin-based corrosion inhibitor like Fluid Film, or a dry PTFE lubricant. Avoid standard WD-40, which is a solvent and will evaporate within weeks, leaving the metal unprotected.
Troubleshooting Common Winterization Mistakes
If you skipped steps or stored the mower improperly, use this diagnostic matrix to address issues before attempting a spring start.
| Spring Symptom | Root Cause from Winter Storage | Required Fix |
|---|---|---|
| Engine cranks but won't catch | Varnished carburetor main jet from stale fuel | Remove carb, soak in chem-dip, or replace carburetor ($25-$45 part) |
| Engine runs rough and surges | Water in fuel bowl due to phase separation | Drain float bowl, flush tank, refill with fresh E0 fuel |
| Battery shows solid green but won't engage | BMS thermal lockout from cold-shed storage | Bring battery to room temp (70°F) for 12 hours before charging |
| Excessive vibration during mowing | Blade sharpened unevenly, causing imbalance | Re-sharpen to equal weight distribution or replace blade |
Final Pre-Storage Checklist
Before rolling the mower into its final winter position, verify the following university extension-recommended baseline conditions:
- [ ] Fuel tank is either 95% full with stabilizer or 100% empty and carb drained.
- [ ] Spark plug wire is disconnected and secured away from the plug terminal.
- [ ] Oil is fresh, at the correct dipstick level, and free of metallic grit.
- [ ] Air filter is removed, cleaned/replaced, and the airbox is free of debris.
- [ ] Battery is at 50% charge, terminals greased, and stored indoors.
- [ ] Mower deck is scraped clean and coated with a rust-inhibiting protectant.
- [ ] Tires are inflated to 20-25 PSI to prevent flat-spotting on the rubber.
By executing these precise, material-specific storage protocols, you eliminate the primary mechanical and chemical failure points that plague push mowers after long dormancy periods, ensuring reliable, one-pull starts when the growing season returns.

