
Lawn Care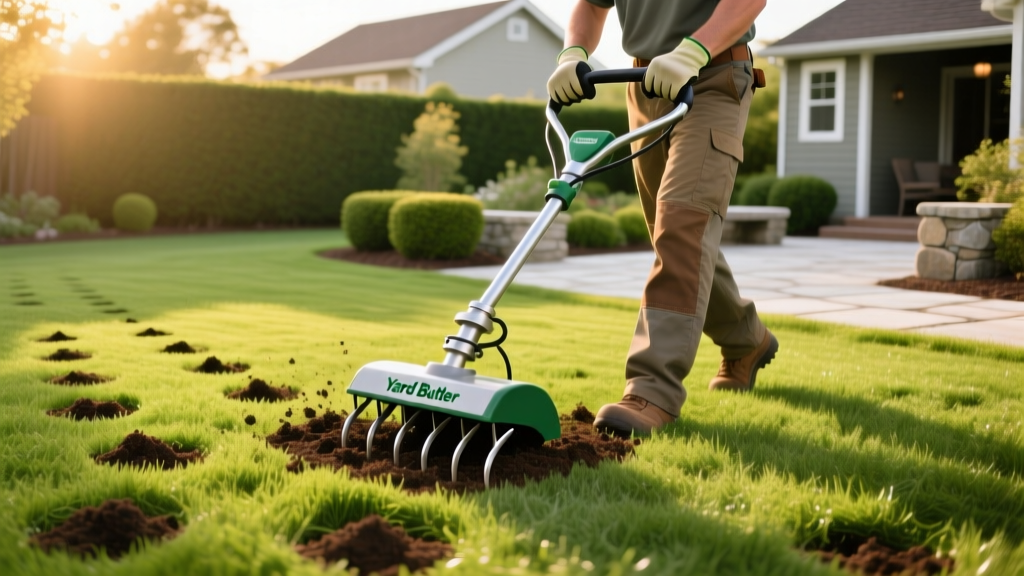
Using the Yard Butler Core Aerator: Step-by-Step Soil Relief Guide
Soil compaction is the silent killer of turfgrass health. When soil bulk density exceeds 1.4 g/cm³, oxygen diffusion drops dramatically, choking root systems and preventing water infiltration. While renting a gas-powered walk-behind aerator costs $70 to $90 per day and risks damaging sprinkler lines, the Yard Butler core aerator offers a precise, zero-emission alternative for lawns under 5,000 square feet. This guide details the exact biomechanics, soil preparation metrics, and step-by-step procedures required to maximize the effectiveness of the Yard Butler manual coring tools.
The Mechanics of Manual Core Aeration
Unlike spike aerators—which merely push soil outward and exacerbate lateral compaction in heavy clay—the Yard Butler core aerator physically removes cylindrical plugs of earth. This creates immediate macropores in the soil profile, allowing atmospheric oxygen to reach the rhizosphere. Yard Butler manufactures two primary models for residential and commercial use. Understanding the metallurgical and dimensional differences is critical before beginning your aeration protocol.
| Feature | Yard Butler ID-4 (Standard) | Yard Butler ID-4C (Commercial) |
|---|---|---|
| Core Extraction Width | 1/2 inch (1.27 cm) | 1/2 inch (1.27 cm) |
| Maximum Penetration Depth | 3.5 inches (8.89 cm) | 3.5 inches (8.89 cm) |
| Steel Gauge & Build | Heavy-duty powder-coated steel | Commercial-grade hardened steel |
| Footplate Surface Area | Standard welded crossbar | Widened anti-slip footplate |
| Average Retail Price (2026) | $38.00 - $42.00 | $45.00 - $49.00 |
| Best Application | Loam, sandy loam, mild clay | Heavy clay, highly compacted zones |
Phase 1: Pre-Aeration Soil Calibration
Attempting to plunge a manual aerator into dry, baked earth will result in bent tines and severe user fatigue. Conversely, aerating saturated mud will destroy soil structure and create a smeared, impermeable layer inside the extraction tubes.
The Screwdriver Moisture Test
According to the University of Minnesota Extension, optimal aeration requires soil moisture levels that allow for clean core extraction without smearing. Perform this test 24 hours before aeration:
- Take a standard 6-inch flathead screwdriver.
- Push it into the soil using only moderate hand pressure.
- Optimal: The blade sinks 3 to 4 inches with steady resistance. Proceed with aeration.
- Too Dry: The blade stops at 1 inch. Apply 0.5 to 0.75 inches of irrigation and wait 24 hours.
- Too Wet: The blade slides in effortlessly and soil sticks to the metal. Wait 48 hours for the water table to recede.
Mowing and Clearance Prep
Lower your mower deck to 1.5 inches. Scalping the lawn slightly ensures the aerator tines reach the soil surface without being deflected by thick thatch layers. Crucially, walk the entire property and flag all shallow sprinkler heads, valve boxes, and invisible dog fence lines with high-visibility paint or pin flags. Manual aerators apply up to 150 PSI of downward force per tine; striking a PVC sprinkler riser will shatter it instantly.
Phase 2: Step-by-Step Aeration Execution
Manual aeration is a full-body biomechanical exercise. Proper form prevents lower back strain and ensures the tines reach their maximum 3.5-inch depth.
The Plunge-and-Rock Technique
- Stance and Grip: Stand directly behind the handle with feet shoulder-width apart. Grip the T-handle with both hands, keeping your arms relatively straight to transfer skeletal weight rather than relying on muscle.
- The Plunge: Place the tines flat against the soil. Step onto the crossbar with your dominant foot, driving your body weight straight down. Do not jump onto the bar, as dynamic shock-loading can snap the welds.
- The Rock (Crucial Step): Once the tines are fully submerged, pull the handle back toward your torso at a 15-degree angle. This snapping motion fractures the soil core at the base of the tine, ensuring it lifts out of the ground rather than staying anchored.
- The Ejection: Lift the tool and push the handle forward slightly. The next plunge will naturally push the previous soil plug out through the side ejection ports.
- Spacing Matrix: Step back 4 inches and repeat. For severely compacted clay soils, perform a double-pass: complete a grid pattern in one direction, then perform a second pass diagonally to create a diamond-pattern extraction matrix.
Pro-Tip: The Dish Soap Lubrication Trick for Heavy Clay
If you are working in dense bentonite or heavy red clay, the soil will stick inside the 1/2 inch tubes, preventing the ejection of cores. Keep a bucket of water mixed with two tablespoons of liquid dish soap nearby. Dip the tines into the soapy water every 5 to 10 plunges. The surfactant reduces the surface tension of the clay, allowing the plugs to slide out of the steel tubes effortlessly.
If you are working in dense bentonite or heavy red clay, the soil will stick inside the 1/2 inch tubes, preventing the ejection of cores. Keep a bucket of water mixed with two tablespoons of liquid dish soap nearby. Dip the tines into the soapy water every 5 to 10 plunges. The surfactant reduces the surface tension of the clay, allowing the plugs to slide out of the steel tubes effortlessly.
Phase 3: Post-Aeration Recovery Protocol
The holes left by the Yard Butler aerator are temporary assets. According to Texas A&M AgriLife Extension, these open macropores must be utilized immediately before they collapse from foot traffic or rain impact.
- Leave the Plugs: Do not rake up the extracted soil cores. They contain vital microorganisms and will break down over 14 to 21 days, top-dressing the lawn and helping decompose the thatch layer.
- Overseeding Window: Drop grass seed immediately after aeration. The 1/2 inch holes act as perfect seed-to-soil contact chambers, protecting the seed from birds and wind while retaining moisture. For cool-season fescue, apply 5 to 8 lbs of seed per 1,000 sq ft.
- Fertilization: Apply a starter fertilizer (e.g., 18-24-12 NPK ratio) within 48 hours. The nutrients will wash directly into the aeration holes, bypassing the thatch layer and reaching the root zone immediately.
Troubleshooting Matrix: Edge Cases & Fixes
Even with perfect soil moisture, manual aeration presents physical obstacles. Use this decision matrix to resolve common operational failures.
| Symptom / Failure Mode | Probable Cause | Corrective Action |
|---|---|---|
| Tines bend or flare outward | Striking subsurface rock or tree roots | Stop immediately. Shift position 6 inches. Do not attempt to hammer the tool through resistance. |
| Cores are solid, muddy cylinders | Soil moisture is too high (smearing) | Halt operations. Wait 48 hours for the soil to dry to field capacity to prevent destroying soil structure. |
| Tool penetrates only 1 inch | Severe subsoil hardpan layer | Pre-water the area deeply (1 inch of water) 48 hours prior to soften the hardpan. Use the ID-4C model for thicker steel walls. |
| Cores refuse to eject from tubes | High clay content causing friction | Utilize the soapy water lubrication dip method. Clear stubborn clogs with a stiff wire coat hanger. |
By adhering to these precise moisture thresholds, biomechanical techniques, and post-aeration timelines, the Yard Butler core aerator transitions from a simple garden tool into a highly effective instrument for reversing soil compaction and revitalizing turfgrass root systems.

