
Pest Control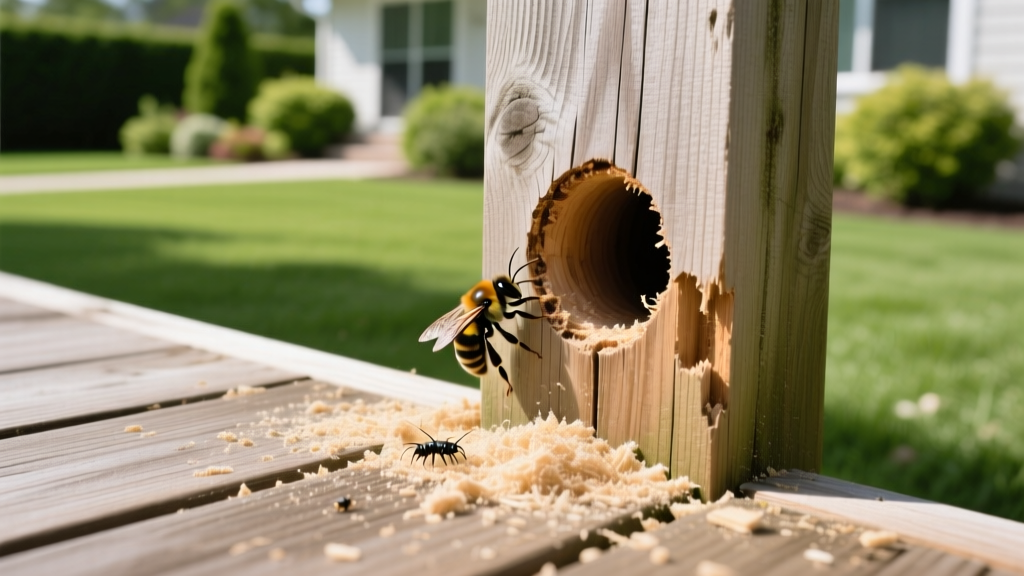
Carpenter Bee Wood Damage: Prevention and Treatment for Yards
Carpenter bees (Xylocopa spp.) are robust, solitary pollinators that play a vital role in garden ecosystems. However, their nesting habits make them a significant structural threat to unpainted or weathered yard wood. Unlike termites, carpenter bees do not consume wood for sustenance; instead, the females use their powerful mandibles to excavate perfectly circular tunnels to lay their eggs. Over successive seasons, these tunnels expand, compromising the structural integrity of deck railings, fascia boards, pergolas, and wooden fencing.
Defending your yard structures requires a targeted approach that addresses both the active nests and the environmental attractants. This guide details the exact identification markers, chemical treatment protocols, and long-term physical barriers required to protect carpenter bee wood in your outdoor spaces.
Identifying Carpenter Bee Wood Damage vs. Other Pests
Accurate identification is the first step in pest management. Homeowners often confuse carpenter bee activity with woodpecker foraging or termite tunneling. Carpenter bees leave highly specific forensic evidence on wood surfaces.
- Entry Holes: Perfectly round, measuring exactly 1/2 inch in diameter.
- Frass (Sawdust): Coarse, yellowish wood shavings piled directly beneath the entry hole.
- Fecal Staining: Yellowish-brown streaks running down the wood surface below the nest.
- Auditory Cues: A distinct, loud buzzing or vibrating sound emanating from within the wood during spring and early summer.
| Pest Indicator | Carpenter Bees | Wood-Destroying Beetles | Woodpeckers |
|---|---|---|---|
| Hole Shape & Size | Perfectly round, 1/2 inch | Irregular, 1/8 to 1/4 inch | Jagged, rectangular, or linear |
| Frass Texture | Coarse, sawdust-like | Fine, powder-like (powderpost) | Wood chips and splinters |
| Wood Preference | Unpainted softwoods (pine, cedar) | Both hardwoods and softwoods | Any wood harboring insect larvae |
The Nesting Cycle: Timing Your Defense Strategy
Understanding the biological timeline of the Eastern carpenter bee (Xylocopa virginica) and Western species (Xylocopa californica) is critical for effective intervention. According to entomological research from the University of Kentucky, treating nests at the wrong time of year results in poor efficacy and recurring infestations.
Spring Emergence (April - May)
Adults emerge from overwintering tunnels. Males establish territories and mate, while females begin scouting for suitable wood. Action: Apply preventive polyurethane coatings or paint before females begin boring.
Active Excavation and Brood Rearing (June - August)
Females bore primary tunnels (often 6-10 inches deep) and create lateral brood chambers. Action: This is the optimal window for applying insecticidal dusts directly into active galleries.
Overwintering (September - March)
New generation adults retreat into existing tunnels to survive the winter. Action: Seal and plug all treated holes to prevent overwintering and deter woodpeckers from tearing the wood apart to reach the bees.
Step-by-Step Treatment for Active Wood Tunnels
Liquid sprays are largely ineffective for carpenter bees because they do not penetrate deeply enough into the winding galleries and degrade quickly under UV exposure. Insecticidal dusts are the industry standard for eradicating active nests.
⚠️ Safety Warning: Male vs. Female Bees
Male carpenter bees are highly territorial and will aggressively hover and dive-bomb intruders near their nests. However, males lack stingers and are completely harmless. Only females possess stingers, and they are generally docile unless physically handled or trapped. Treat nests at dusk or dawn when female bees are inactive inside the tunnels to minimize stinging risks.
- Select the Right Dust: Use a desiccant or synthetic pyrethroid dust labeled for carpenter bees. Top professional choices include Delta Dust (0.05% deltamethrin) or Tempo 1% Dust (cyfluthrin). Delta Dust is uniquely waterproof, making it ideal for exterior yard structures exposed to rain and humidity.
- Load a Bulb Duster: Fill a handheld bulb duster (like the JT Eaton 902) no more than one-third full with the insecticide. This allows air space for the dust to aerosolize properly.
- Inject the Tunnel: Insert the duster nozzle slightly into the 1/2-inch entry hole. Give two to three quick puffs. The goal is to coat the interior walls of the gallery, not to pack the hole solid.
- Wait 48 to 72 Hours: Leave the hole open. As bees enter and exit, they will track the dust deep into the lateral brood chambers, transferring it to the larvae and other adults via contact.
- Plug the Hole: Once activity has completely ceased, seal the entry point. Use an exterior-grade wood putty, a 1/2-inch wooden dowel coated in wood glue, or a cork. For a permanent structural fix, apply Bondo wood filler over the plug and sand it flush before painting.
Long-Term Wood Protection Strategies
Eradicating current nests is only half the battle. Carpenter bees are opportunistic and strongly prefer bare, weathered, or lightly stained softwoods like pine, fir, cypress, and redwood. To defend your yard long-term, you must alter the physical profile of the wood.
The Paint vs. Stain Debate
While oil-based stains enhance the natural grain of wood, they offer virtually zero protection against carpenter bee mandibles. Solid-body exterior paint (100% acrylic latex or alkyd) forms a thick, hardened film that deters excavation. If you must maintain a natural wood look, apply multiple coats of a high-gloss exterior polyurethane or marine-grade varnish. The hard, glossy surface makes it difficult for the bees to gain the traction needed to chew into the wood.
Physical Deterrents and Material Swaps
- Composite Decking: When replacing damaged deck boards, opt for capped composite materials (e.g., Trex or TimberTech). Carpenter bees cannot bore into composite polymers.
- Wire Mesh Backing: For fascia boards or soffits with historical bee damage, staple 1/4-inch hardware cloth or aluminum screening behind the wood surface before applying a new facade.
- Aluminum Wrapping: Wrap exposed wooden fascia and trim with painted aluminum coil stock. This completely eliminates the wood scent and physical access.
Cost Breakdown: DIY Treatment vs. Professional Extermination
Managing carpenter bee wood damage is highly cost-effective as a DIY project, provided you have safe ladder access to eaves and pergolas. Below is a 2026 pricing estimate for typical yard defense scenarios.
| Treatment Approach | Estimated Cost | Best For |
|---|---|---|
| DIY Insecticidal Dust & Plugs | $25 - $55 | Ground-level decks, fences, accessible railings |
| DIY Polyurethane/Paint Sealing | $60 - $150 (per gallon + supplies) | Preventative maintenance on large pergolas or gazebos |
| Professional Pest Control Service | $175 - $350 per visit | Multi-story eaves, steep rooflines, severe infestations |
| Carpenter/Woodworker Repair | $300 - $800+ | Structurally compromised load-bearing beams or joists |
Frequently Asked Questions
Do carpenter bees cause structural collapse?
Rarely on their own. A single female excavates a tunnel roughly 6 to 10 inches long. However, because subsequent generations reuse and expand these same galleries over years, the cumulative hollowing can weaken structural beams. Furthermore, the primary cause of catastrophic wood failure is secondary: woodpeckers will aggressively tear apart infested wood to eat the bee larvae, causing massive cosmetic and structural damage.
Can I use wasp freeze spray on carpenter bee holes?
Aerosol 'wasp freeze' sprays (containing prallethrin or tetramethrin) provide instant knockdown but leave no residual effect. If you spray the hole and the bee is not inside, the chemical evaporates quickly, offering zero protection when the bee returns. Dusts are vastly superior for long-term gallery treatment.
Are there natural repellents for carpenter bees?
Citrus oil sprays and almond oil are frequently touted online as natural repellents. While strong odors may temporarily deter scouting females, they evaporate within days and offer no reliable protection for high-value yard structures during peak spring nesting season. Rely on physical barriers (paint/polyurethane) rather than essential oils for permanent defense.

