
Pest Control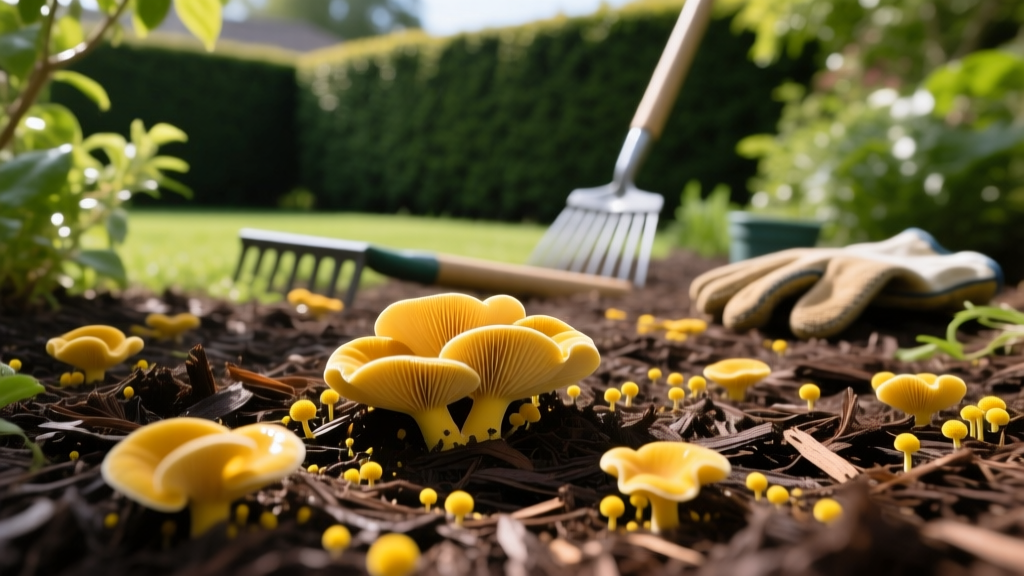
How to Identify and Eliminate Yellow Mulch Fungus in Your Garden
The 'Yellow Growth' Panic: Slime Mold vs. True Fungus
When bright yellow growths erupt across your mulch beds, the immediate assumption is often a toxic fungal infestation. However, accurate diagnosis is the critical first step before applying any treatment. In 90% of residential cases, 'yellow mulch fungus' is actually Fuligo septica, commonly known as dog vomit slime mold. While it looks alarming—resembling bright yellow scrambled eggs or a crusty sponge—it is a myxomycete (slime mold), not a true fungus. True yellow fungi, such as Leucocoprinus birnbaumii (the flowerpot parasol), occasionally appear in fine mulch but are far less common outdoors.
Expert Insight: Slime molds feed on bacteria and decaying organic matter, not your living plants. They are entirely harmless to your landscaping, though their aesthetic impact usually prompts immediate removal.
Diagnostic Decision Matrix
Use this framework to determine exactly what is growing in your beds before purchasing treatments.
| Characteristic | Fuligo Septica (Slime Mold) | Leucocoprinus / Coprinus (True Fungi) |
|---|---|---|
| Physical Structure | Amorphous, crusty, sponge-like mass; no stem or cap. | Distinct stipe (stem) and pileus (cap); often features gills underneath. |
| Mobility | Plasmodial stage physically creeps across mulch (up to 1 inch per hour). | Stationary; grows in place from mycelium network. |
| Color Evolution | Bright yellow, transitioning to brown/black powdery spores within 48 hours. | Consistent yellow or yellow-brown; turns to black ink-like liquid (if Coprinus) when decaying. |
| Plant Impact | Zero; strictly saprophytic. | Zero; strictly saprophytic (breaks down dead wood/mulch). |
For authoritative identification resources, the Penn State Extension provides excellent visual guides for distinguishing slime molds from pathogenic fungi in landscape beds.
Root Cause Analysis: Why Your Mulch is Fruiting
Yellow growths are symptom indicators of specific environmental conditions. Fungi and slime molds require three elements to fruit: high moisture, moderate temperatures (70°F–85°F), and abundant decaying organic carbon.
- Over-Mulching: Applying mulch deeper than 3 inches creates an anaerobic (oxygen-deprived) lower layer. This sour environment accelerates the breakdown of wood chips, feeding fungal mycelium.
- Dyed Mulch Breakdown: Cheap, color-enhanced mulches (often dyed with iron oxide or carbon black) are frequently made from recycled pallet wood. The rapid decomposition of this processed wood provides a massive, easily accessible carbohydrate spike for fungi.
- Surface Irrigation: Overhead sprinklers keep the top inch of mulch perpetually saturated, creating the exact humidity microclimate required for Fuligo septica plasmodia to form.
Rescue Fixes: Step-by-Step Eradication Protocols
Once you have confirmed the presence of yellow mulch fungus or slime mold, execute the following rescue sequence. Do not skip the mechanical removal step, as chemical treatments cannot penetrate the thick crust of mature slime molds.
Step 1: Mechanical Extraction (The Scoop Method)
Never use a leaf blower or a high-pressure hose on yellow growths. This will atomize the spores and spread them across your entire property. Wear nitrile gloves and use a metal hand trowel to scoop out the growth along with the top 1 inch of underlying mulch. Place the material directly into a sealed heavy-duty contractor trash bag. Dispose of it in your municipal waste bin; do not compost it, as home compost piles rarely reach the 140°F required to kill fungal spores.
Step 2: Environmental Disruption
Fungi rely on a stable, humid microclimate. Disrupt it immediately:
- Rake the Bed: Use a steel-tined leaf rake to aggressively turn the remaining mulch. This breaks up the hydrophobic crust, exposes anaerobic lower layers to UV light, and accelerates drying.
- Halt Overhead Watering: Switch to drip irrigation or soaker hoses placed directly on the soil beneath the mulch. Keep the mulch surface completely dry for 7 to 10 days.
Step 3: Targeted Organic & Chemical Treatments
If the growth returns after mechanical removal, apply a targeted treatment. Choose your protocol based on your soil health goals and budget.
| Treatment Type | Active Ingredient & Mix Ratio | Cost per Gallon | Efficacy & Soil Impact |
|---|---|---|---|
| Alkaline Spray | 1 tbsp Baking Soda + 1/2 tsp Liquid Castile Soap + 1 Gallon Water | < $0.10 | Alters surface pH to inhibit fruiting. Safe for all plants and soil biology. |
| Botanical Fungicide | 2 oz Cold-Pressed Neem Oil + 1 tsp Dish Soap + 1 Gallon Water | ~ $0.45 | Disrupts fungal cellular membranes. Breaks down in sunlight within 48 hours. |
| Copper Fungicide | 2 tbsp Liquid Copper (e.g., Bonide Liquid Copper) + 1 Gallon Water | ~ $1.15 | Highly effective broad-spectrum kill. Warning: Copper accumulates in soil and is toxic to earthworms. Use only as a last resort. |
Apply your chosen spray using a 2-gallon pump sprayer, drenching the mulch surface until it is uniformly damp but not pooling. Reapply every 5 to 7 days until the fruiting cycle breaks. Consult Cornell University's New York State Integrated Pest Management guidelines for safe handling of copper-based botanical treatments in residential landscapes.
Long-Term Prevention: Engineering a Fungus-Resistant Bed
Eradication is temporary if the underlying environmental drivers remain unaddressed. Implement these structural changes to your garden beds to prevent recurrence.
Strict Mulch Depth Calibration
The most common homeowner error is 'volcano mulching' or applying 4 to 6 inches of wood chips. Maintain a strict depth of 2 to 3 inches after settling. This depth is sufficient to retain soil moisture and suppress weeds, but shallow enough to allow the lower layers to breathe and dry out between rain events. According to the University of Minnesota Extension, keeping mulch away from plant stems and limiting depth prevents the anaerobic conditions that breed fungal diseases.
Soil pH Adjustment for Fungal Suppression
Most wood-decaying fungi and slime molds thrive in slightly acidic environments (pH 5.0 to 6.0). As hardwood mulch decomposes, it releases tannic and acetic acids, naturally lowering the bed's pH.
Actionable Fix: Test your mulch bed soil pH annually. If it drops below 6.0, apply pelletized garden lime (calcium carbonate) at a rate of 5 lbs per 100 square feet. This raises the pH toward a neutral 6.5 to 7.0, creating an alkaline surface environment that actively suppresses fungal fruiting without harming most ornamental shrubs.
Upgrade Your Mulch Material
If yellow fungus is a chronic, multi-season issue, your mulch material is likely the culprit. Transition away from cheap, dyed hardwood chips. Instead, use aged pine bark nuggets or cedar mulch. Pine bark contains natural resins and terpenes that act as mild, natural fungistatics. Cedar mulch contains thujone, a natural compound that resists both fungal decay and insect infestation. While these premium mulches cost approximately 30% to 40% more upfront (averaging $45–$60 per cubic yard compared to $25 for dyed hardwood), they last twice as long and drastically reduce the labor and chemical costs associated with fungal management.

