
Pest Control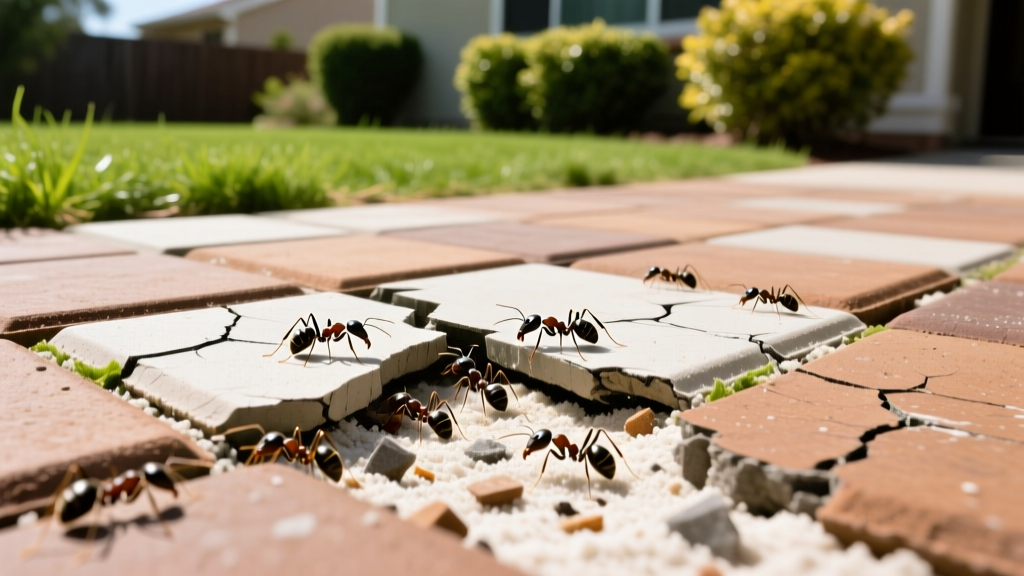
Ants in Pavers: How to Eliminate Nests and Re-Sand Joints
Paver patios and walkways offer excellent drainage and high-end aesthetic appeal, but the sand joints between the stones create an ideal microhabitat for pavement ants (Tetramorium caespitum). These colonies do more than just create unsightly mounds; their extensive tunneling undermines the gravel base, causing pavers to sink, shift, and crack over time. Eradicating ants in pavers requires a two-pronged approach: eliminating the existing colony without triggering a reproductive swarm, and structurally fortifying the joints to prevent re-infestation.
Why Paver Joints Attract Pavement Ants
To effectively manage ants in pavers, you must understand why they choose this specific environment. Paver systems rely on a bed of compacted gravel topped with a 1-inch layer of coarse bedding sand. This sand layer provides three critical resources for ant colonies:
- Thermal Regulation: Brick and stone pavers absorb and retain solar heat. This keeps the underlying sand warm in early spring and late fall, extending the colony's foraging season and accelerating brood development.
- Moisture Retention: While the joints drain surface water, the bedding sand holds residual moisture, preventing the colony from desiccating during summer droughts.
- Structural Stability: The narrow 1/8-inch to 1/2-inch joints protect the colony from larger predators and foot traffic while allowing easy access to the surface for foraging.
According to entomologists at Penn State Extension, pavement ants typically establish colonies with 2,000 to 10,000 workers. When these colonies establish under heavy hardscapes, surface treatments alone will fail because the bulk of the population remains shielded deep within the base layer.
The 3-Phase Eradication Protocol
Avoid the common mistake of spraying over-the-counter repellent insecticides (like bifenthrin or permethrin) directly onto the pavers. Repellents kill only the foraging workers on contact and cause the surviving queen to initiate 'budding'—a process where the colony splits into multiple satellite nests, making the infestation exponentially worse.
Phase 1: Non-Repellent Liquid Application
Use a non-repellent, transferable insecticide such as Alpine WSG (active ingredient: Dinotefuran). Because it is undetectable to ants, foragers will walk through the treated joints and carry the active ingredient back to the queen.
- Mix Rate: Dissolve 0.375 ounces of Alpine WSG per gallon of water in a pump sprayer.
- Application: Apply directly to the paver joints during dry weather, using a fan nozzle to ensure the liquid penetrates at least 2 inches into the sand bed.
- Cost & Yield: A 50-gram packet costs approximately $45 and yields up to 50 gallons of finished solution, enough to treat over 5,000 square feet of hardscape.
Phase 2: Targeted Baiting
While the non-repellent works over 7 to 14 days, deploy slow-acting baits to accelerate colony collapse. The University of California IPM program recommends baits containing Borax or Indoxacarb for sweet-feeding pavement ants. Place Terro T300B Liquid Ant Baits ($5-$8 per multi-pack) directly over the most active joint trails. Do not disturb the trails or kill the ants feeding on the bait; they must return to the nest to share the toxic food source.
Treatment Product Comparison Matrix
Selecting the right chemical intervention depends on the severity of the infestation and your environmental constraints. Use the matrix below to choose the optimal product for your patio.
| Product Type | Active Ingredient | Best Use Case | Est. Cost | Time to Collapse |
|---|---|---|---|---|
| Non-Repellent Spray | Dinotefuran (Alpine WSG) | Heavy infestations, deep base penetration | $45 / 50g | 7-14 Days |
| Liquid Bait Stations | Borax (Terro T300B) | Active surface trails, sweet-feeding colonies | $6 / 6-pack | 14-21 Days |
| Granular Bait | Indoxacarb (Advance 375A) | Protein/grease-feeding colonies, perimeter defense | $35 / 2lb | 10-14 Days |
| Organic Flush | D-Limonene / Boiling Water | Isolated, small surface mounds (eco-sensitive areas) | $15 / gal | Immediate (Surface only) |
The Permanent Structural Fix: Polymeric Sand Replacement
Chemical eradication is only half the battle. Once the colony is dead, the hollowed-out voids in your paver joints must be filled. Standard masonry sand is an open invitation for the next scouting ant. The permanent solution is to remove the compromised sand and replace it with polymeric sand.
Polymeric sand contains fine silica particles mixed with water-activated binding agents (often acrylic or organic polymers). When hydrated, it hardens to a mortar-like consistency, locking the pavers together and creating an impenetrable barrier against insects and weed seeds.
Step-by-Step Polymeric Sand Installation
- Excavate Old Sand: Use a specialized paver sand removal tool or a heavy-duty shop vac to extract the old sand to a depth of at least 1 inch. Warning: If using a pressure washer to blow out joints, keep the PSI under 1,600 and use a 15-degree nozzle. Higher pressure will erode the critical gravel base layer beneath the sand.
- Dry the Base: The paver base must be bone-dry. Moisture trapped in the base will prematurely activate the polymers, leading to severe efflorescence (a stubborn white, powdery residue on the stone surface).
- Apply Polymeric Sand: Sweep a high-quality polymeric sand (e.g., Techniseal or Alliance Gator, costing $35-$45 per 40lb bag) across the patio. Fill the joints to exactly 1/8-inch below the paver surface to allow for compaction and water runoff.
- Compact the Joints: Run a vibratory plate compactor (rental cost: $80-$120 per day) over the patio with a protective urethane pad attached. This vibrates the sand deep into the joints, eliminating air pockets.
- Activate the Polymers: Use a hose with a gentle shower nozzle to mist the patio for 2 to 3 minutes. Do not use a high-pressure jet, which will wash the polymers out of the joint. Allow 24 to 48 hours for full curing before allowing foot traffic.
⚠️ Critical Warning: Avoid Efflorescence
Never apply polymeric sand if rain is forecasted within 48 hours or if the underlying base is damp. Premature activation causes the binding agents to migrate to the surface, creating a white haze that requires specialized chemical cleaners (like Techniseal Efflorescence Cleaner, ~$25/bottle) and extensive scrubbing to remove.
Ongoing Yard Defense & Drainage Management
Even with hardened joints, environmental factors can invite new colonies to the perimeter of your hardscape. Implement these yard defense strategies to maintain a pest-free patio:
- Vegetation Setbacks: Trim all shrubs, groundcover, and lawn edges at least 6 inches away from the paver perimeter. Overhanging foliage traps moisture and provides a bridge for carpenter ants and other pests to bypass your treated zones.
- Correct Grading Issues: Ensure the soil adjacent to the patio slopes away at a minimum grade of 2% (a 2-inch drop per 10 feet). Standing water against the patio edge will eventually degrade the polymeric sand from the outside in.
- Perimeter Granular Barrier: In early spring, apply a 12-inch band of granular bait (like Advance 375A) along the soil-to-paver transition line to intercept foraging queens before they can establish new nests under the hardscape.
By combining non-repellent transferable insecticides with structural joint reinforcement, you transition your patio from an ant sanctuary to an impenetrable, low-maintenance outdoor living space.

