
Pest Control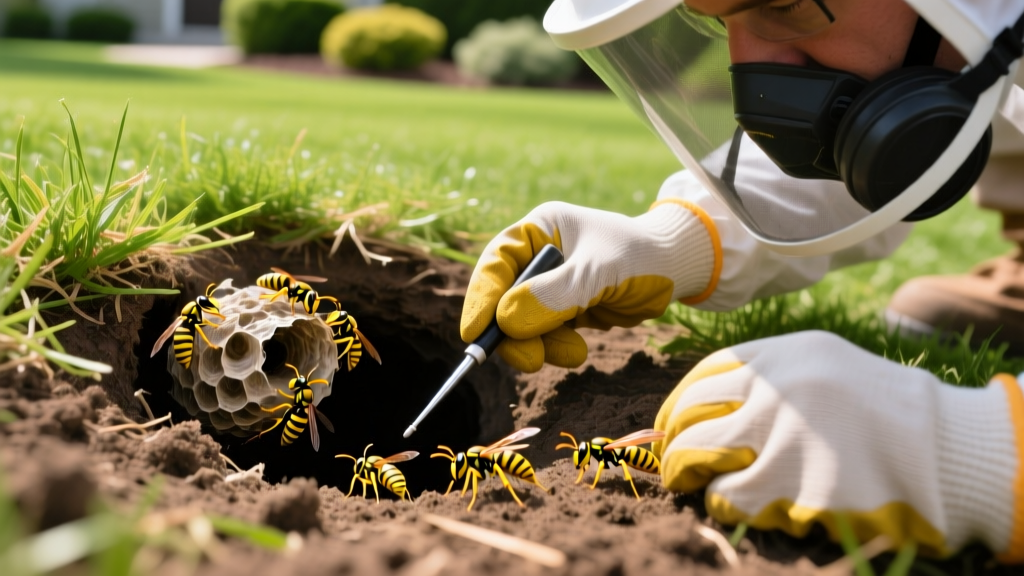
How to Find and Treat a Yellow Jackets Nest in Ground Safely
Symptom Diagnosis: Confirming a Ground-Nesting Colony
Finding a yellow jackets nest in ground requires careful observation before taking action. Unlike paper wasps that build visible aerial combs under eaves, ground-nesting species—primarily the Western yellowjacket (Vespula pensylvanica) and the German yellowjacket (Vespula germanica)—construct massive subterranean hives that can house 4,000 to 5,000 aggressive workers by late summer. Misidentifying these nests or treating them at the wrong time of day is the leading cause of severe stinging incidents in residential landscaping.
The first symptom of a subterranean colony is often behavioral rather than visual. Homeowners typically discover the nest when mowing the lawn; the low-frequency vibrations and carbon dioxide emissions from the mower engine trigger a massive, defensive swarm response. Before you see the insects, you may notice a sudden die-off of grass in a localized 12-inch patch, caused by the colony excavating soil and disrupting root structures to expand their brood chambers.
Visual Identification of the Entrance Hole
A true yellow jackets nest in ground is characterized by a specific entrance architecture. Look for a hole roughly the size of a nickel or quarter (0.75 to 1.25 inches in diameter). Unlike ant hills, which feature conical mounds of fine dirt, yellow jacket excavations produce a subtle, fanned-out scattering of coarse soil pellets and thatch debris radiating outward from the hole. The entrance is frequently hidden beneath dense turfgrass, ivy, or mulch beds, making it a hidden hazard during routine yard work.
Warning: The Vibration Trigger
Never use a weed whacker, lawn aerator, or heavy foot traffic near a suspected hole to 'test' if it is active. Ground vibrations instantly trigger the colony's alarm pheromones, causing hundreds of defenders to flood the entrance within seconds.
Never use a weed whacker, lawn aerator, or heavy foot traffic near a suspected hole to 'test' if it is active. Ground vibrations instantly trigger the colony's alarm pheromones, causing hundreds of defenders to flood the entrance within seconds.
Differential Diagnosis: Yellow Jackets vs. Beneficial Insects
Not every hole in your lawn is a threat. It is critical to distinguish aggressive social yellow jackets from solitary, beneficial ground-nesting insects before applying any rescue fixes.
| Feature | Ground Yellow Jackets | Beneficial Ground Bees (Andrena) | Cicada Killers (Sphecius) |
|---|---|---|---|
| Traffic Volume | High (dozens per minute) | Low (1-2 per hole) | Low (1 large wasp per hole) |
| Entrance Size | Nickel to Quarter size | Pencil eraser size | Dime size, with large dirt mound |
| Aggression Level | Extreme; will pursue targets | Docile; rarely stings | Docile unless physically grabbed |
| Colony Structure | Social (thousands of workers) | Solitary (one female per hole) | Solitary (one female per hole) |
The Rescue Fix Protocol: Step-by-Step Eradication
Once you have confirmed a yellow jackets nest in ground, timing and technique are everything. According to the UC Statewide Integrated Pest Management Program, ground-nesting colonies are most vulnerable at night or in the very early morning when temperatures drop below 65°F (18°C). At these temperatures, the insects are sluggish, and the entire foraging population has returned to the subterranean brood chambers.
Required Personal Protective Equipment (PPE)
Do not attempt this rescue fix in standard gardening clothes. Yellow jackets can sting through thin fabrics and will target dark colors and moving shadows. Your PPE must include:
- Head-to-Toe Barrier: A ventilated bee suit (such as the VEVOR Professional Bee Suit) with an attached mesh veil.
- Layered Hand Protection: 3mm nitrile gloves worn underneath thick, elbow-length leather gauntlet gloves. Yellow jacket stingers can pierce standard leather, but the nitrile layer prevents the venom from transferring to the skin.
- Sealed Ankles: Duct tape sealing the gap between your bee suit legs and rubber work boots.
- Red-Lens Flashlight: Yellow jackets cannot see red light well. Taping a piece of red cellophane over your flashlight lens allows you to see the entrance hole without triggering a defensive swarm.
Method 1: Insecticidal Dust (The Gold Standard for Deep Nests)
Liquid sprays often fail to penetrate deep into the soil voids where the brood chambers are located, which can be 12 to 18 inches below the surface. Insecticidal dust is the most effective rescue fix because the foraging workers track the toxic powder deep into the nest on their legs and bodies, distributing it to the queen and larvae.
Recommended Product: Tempo 1% Dust (active ingredient: Cyfluthrin) or DeltaDust (active ingredient: Deltamethrin). These cost between $18 and $25 for a 1-pound shaker bottle.
Application Steps:
- Fill a hand-held bulb duster (like the Harris Bulb Duster) no more than one-third full with the dust. Overfilling prevents the air from mixing with the powder, resulting in clumps rather than a fine cloud.
- Approach the nest from the side, never standing directly over the hole, to avoid blocking their primary escape route and triggering an upward swarm.
- Insert the duster tube just inside the entrance and give 2 to 3 quick, firm puffs. You want to inject a cloud of dust into the void, not pile it at the entrance.
- Critical Mistake to Avoid: Do NOT plug the hole with dirt, mud, or a rock after dusting. If you seal the entrance, the colony will simply excavate a secondary exit hole a few inches away, bypassing the treated zone entirely. Leave the hole open so returning foragers walk through the dust.
Method 2: Liquid Drench (For Shallow, Exposed Nests)
If the nest is located in a highly visible, shallow area (less than 6 inches deep) or under a patio slab where dust cannot be effectively puffed, a high-volume liquid drench is the alternative.
Recommended Product: Onslaught FastCap or Talstar P (Bifenthrin). Mix 1 ounce of concentrate per gallon of water.
Application Steps:
- Remove the fan-spray nozzle from your pump sprayer to create a solid, concentrated stream of liquid rather than a fine mist.
- Pour 1 to 2 gallons of the mixture directly down the entrance hole in a continuous stream to flood the upper galleries.
- Unlike dust, liquid treatments require you to immediately cover the hole with a heavy piece of sod or a brick to trap the fumes and force the insects to contact the treated soil as they attempt to dig out.
Pro-Tip: The 48-Hour Rule
Never dig up or fill the nest immediately after treatment. It takes 24 to 48 hours for the insecticide to circulate through the entire colony and kill the queen. Wait three full days, then check for activity. If no insects are seen entering or exiting, the rescue fix was successful.
Never dig up or fill the nest immediately after treatment. It takes 24 to 48 hours for the insecticide to circulate through the entire colony and kill the queen. Wait three full days, then check for activity. If no insects are seen entering or exiting, the rescue fix was successful.
What NOT To Do: Dangerous DIY Myths
When dealing with a yellow jackets nest in ground, desperation often leads homeowners to attempt hazardous, ineffective methods. The Penn State Extension explicitly warns against the following practices:
- Gasoline or Diesel Fuel: Pouring flammable liquids into the ground is illegal, highly dangerous, and causes severe, long-term contamination of your soil and local groundwater. It will also permanently kill the surrounding turfgrass.
- Boiling Water: While boiling water can kill insects on contact, a ground nest's intricate, multi-chambered architecture acts as a thermal insulator. The water will cool rapidly before reaching the deep brood chambers, succeeding only in enraging the thousands of workers in the upper galleries.
- Shop-Vac Extraction: Attempting to vacuum the insects out of the ground usually results in the wasps escaping through the vacuum's exhaust port, stinging the operator.
Cost Breakdown: DIY vs. Professional Extermination
Deciding whether to handle the rescue fix yourself or hire a professional depends on the nest's location and your household's medical history.
| Treatment Route | Estimated Cost | Best Used When... |
|---|---|---|
| DIY Dust Treatment | $18 - $35 | Nest is in an open lawn area, and no residents have venom allergies. |
| DIY Liquid Drench | $25 - $45 | Nest is shallow and located near hardscapes or garden beds. |
| Professional Exterminator | $150 - $350 | Nest is under a shed, inside a retaining wall, or near high-traffic play areas. |
If the nest is located beneath a structural element like a wooden deck, a shed foundation, or a hollow retaining wall, DIY treatments are highly discouraged. These structures provide secondary escape routes that are impossible to treat with surface applications. According to North Carolina State Extension, structural void nests require professional-grade micro-encapsulated products and specialized injection equipment to ensure the entire colony is neutralized without damaging the structure.
Post-Treatment Lawn Recovery
Once the colony is confirmed dead (usually after 72 hours), the physical void left in the soil can become a tripping hazard and a collection point for water runoff. To repair the lawn:
- Use a spade to carefully collapse the upper crust of the entrance hole.
- Fill the void with a 50/50 mix of native topsoil and coarse sand to ensure proper drainage and prevent future settling.
- Tamp the soil down firmly with the back of a garden rake.
- Overseed the patched area with a grass variety that matches your existing turf, applying a light layer of peat moss to retain moisture during germination.
By accurately diagnosing the symptoms and applying a targeted, science-backed rescue fix, you can safely reclaim your yard from ground-nesting yellow jackets without resorting to hazardous myths or unnecessary chemical over-application.

