
Pest Control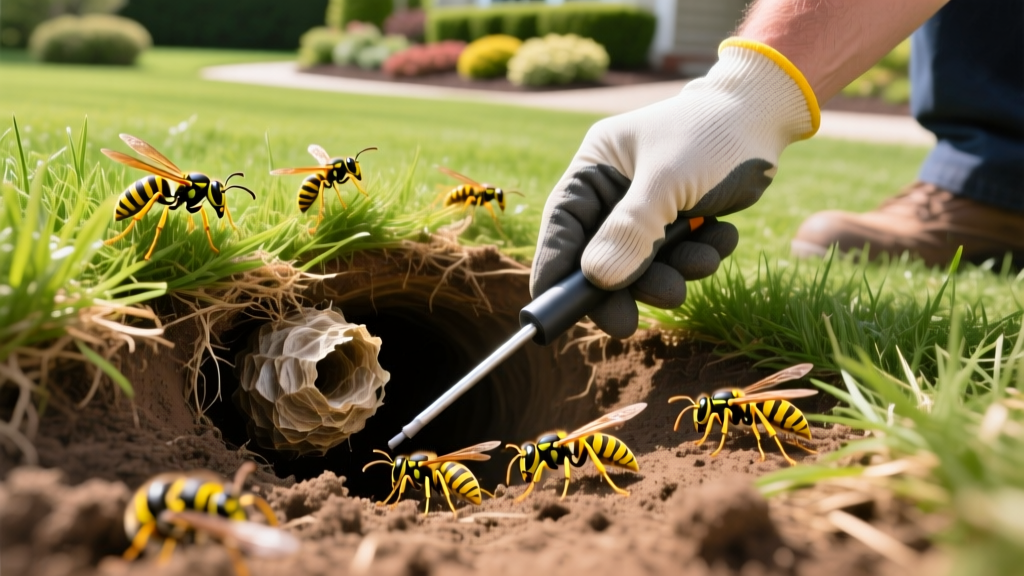
Diagnosing and Destroying a Yellow Jacket Nest in Ground Safely
Symptom Diagnosis: Is That Hole a Yellow Jacket Nest?
Ground-nesting yellow jackets (primarily Vespula maculifrons and Vespula germanica) account for the majority of severe stinging incidents in North American lawns. Unlike aerial nests suspended from eaves or branches, a yellow jacket nest in ground hides its true population size until a lawnmower, string trimmer, or footstep triggers a massive defensive swarm. Colonies peak between late August and October, often harboring 3,000 to 5,000 aggressive workers.
Before initiating any rescue fix, you must confirm the hole is actually a yellow jacket nest. Homeowners frequently misidentify the burrows of beneficial solitary insects or small mammals, leading to unnecessary and ecologically damaging pesticide applications.
Diagnostic Decision Tree
- Steady Traffic Pattern: Yellow jacket nests exhibit a continuous, organized flow of 1 to 3 wasps per second entering and exiting the primary hole during daylight hours.
- Hole Dimensions: Entrances are typically 1 to 2 inches in diameter, often located in bare lawn patches, near landscape timbers, or along retaining walls.
- Debris Signatures: Look for small, fan-shaped mounds of fine soil or chewed wood pulp pushed out from the excavation. The surrounding grass is often clipped short by the workers to maintain a clear flight path.
- The Bumblebee Differentiator: Bumblebees (Bombus spp.) also nest underground but are distinctly fuzzy, move much slower, and have vastly smaller colonies (rarely exceeding 400 individuals). They are crucial pollinators and should not be eradicated.
- The Cicada Killer Differentiator: Cicada killers (Sphecius speciosus) are massive (up to 1.5 inches) but are solitary. You will see individual females digging separate holes, not a coordinated swarm sharing a single entrance.
According to UC Agriculture and Natural Resources, accurate identification is the first step in integrated pest management, preventing the misuse of broad-spectrum chemicals on non-target beneficial insects.
The Rescue Fix: Step-by-Step Ground Nest Eradication
When a nest poses an immediate threat to children, pets, or high-traffic lawn areas, a rapid rescue fix is required. Liquid sprays and aerosol "Wasp Freezes" are virtually useless for subterranean nests; they only kill surface-level foragers while the queen and thousands of workers remain protected deep within the soil cavity.
The only effective eradication method for a yellow jacket nest in ground is the application of insecticidal dust. Dust adheres to the wasps' bodies as they enter the hole. Through natural grooming behaviors and trophallaxis (the sharing of food and fluids within the colony), the toxic dust is distributed deep into the nest, eventually reaching the queen.
Phase 1: Preparation and Timing
Timing is your primary safety mechanism. Yellow jackets are highly visual and rely on daylight to forage. You must execute the treatment at least two hours after sunset when ambient temperatures drop below 65°F (18°C). At these temperatures, the colony's metabolic rate slows, and the vast majority of foragers have returned to the nest.
- Lighting: Use a flashlight equipped with a red lens filter. Yellow jackets lack red photoreceptors and cannot see red light, preventing them from swarming the beam. Standard white or LED flashlights will instantly trigger a defensive attack.
- PPE Requirements: Wear a full bee suit or multiple layers of thick, light-colored clothing. Tuck pant legs into socks, wear heavy leather gloves (not cotton or rubber), and secure a protective veil over your face and neck.
- Application Tool: Use a bellows-style hand duster (such as the JT Eaton 4 oz Duster, retailing around $14). Do not apply dust directly from the manufacturer's shaker bottle, as this requires you to get dangerously close to the entrance.
Phase 2: Dust Application Protocol
- Fill the bellows duster no more than one-third full with your chosen insecticidal dust. Overfilling prevents the bellows from creating the necessary air puff.
- Approach the nest slowly from the side, avoiding any vibration or heavy footsteps that could transmit tremors through the soil.
- Position the duster nozzle approximately 4 to 6 inches from the hole entrance.
- Puff 3 to 4 distinct clouds of dust directly into the opening. The goal is to coat the entrance tunnel, not to bury it.
- Critical Step: Do NOT plug the hole with dirt, rocks, or tape. The returning foragers must be able to walk through the dust and carry it inside. Plugging the hole will force the colony to dig secondary emergency exits, potentially surfacing in unpredictable areas of your lawn.
Chemical Rescue Treatment Matrix
Selecting the correct dust formulation depends on your local soil conditions and the urgency of the threat. Below is a comparison of the three industry-standard dusts used by pest management professionals for subterranean wasp eradication.
| Product Name | Active Ingredient | Kill Speed | Moisture Tolerance | Avg. Cost (2026) | Best Use Case |
|---|---|---|---|---|---|
| Tempo Dust | Cyfluthrin (1%) | Fast (1-12 hrs) | Low | $24 / 1.25 lb | Urgent rescue fixes in dry, sandy soils where rapid knockdown is required. |
| Delta Dust | Deltamethrin (0.05%) | Moderate (24-48 hrs) | High (Waterproof) | $28 / 1 lb | Damp clay soils, irrigated lawns, or nests located near drainage zones. |
| Drione Dust | Silica Gel + Pyrethrin | Slow (24-72 hrs) | Low | $35 / 1 lb | Dry environments; utilizes a desiccant action to destroy the wasps' waxy exoskeleton. |
Critical Failure Modes: What NOT to Do
Desperation often leads homeowners to attempt dangerous, ineffective, or illegal eradication methods. The Environmental Protection Agency (EPA) strictly warns against the misuse of pesticides and household chemicals in residential landscapes.
Hazardous Rescue Mistakes
- Flooding with Gasoline or Kerosene: This is highly illegal, severely contaminates local groundwater, and creates a massive fire hazard in your soil. Furthermore, it rarely reaches the deep nesting cavity, merely angering the colony.
- Using Garden Hoses: Pumping water into the hole will not drown a mature colony. Subterranean nests feature complex, multi-chambered architectures with air pockets. Water will simply flood the top chambers, causing the wasps to swarm out aggressively and relocate the queen to a secondary tunnel.
- Daytime Aerosol Sprays: Spraying "Wasp Freeze" into a ground hole during the day only kills the 50 foragers currently at the entrance. The remaining 4,000 wasps will immediately recognize the chemical threat and seal off the tunnel from the inside, rendering your treatment useless.
Post-Eradication Lawn Recovery
Once the insecticidal dust has done its work, the colony will collapse within 48 to 72 hours. You can verify the nest is dead by observing the entrance during peak daylight hours; if no traffic is present for two consecutive days, it is safe to proceed with lawn repair.
Safe Backfilling and Reseeding
Do not simply kick dirt over the hole. The subterranean cavity left behind by a mature yellow jacket colony can be the size of a basketball or larger, creating a hidden sinkhole that can cause ankle injuries during lawn activities.
- Neutralize the Entrance: Use a long screwdriver or rebar to gently probe and break up the soil cap over the hole, allowing the underlying cavity to collapse safely.
- Backfill: Fill the void with a 50/50 mix of native topsoil and compost. Tamp the soil down firmly with your boot to eliminate air pockets.
- Overseed: Apply a turf-type tall fescue, Kentucky bluegrass, or bermudagrass seed blend that matches your existing lawn. Cover the patch with a thin layer of peat moss to retain moisture and deter birds.
- Hydrate: Water the patch lightly twice daily for 14 days until germination occurs. The residual insecticidal dust in the deep soil cavity will not harm the shallow roots of new grass seed.
By utilizing precise diagnostic criteria and targeted dust applications, you can eliminate the immediate danger of a ground-nesting yellow jacket colony while preserving the ecological balance of your surrounding landscape and maintaining the structural integrity of your lawn.

