
Pest Control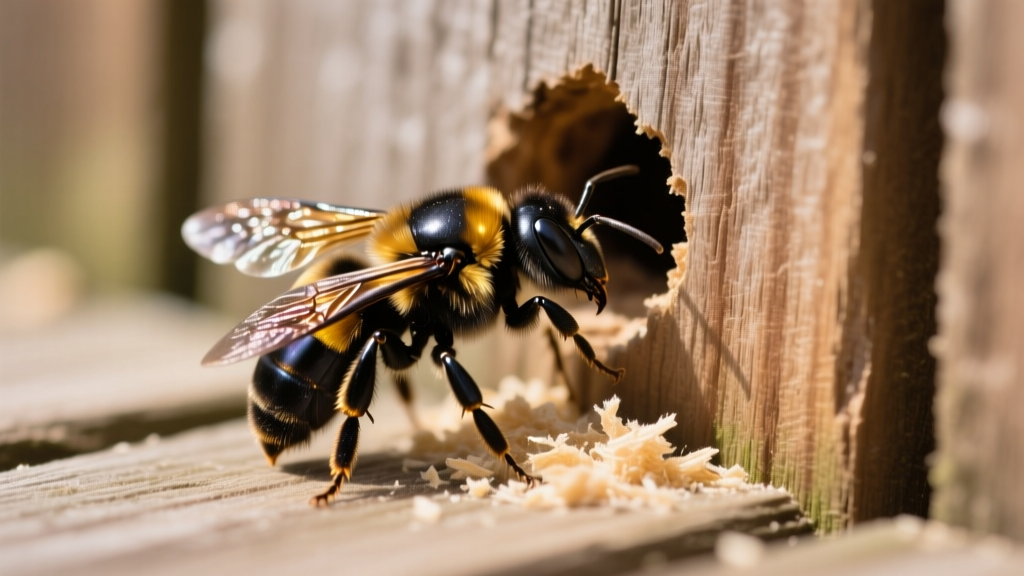
How to Exterminate Carpenter Bees From Yard Wood Structures
Identifying the Threat: Carpenter Bees vs. Wood Damage
Carpenter bees (Xylocopa virginica) do not consume wood for sustenance; they excavate it to create nesting galleries. These large, robust insects target unpainted, weathered softwoods with a Janka hardness rating below 900 lbf, such as cedar, cypress, redwood, and untreated pine. The primary indicator of an active infestation is a perfectly circular entry hole measuring exactly 1/2 inch in diameter, accompanied by a small pile of coarse, sawdust-like frass directly beneath the opening.
According to University of Kentucky Entomology, a single female can excavate a primary tunnel 6 to 10 inches deep, branching into multiple lateral chambers for her larvae. Left unchecked over successive seasons, these galleries can compromise the structural integrity of fascia boards, deck railings, and pergola beams, while also attracting woodpeckers that cause secondary, catastrophic damage while hunting the bee larvae.
Damage Differentiation Matrix
Before initiating an extermination protocol, confirm the pest. Misidentifying woodpecker damage as bee damage leads to ineffective treatment strategies.
| Indicator | Carpenter Bee Activity | Woodpecker Foraging |
|---|---|---|
| Hole Shape | Perfectly round, 1/2-inch diameter | Jagged, irregular, oval or teardrop |
| Frass/Debris | Fine to coarse sawdust piles below hole | Wood splinters scattered widely |
| Auditory Signs | Loud, rhythmic buzzing near wood | Rapid tapping or drumming sounds |
| Wood Preference | Unpainted softwoods (cedar, pine) | Any wood housing insect larvae |
The 3-Step Extermination Protocol for Active Nests
Eliminating an established colony requires a strategic approach that targets both the foraging adults and the developing larvae deep within the wood. Liquid sprays are largely ineffective because they fail to penetrate the 90-degree upward turn at the back of the entry hole.
Step 1: Insecticidal Dust Application
Insecticidal dust is the gold standard for carpenter bee extermination. The dust adheres to the bee's hairy body and is carried deep into the gallery, ensuring the poison reaches the larvae and the queen.
- Recommended Products: Delta Dust Insecticide (Bayer) or Drione Dust. Both contain active ingredients that remain effective in the high-moisture environment of outdoor wood galleries. Expect to pay $25 to $35 for a 1-pound applicator bottle.
- Application Tool: Use a brass bellows hand duster (such as the JT Eaton Bellow Duster, approx. $14). This tool shoots a fine, pressurized cloud of dust rather than a heavy clump.
- Execution: Insert the duster nozzle about 1 inch into the 1/2-inch hole. Puff the bellows 2 to 3 times. Do not overfill the hole; a light coating on the tunnel walls is sufficient.
Step 2: The 48-Hour Wait Rule
The most common failure point in DIY extermination is plugging the hole immediately after dusting. Do not seal the hole yet. You must leave the entry open for 48 to 72 hours. This allows foraging bees to enter, exit, and track the insecticide throughout the entire lateral gallery network. Sealing it too early traps the treated bees outside and leaves the untreated larvae inside to mature and emerge the following spring.
Step 3: Sealing with Copper Mesh and Exterior Filler
After the 72-hour waiting period, the nest must be permanently sealed to prevent future generations from reusing the existing tunnel.
- Insert Copper Mesh: Pack the hole tightly with copper mesh (e.g., Stuf-Fit). Carpenter bees cannot chew through copper, and it provides a rigid backing for the filler. Steel wool is an alternative but will rust and stain the surrounding wood when exposed to rain.
- Apply Wood Filler: Cover the mesh with a high-quality, exterior-grade, paintable wood filler (such as Minwax High Performance Wood Filler, approx. $14). Smooth it flush with the wood surface using a putty knife.
- Paint or Stain: Once the filler cures, paint or stain the patched area to match the surrounding structure and weatherproof the seal.
Ecological Trade-off Warning: Carpenter bees are vital native pollinators, particularly effective at buzz-pollinating tomatoes, eggplants, and native wildflowers. If the bees are nesting in a non-structural, easily replaceable piece of yard lumber (like a remote fence post), Penn State Extension recommends tolerating them. Reserve extermination protocols for structural elements like home fascia, load-bearing deck beams, and primary railing supports.
Preventative Yard Defense: Denying the Next Generation
Extermination addresses the current infestation, but prevention stops the next generation. Female carpenter bees exhibit strong nest-site fidelity, often returning to the exact same wood structures where they emerged.
Surface Treatments and Coatings
The texture and chemical composition of the wood surface dictate its vulnerability.
- 100% Acrylic Latex Paint: The most effective deterrent. A thick, opaque coat of paint masks the wood grain and creates a hard shell that bees cannot easily mandible into. Cost: $40-$60 per gallon.
- Polyurethane/Varnish: Provides a hard physical barrier while maintaining the natural wood look. Requires reapplication every 2-3 years due to UV degradation. Cost: $35-$50 per gallon.
- Wood Stains: Largely ineffective. Penetrating stains do not alter the surface texture enough to deter excavation. Solid-body stains offer moderate protection but fall short of paint.
Chemical and Botanical Repellents
For surfaces that cannot be painted, citrus and almond oils act as temporary olfactory repellents. Spraying a mixture of water and pure almond oil (available in garden centers for roughly $12 per bottle) on vulnerable fascia boards in early April—just before the spring emergence—can deter scouting females. However, this requires weekly reapplication and washes away during heavy spring rains.
Cost Breakdown: DIY Extermination vs. Professional Pest Control
Deciding between a DIY approach and hiring a licensed exterminator depends on the height of the affected structures and the severity of the infestation.
| Method | Estimated Cost | Pros | Cons |
|---|---|---|---|
| DIY Treatment | $50 - $85 total | Highly cost-effective; targets specific holes; low environmental impact. | Requires ladder work; time-consuming (3-day process); purchasing specialized duster tools. |
| Professional Exterminator | $150 - $350 per visit | Includes high-reach equipment; comprehensive fascia inspection; often includes a 30-day warranty. | Higher upfront cost; may use broad-spectrum sprays rather than targeted dusting if not specifically requested. |
Frequently Asked Questions
Do carpenter bees sting?
Male carpenter bees are highly territorial and will aggressively dive-bomb intruders, but they lack stingers and are entirely harmless. Female carpenter bees possess a potent stinger but are highly docile and will only sting if physically crushed or handled. When treating nests, wear a bee veil and thick gloves as a precaution against defensive females.
Does WD-40 or expanding foam kill carpenter bees?
No. WD-40 is not a registered pesticide, evaporates rapidly, and leaves no residual control. Expanding foam (like standard Great Stuff) is easily chewed through by emerging adult bees the following spring. If using foam, you must use a specialized pest-blocking foam containing a bitterant, and it should only be used as a secondary sealant after the nest has been dusted and the bees are confirmed dead.
When is the best time of year to treat the holes?
The optimal treatment window is late summer or early fall (August to October). During this time, the new generation of bees is pupating inside the sealed galleries, and the adults are actively foraging and returning to the tunnels to overwinter. Treating in early spring is less effective, as the bees are actively excavating new wood rather than utilizing the old, treatable tunnels.

