
Pest Control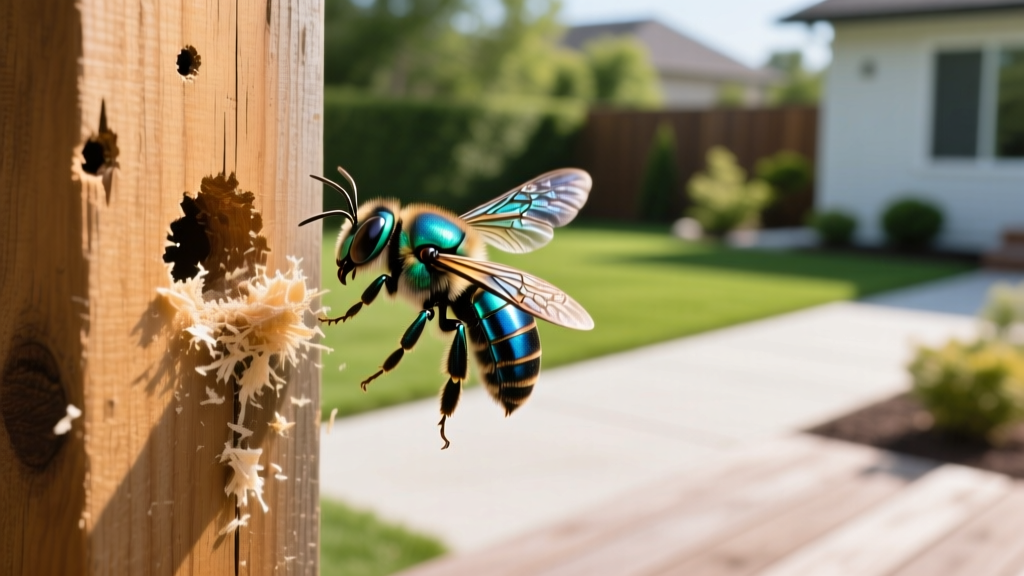
How to Get Rid of Carpenter Bees in Yard Wood Structures
The Structural Threat of Carpenter Bees
Carpenter bees (Xylocopa spp.) are solitary, wood-boring insects that excavate perfectly round, half-inch (12.7 mm) galleries in untreated timber to rear their young. While they are vital native pollinators, their preference for soft, unpainted woods—such as cedar, redwood, pine, and cypress—makes them a primary structural pest for wooden decks, pergolas, fence posts, and roof eaves. Unlike termites, carpenter bees do not consume the wood; they merely tunnel through it. However, a multi-year infestation can result in extensive internal honeycomb networks that compromise structural integrity, retain moisture, and invite secondary wood-rot fungi.
Understanding how to get rid of carpenter bees requires a targeted approach that addresses the active galleries, neutralizes residual pheromones, and alters the wood surface to prevent future colonization. Because female carpenter bees exhibit high site fidelity—often returning to the exact same timber where they emerged—superficial treatments will fail. The protocol below outlines the precise chemical, mechanical, and exclusion strategies required for permanent yard defense.
Identifying Carpenter Bee Damage vs. Other Wood Pests
Before initiating treatment, confirm the pest. Misidentifying wood damage can lead to ineffective chemical applications. Carpenter bees leave distinct signatures that differentiate them from woodpeckers, mason bees, and wood-boring beetles.
| Pest Indicator | Carpenter Bees | Mason Bees | Woodpeckers |
|---|---|---|---|
| Hole Shape & Size | Perfectly round, exactly 1/2-inch diameter | Irregular, smaller (1/4-inch), often in pre-existing cracks | Jagged, rectangular, or deeply gouged cavities |
| Debris (Frass) | Coarse, dry sawdust piles directly beneath the hole | Mud or clay packed into the hole crevices | Wood chips scattered widely around the base |
| Auditory Signs | Faint buzzing or gnawing vibration from within the wood | Silent | Loud, rapid drumming echoing through the structure |
| Wood Preference | Untreated, unpainted softwoods (cedar, pine) | Pre-existing hollow stems or abandoned beetle holes | Any wood, often targeting siding with insect larvae inside |
According to University of Kentucky Entomology, the initial entry hole is typically followed by a sharp 90-degree upward turn, leading to a horizontal tunnel that can extend 4 to 6 inches deep, with individual brood cells partitioned by compacted sawdust.
The 48-Hour Eradication and Exclusion Protocol
Liquid sprays often fail to penetrate deep into the 90-degree angled galleries. Insecticidal dusts are the industry standard because the bees track the powder deep into the nest, spreading it to larvae and emerging adults. Follow this strict timeline for maximum efficacy.
Step 1: Dusk Inspection and Application
Treat galleries at dusk or after dark. Female carpenter bees are less active and less aggressive at night, reducing the risk of stings (though males, which lack stingers, may hover defensively during the day). Using a bulb duster or a specialized crack-and-crevice straw, apply a residual insecticidal dust directly into the 1/2-inch entry hole.
- Top Product Recommendation: Bayer Tempo 1% Dust (Active ingredient: Cyfluthrin). Priced around $18 for a 10 oz shaker, it provides excellent residual action and adheres to the gallery walls.
- Alternative: DeltaDust (Deltamethrin), which is highly moisture-resistant, making it ideal for high-humidity eaves or exposed deck joists.
Step 2: The 48-Hour Waiting Period
Do not plug the hole immediately. Leaving the hole open for 48 hours allows foraging bees to return, track the dust into the deeper brood cells, and eliminate the developing larvae. Plugging the hole too early will trap active bees inside, prompting them to chew new exit holes through your wood trim.
Step 3: Gallery Cleaning and Pheromone Removal
This is the most frequently skipped step, leading to recurring infestations. Old galleries contain fecal matter and pupal casings that emit aggregation pheromones, signaling next year's bees that the timber is a prime nesting site. Insert a narrow, stiff-bristled bottle brush into the hole and vigorously scrub the interior, then use a wet/dry shop vac with a crevice tool to extract the debris.
Step 4: Mechanical Plugging and Sealing
Once the gallery is clean and dry, physically seal the entry point.
Expert Warning: Avoid Standard Steel Wool
Many guides recommend stuffing holes with steel wool before applying wood filler. However, standard steel wool will rust when exposed to moisture, leaving permanent, bleeding orange stains on cedar and redwood. Instead, use stainless steel wool, copper mesh, or tightly rolled #10/#12 cork stoppers. Fill the remaining 1/4-inch of the hole with a high-quality, paintable exterior polyurethane wood filler or elastomeric sealant.
Many guides recommend stuffing holes with steel wool before applying wood filler. However, standard steel wool will rust when exposed to moisture, leaving permanent, bleeding orange stains on cedar and redwood. Instead, use stainless steel wool, copper mesh, or tightly rolled #10/#12 cork stoppers. Fill the remaining 1/4-inch of the hole with a high-quality, paintable exterior polyurethane wood filler or elastomeric sealant.
Chemical vs. Botanical Treatment Matrix
Depending on your yard's proximity to edible gardens, water features, or pollinator habitats, you may prefer botanical deterrents over synthetic pyrethroids. The matrix below compares the primary treatment categories based on efficacy, cost, and application scenarios.
| Treatment Type | Active Ingredient / Source | Avg. Cost | Kill / Repel Action | Best Application Scenario |
|---|---|---|---|---|
| Residual Dust | Cyfluthrin (Tempo 1%) | $15 - $20 | Contact kill + 90-day residual | Active galleries, deep structural tunnels, high eaves |
| Aerosol Jet Spray | Lambda-cyhalothrin (Spectracide) | $5 - $8 | Instant knockdown, low residual | Targeting hovering males, quick surface knockdown |
| Botanical Oil Spray | d-limonene (Citrus Oil) / Almond Oil | $12 - $18 | Strong contact kill + short-term repellent | Playsets, raised garden beds, sensitive pollinator zones |
| Borax Powder | Sodium Borate | $4 - $6 | Stomach poison (slow acting) | Mixed with sugar water traps (less effective for wood tunnels) |
For comprehensive yard defense, Penn State Extension recommends utilizing synthetic dusts for active eradication in structural timbers, while reserving citrus or almond oil sprays as weekly surface repellents on vulnerable, untreated fence lines during the peak spring mating season (April to May).
Long-Term Wood Defense and Exclusion Tactics
Carpenter bees are highly selective. They bypass painted, heavily varnished, or pressure-treated wood in favor of weathered, bare softwoods. Implementing the following surface modifications will render your yard structures unappealing to scouting females.
Surface Coatings and Finishes
- Exterior Paint: A high-quality acrylic latex exterior paint completely masks the wood grain and texture, making it nearly impossible for the bee's mandibles to gain purchase. This is the most effective permanent deterrent.
- Polyurethane / Varnish: If you wish to maintain the natural wood grain, apply at least three coats of exterior-grade spar urethane. Reapply every 24 months, as UV degradation will create micro-fissures that bees can exploit.
- Solid Stains: Semi-transparent stains offer minimal protection. You must use solid-body exterior stains, which build a thick, paint-like film over the wood pores.
Physical Exclusion Materials
For structures that cannot be painted, such as the underside of wooden shakes or the back of fascia boards, staple 1/8-inch aluminum or fiberglass window screen mesh over vulnerable joints and vents. Additionally, replacing damaged wooden trim boards with composite materials (like PVC or Trex) or fiber-cement (like James Hardie) permanently eliminates the nesting medium while maintaining the aesthetic profile of your yard.
Frequently Asked Questions
Do male carpenter bees sting?
No. Male carpenter bees are highly territorial and will aggressively hover, dart, and buzz near your face if you approach their nesting site. However, they lack a stinger and are completely harmless. Only the females possess stingers, and they are generally docile unless physically handled or trapped.
Can I just spray the wood surface with insecticide to prevent them?
Surface spraying with liquid pyrethroids (like Bifenthrin) provides only 2 to 3 weeks of repellency and degrades rapidly under UV sunlight and rain. It is not a viable long-term prevention strategy. Surface modification (paint/polyurethane) is vastly superior to repeated chemical surface spraying.
What time of year should I treat the holes?
The primary treatment window is late summer or early fall (August to October). By this time, the new generation of adults has emerged, and the galleries are empty, allowing you to clean and plug them before they can be reused the following spring. If you treat in early spring (April), you risk trapping the egg-laying female inside, which will result in secondary exit holes.

