
Pest Control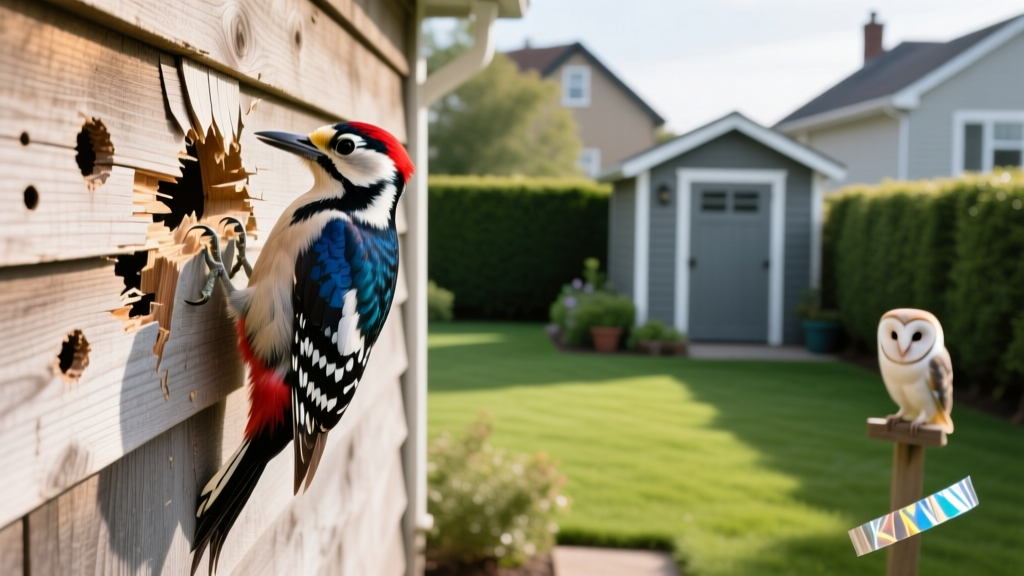
Woodpecker Deterrent Playbook: Stop Siding Damage Without Harm
Woodpeckers can inflict thousands of dollars in structural damage to cedar siding, stucco, and wooden eaves in a matter of weeks. Before deploying a woodpecker deterrent, homeowners must navigate the Migratory Bird Treaty Act (MBTA), which makes it a federal offense to trap, harm, or kill these birds without a specific permit. Fines for violations can exceed $15,000. Effective pest management requires shifting from lethal control to strategic behavioral modification and physical exclusion.
Decoding the Damage: Drumming vs. Foraging vs. Nesting
Selecting the correct deterrent requires identifying the specific behavior driving the damage. Woodpeckers interact with human structures for three distinct reasons, each requiring a different tactical response.
Behavior Identification Matrix
- Drumming: Rapid, machine-gun-like tapping on metal gutters, fascia, or wood. Usually occurs in early spring. Purpose: Territorial declaration and mate attraction. Damage is superficial but noisy.
- Foraging: Small, scattered, irregular holes in wood siding. Purpose: Extracting carpenter bees, leafcutter bees, or wood-boring beetle larvae. Damage indicates an underlying insect infestation.
- Nesting/Excavation: Large, deep, oval or rectangular cavities, often high up under eaves. Purpose: Creating a roost or breeding cavity. The Northern Flicker and Pileated Woodpecker are the primary culprits for massive excavation damage.
According to wildlife management experts at Penn State Extension, misidentifying the behavior is the leading cause of deterrent failure. If a bird is foraging for carpenter bees, hanging reflective tape will not stop them; you must eliminate the food source first.
Tier 1 Deterrents: Physical Exclusion (95%+ Success Rate)
Physical barriers are the only universally reliable woodpecker deterrent. When installed correctly, they completely eliminate the bird's ability to strike the surface.
Polypropylene and Polyethylene Netting
Bird netting is the gold standard for protecting large expanses of siding or complex eaves. You must use UV-stabilized, 3/4-inch mesh netting (such as Bird B Gone Heavy-Duty Polypropylene Netting or Bird-X Super Polyethylene Netting). The 3/4-inch size prevents smaller species like Downy Woodpeckers from becoming entangled while blocking larger species like the Pileated Woodpecker.
Critical Installation Warning: The most common failure mode in DIY netting is mounting it flush against the wood. If the netting touches the siding, a woodpecker will simply reach its bill through the 3/4-inch mesh and continue pecking the wood. You must install standoff brackets, wooden battens, or tension cables to suspend the netting exactly 3 to 4 inches away from the structure's surface.
Hardware Cloth and Metal Flashing
For localized damage or specific corners where birds repeatedly drum, 1/2-inch galvanized hardware cloth or aluminum L-flashing provides an impenetrable armor. Wrap the hardware cloth around the corner of the fascia board, securing it with stainless steel staples. This is highly effective for stopping springtime drumming on vulnerable architectural corners.
Tier 2 Deterrents: Visual and Acoustic Harassment (60% Success Rate)
Psychological deterrents rely on startling the bird. They are best used as secondary layers of defense alongside physical barriers, or as temporary measures while awaiting netting installation.
Holographic Flashing Tape
Products like Irri-Tape utilize a mylar-like holographic material that reflects sunlight and creates a metallic rattling sound in the wind. Cut the tape into 3-foot strips and hang them vertically from the eaves every 4 to 5 feet. Failure mode: Birds habituate to visual stimuli within 7 to 10 days. You must relocate the strips and change their angles bi-weekly to maintain effectiveness.
Predator Decoys and Acoustic Callers
Plastic owl or hawk decoys offer minimal long-term value unless they feature mechanical movement (e.g., bobbleheads or wind-activated wings). Electronic acoustic deterrents, such as the Bird-X Peller Pro, broadcast recorded woodpecker distress calls and predator cries. Set these devices to random intervals rather than continuous loops to prevent auditory habituation. Expect to pay between $180 and $250 for a commercial-grade acoustic unit.
Deterrent Comparison Matrix
| Deterrent Method | Target Behavior | Estimated Cost | Effectiveness | Maintenance Required |
|---|---|---|---|---|
| 3/4" Poly Netting (with 4" standoff) | Nesting, Foraging, Drumming | $0.25 - $0.40 / sq ft | 95% - 100% | Annual inspection for tears/sagging |
| Galvanized Hardware Cloth | Drumming on corners | $15 - $25 per 10ft roll | 90% - 95% | None |
| Holographic Flashing Tape | Drumming, Light Foraging | $18 - $25 per 100ft roll | 50% - 65% | Must be moved every 14 days |
| Electronic Acoustic Caller | Nesting, Territorial Drumming | $180 - $250 per unit | 40% - 60% | Battery replacement, volume adjustment |
| Insecticide Treatment (Bifenthrin) | Foraging (Carpenter Bees) | $40 - $60 per gallon | 80% (Indirect) | Reapply every 60-90 days in summer |
The 7-Day Woodpecker Eradication Playbook
Follow this sequential framework to permanently resolve woodpecker conflicts without violating federal wildlife protections.
- Day 1: Inspect and Identify. Determine if the holes are foraging (small, scattered) or nesting (large, singular). Check for sawdust piles or dead insect casings near the base of the siding.
- Day 2: Eliminate the Food Source. If foraging is the cause, treat the siding and eaves with a residual pyrethroid insecticide like Bifen XTS (bifenthrin). This eliminates the carpenter bees and wood-boring beetles that are attracting the woodpecker.
- Day 3: Repair Existing Cavities. Do not leave holes open, as they will attract secondary pests like starlings or squirrels. For shallow holes, use a paintable exterior wood filler like DAP DryDex. For deep, structural excavations, use a two-part structural epoxy such as Abatron WoodEpox (approx. $65 per kit), which hardens to match the density of natural timber.
- Day 4: Paint and Color-Match. Woodpeckers are highly visual. Studies indicate they are less likely to attack surfaces that are painted in light, reflective colors (whites, light grays) compared to dark browns or natural cedar stains. Paint the repaired areas with a high-gloss or semi-gloss exterior acrylic latex paint.
- Day 5: Install Primary Physical Barriers. Mount your standoff brackets and stretch the 3/4-inch polypropylene netting across the vulnerable facades. Ensure the bottom edge of the netting is pulled taut and secured flush against the lower trim to prevent birds from flying up underneath.
- Day 6: Deploy Secondary Harassment. Hang holographic Irri-Tape strips from the eaves above the netted areas. The combination of a physical barrier and unpredictable visual flashing creates an overwhelming sensory deterrent.
- Day 7: Monitor and Adjust. Observe the property at dawn and dusk. If drumming persists on unprotected metal gutters, wrap the gutters in foam padding or install hardware cloth over the specific impact zone.
Cost Breakdown: DIY vs. Professional Installation
The financial investment in a woodpecker deterrent system varies wildly based on the height of your home and the square footage of the affected area.
DIY Approach: For a standard single-story home with 200 square feet of vulnerable fascia and siding, expect to spend $150 to $250 on materials. This includes two boxes of Bird B Gone netting ($80), a kit of stainless steel standoff hooks ($45), Irri-Tape ($20), and exterior wood filler ($15). The primary cost here is your own labor and the physical risk of working on ladders.
Professional Wildlife Control: Hiring a licensed pest control or wildlife exclusion company typically costs between $8 and $15 per linear foot for netting installation. For a two-story home requiring 100 linear feet of eave protection, professional quotes generally range from $1,200 to $2,200. Professionals carry liability insurance and possess the specialized scaffolding required to safely tension netting on steep pitches and multi-story peaks. If your home exceeds two stories or features complex architectural gables, professional installation is highly recommended to ensure the 4-inch standoff gap is maintained uniformly across the entire structure.

