
Tree Care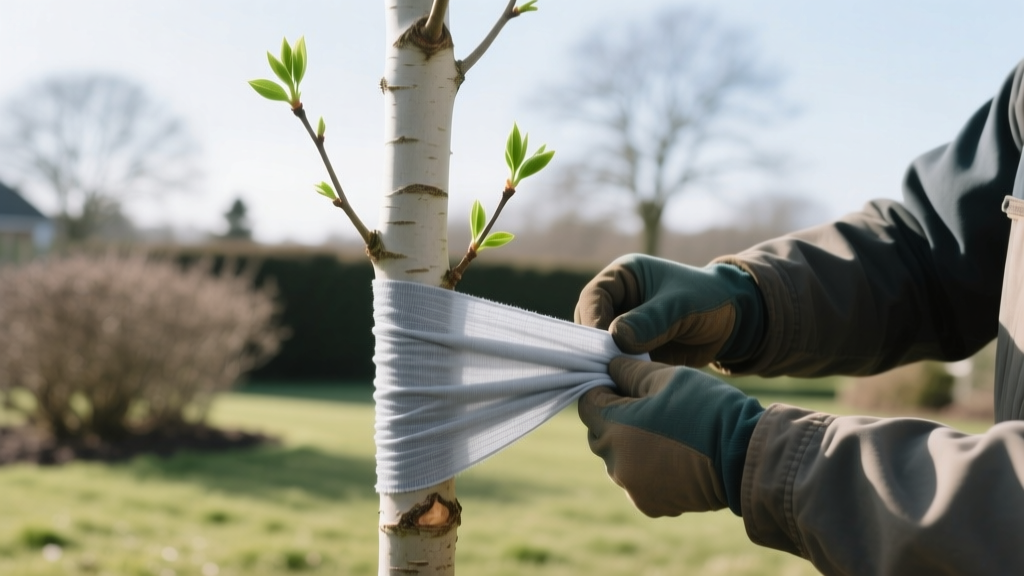
How to Apply Tree Wraps to Protect Young Trees in Winter
The Physiology of Winter Bark Damage
Thin-barked trees planted within the last three years face a severe, often invisible threat during winter months: southwest injury. When ambient air temperatures hover around 20°F (-6°C), direct winter sunlight can heat the dark, exposed bark on the southwest side of a trunk to over 70°F (21°C). This drastic temperature differential tricks the underlying cambium cells into breaking dormancy. When the sun sets and temperatures rapidly plunge back below freezing, these active cells freeze, rupture, and die, resulting in sunscald.
Simultaneously, the outer bark cools and contracts faster than the inner wood. This creates immense mechanical tension, leading to longitudinal frost cracks that can split the trunk entirely. Current 2026 arboriculture guidelines dictate that any deciduous tree with a Diameter at Breast Height (DBH) under 4 inches and thin bark—specifically Acer rubrum (Red Maple), Pyrus calleryana (Callery Pear), Prunus spp. (Cherries and Plums), and Tilia americana (Basswood)—requires physical trunk protection until the bark thickens and develops deep fissures.
Material Selection: What to Buy
Not all tree wraps are created equal. The primary goal of a wrap is to reflect solar radiation and insulate the cambium, not just to provide a physical barrier. Below is a comparison of the most common commercial tree wraps available to homeowners and landscape professionals.
| Material Type | Avg. Cost (per 150ft roll) | Solar Reflectivity | Lifespan | Best Use Case |
|---|---|---|---|---|
| White Polypropylene Fabric | $12 - $18 | High (Reflects UV) | 2-3 Years | Long-term protection, high-sun exposure zones |
| Crepe Paper (e.g., DeWitt) | $4 - $7 | Moderate | 1 Season | Budget-friendly, standard residential planting |
| Corrugated Cardboard | $5 - $9 | Low | 1 Season | Temporary frost protection, bulk commercial jobs |
| Natural Burlap | $10 - $15 | Very Low | 1-2 Years | Wind desiccation protection (Not recommended for sunscald) |
Expert Tip: Always choose white or light-tan wraps. Dark green or brown wraps absorb solar radiation, defeating the primary purpose of preventing cambial heating during winter afternoons.
Step-by-Step Application Protocol
Improper application is the leading cause of wrap-related tree death. A wrap that is too tight will girdle the tree as it grows, while a wrap that starts too high will leave the critical root flare vulnerable. Follow this exact sequence for optimal protection.
- Prep the Trunk: Brush away any soil, mulch, or debris from the base of the trunk. Inspect the lower 12 inches for existing borer holes or mechanical damage from string trimmers.
- Anchor the Base: Begin wrapping exactly 1 inch below the soil line. Burying the bottom edge prevents rodents (like voles and mice) from tunneling under the wrap and girdling the root flare. Hold the end firmly against the trunk.
- Wrap Upward at a 33% Overlap: Pull the wrap snugly—but not tight—and spiral upward. Each new layer must overlap the previous layer by exactly one-third (33%). This shingle effect sheds melting snow and rain away from the bark.
- Stop at the First Scaffold Branch: Continue wrapping until you reach the lowest major lateral branch. There is no need to wrap the upper canopy or secondary branches.
- Secure the Top: Cut the wrap and secure it using a stretchable polyurethane tape, specialized tree tie, or natural jute twine.
WARNING: Never use duct tape, electrical tape, or wire directly against the bark. These materials do not stretch, will girdle the expanding trunk within months, and leave toxic adhesive residues that damage the periderm.
The Critical Removal Window
According to extension research on winter injury, leaving tree wraps on year-round is a fatal mistake. Tree wraps must be treated as seasonal garments, not permanent fixtures.
"Tree wraps should be removed in early spring, typically by mid-March or immediately after the last hard freeze. Leaving wraps on during the spring growing season traps moisture against the bark, creating an ideal microclimate for fungal pathogens like Phytophthora and Armillaria root rot."
Exact Removal Triggers:
- When local soil temperatures consistently reach 45°F (7°C) at a 2-inch depth.
- When the tree's leaf buds begin to show green tissue (bud swell).
- No later than April 15th in USDA Hardiness Zones 4 through 6.
Troubleshooting Common Edge Cases
Rodent Damage Under the Wrap
If you notice chewed bark at the soil line when removing the wrap in spring, voles have likely nested under the material. The Fix: For the following winter, apply the tree wrap as usual, but install a 1/4-inch galvanized hardware cloth cylinder around the base. The hardware cloth should extend 18 inches above the soil and 2 inches below, creating a physical barrier that allows airflow while stopping rodents.
Trunk Caliper Expansion
Young trees can increase their DBH by 0.5 to 1 inch in a single growing season. If you are using multi-year polypropylene wraps, you must completely unroll and re-wrap the tree every autumn. Reusing the same spiral pattern without adjusting the tension will result in severe girdling as the trunk expands against the non-yielding fabric.
Evergreen Trees and Wraps
Do not apply trunk wraps to evergreen species (Pines, Spruces, Junipers) unless specifically treating a mechanical wound. Evergreens rely on their needles for winter transpiration and have naturally adapted bark structures that do not suffer from southwest sunscald in the same manner as thin-barked deciduous species. Wrapping evergreen trunks often leads to unnecessary moisture trapping and bark decay.

