
Tree Care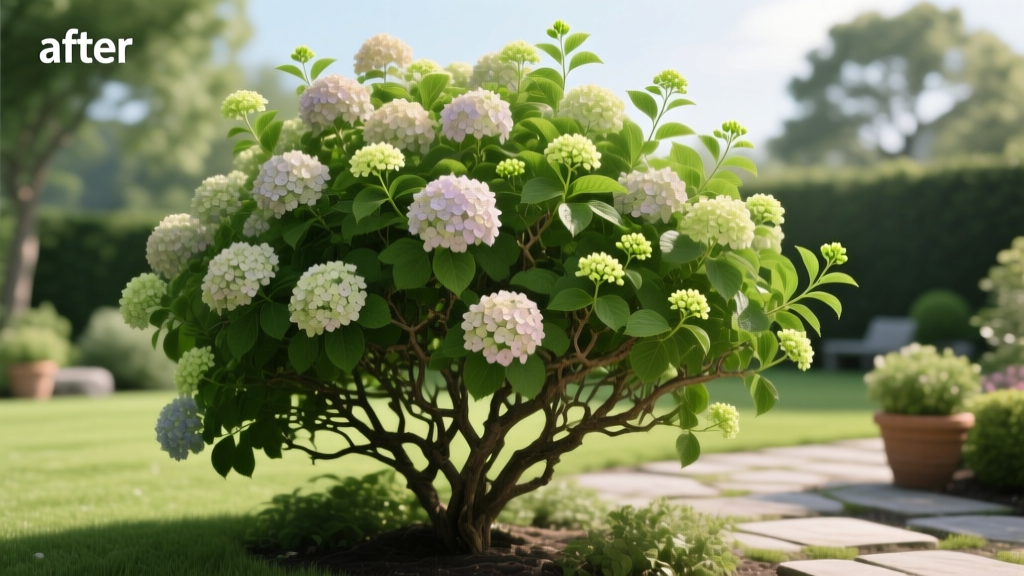
Before and After Hydrangea Pruning: Rejuvenate Overgrown Shrubs
The difference between a sparse, leggy shrub and a lush, bloom-heavy specimen often comes down to a single factor: strategic cutting. When analyzing before and after hydrangea pruning results, the most dramatic transformations occur when homeowners stop treating all hydrangeas as a monolith. Pruning a panicle hydrangea like a mophead will obliterate your summer display, while neglecting an oakleaf variety leads to woody, unproductive tangles.
This guide bypasses generic advice to deliver species-specific pruning protocols, exact tool requirements, and the physiological mechanics that drive the visual transformation from overgrown mess to structured, high-yielding shrub.
The Botanical Divide: Old Wood vs. New Wood
The fundamental rule of hydrangea care hinges on where the plant sets its flower buds. Misidentifying this trait is the primary cause of 'blind' shrubs (plants that produce lush foliage but zero flowers). According to North Carolina State Extension, hydrangeas are strictly categorized by their blooming wood, which dictates the exact pruning window.
| Common Name | Botanical Species | Blooms On | Pruning Window | Before & After Impact |
|---|---|---|---|---|
| Mophead / Lacecap | H. macrophylla | Old Wood | Immediately after flowering (late summer) | Removes dead weight, preserves next year's buds |
| Panicle | H. paniculata | New Wood | Late winter / early spring (dormancy) | Massive bloom size increase, stronger stems |
| Smooth / Annabelle | H. arborescens | New Wood | Late winter (cut to ground) | Prevents winter damage, promotes giant flower heads |
| Oakleaf | H. quercifolia | Old Wood | Rarely needed; shape after bloom | Maintains natural architecture, removes dieback |
| Reblooming | H. macrophylla (e.g., Endless Summer) | Both Old & New | Early spring (deadwood only) | Cleans up winter kill, encourages continuous flush |
Before and After Hydrangea Pruning: Real-World Scenarios
To understand the physical transformation, we must look at specific pruning techniques applied to the two most commonly mismanaged species in residential landscapes.
Scenario 1: The Neglected Mophead (H. macrophylla)
Before: A 6-foot-wide, 5-foot-tall thicket of crossing canes. The interior is shaded out, leading to fungal issues like Cercospora leaf spot. Blooms are small, sparse, and confined only to the outermost edges where sunlight penetrates. Spent flower heads from the previous year remain attached, weighing down stems.
The Technique: Mopheads require a two-pronged approach. First, deadhead spent blooms by cutting the stem just above the first pair of healthy, plump buds below the flower. Second, perform structural thinning. Identify the oldest, thickest canes (usually gray and peeling) and cut them completely to the soil line. Remove no more than 20% to 30% of the total canes in a single season to avoid shocking the root system.
After: The shrub is reduced to a 4-foot framework with an open center. Sunlight and airflow reach the interior buds. The following summer, the remaining canes produce larger, more vibrantly colored blooms, and new basal shoots emerge to replace the removed old wood.
Scenario 2: Rebuilding a Tree-Form Panicle (H. paniculata)
Before: A 'Limelight' or 'Quick Fire' panicle hydrangea that has become top-heavy. The stems are thin and spindly, causing the massive late-summer flower panicles to bend and snap under their own weight or during heavy rain. The base is bare and woody.
The Technique: Because panicles bloom exclusively on new wood, they tolerate aggressive rejuvenation. In late February or early March (before bud break), cut the entire shrub back to 18 to 24 inches from the ground. If training a tree-form (standard), select one or three strong central leaders, remove all lower lateral branches, and cut the top canopy back by 50% to force lateral branching.
After: By late spring, the shrub pushes out thick, rigid, vertical shoots. Because the plant's energy is concentrated into fewer growing points, the resulting panicles are often 30% to 50% larger than the previous year, and the heavier caliper stems easily support the weight of the blooms without staking.
The Execution: Step-by-Step Rejuvenation Protocol
Achieving professional before and after hydrangea pruning results requires the right equipment and precise cutting mechanics. Ragged cuts invite wood-boring insects and fungal cankers.
- Sanitize Tools: Wipe blades with 70% isopropyl alcohol between every single shrub to prevent the transmission of Botrytis blight and Hydrangea ringspot virus.
- Select the Right Blade: Use bypass pruners (e.g., Felco F-2) for stems under 1/2 inch in diameter. Switch to 28-inch bypass loppers (e.g., Fiskars PowerGear2) for canes up to 1.5 inches. Never use anvil pruners, which crush the vascular tissue of hydrangea stems.
- Locate the Node: Identify a pair of healthy, swelling buds on the stem. These are your growth nodes.
- Make the Cut: Position the blade exactly 1/4 inch above the node. Angle the cut at 45 degrees, sloping away from the bud to shed water and prevent rot.
- Clear the Base: Rake out all fallen debris, dead leaves, and clipped wood from the root zone to eliminate overwintering sites for pests and fungal spores.
⚠️ CRITICAL WARNING: Climbing Hydrangeas
Never apply rejuvenation pruning to Hydrangea petiolaris (Climbing Hydrangea). These slow-growing vines take up to five years to establish and bloom on old wood. Pruning them heavily will result in a multi-year loss of blooms and can permanently stunt their clinging root structures. Only remove dead wood or stray tendrils immediately after flowering.
Post-Pruning Nutrition and Soil Amendment
The 'after' phase of pruning is incomplete without addressing the soil chemistry. Pruning stimulates a massive flush of vegetative growth, which rapidly depletes local soil nutrients.
For acid-loving mopheads and oakleaf hydrangeas, apply a granular, slow-release fertilizer formulated for ericaceous plants. Espoma Holly-tone (4-3-4 NPK) is the industry standard. Apply at a rate of 1 cup per foot of branch spread, scratching it lightly into the top inch of soil. To maintain or enhance blue pigmentation in H. macrophylla, the soil pH must remain between 5.2 and 5.5. If your soil tests above 6.0, apply elemental sulfur at a rate of 1 pound per 100 square feet in early spring to lower the pH and unlock aluminum ions, which are responsible for the blue anthocyanin pigments.
'The most common mistake homeowners make after a hard spring pruning is over-fertilizing with high-nitrogen synthetic blends. This pushes weak, sappy growth that attracts aphids and fails to harden off before winter. Stick to organic, slow-release formulations.' — Clemson University HGIC Guidelines on Shrub Maintenance
Finally, replenish the mulch layer. Apply 2 to 3 inches of double-shredded hardwood bark or pine straw over the root zone, keeping it strictly 3 inches away from the main crown to prevent crown rot. This retains the soil moisture necessary to support the new growth generated by your precise pruning cuts, ensuring the dramatic visual improvement lasts well into the autumn months.
For further reading on regional pruning schedules and disease management, consult the Clemson University Home & Garden Information Center or your local county extension office.

