
Tree Care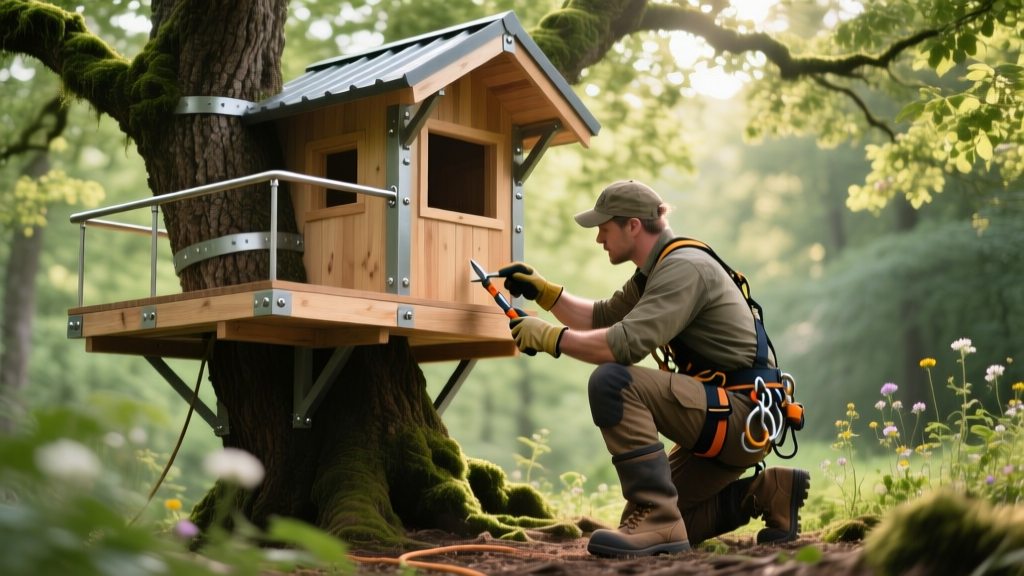
How to Build a Tree Home Safely: An Arborist’s Guide
The Hidden Danger of Traditional Treehouse Hardware
When families decide to build a tree home, the focus is usually on the design of the fort, the trapdoor, or the zip line. However, from an arboriculture perspective, the most critical phase is the initial attachment to the living organism. Traditional DIY methods—such as driving dozens of galvanized nails, wrapping cables around branches, or using standard lag screws—introduce severe long-term health risks to the tree.
⚠️ Arborist Warning: The Girdling Effect
Wrapping ropes, chains, or wires around a branch or trunk restricts the flow of water and nutrients through the phloem and xylem. As the tree grows, these materials become embedded in the bark, eventually girdling and killing the limb or the entire tree. Furthermore, standard nails create dozens of small, permanent wound columns that decay fungi can exploit.
Trees do not "heal" wounds in the way human skin does; instead, they use a process called Compartmentalization of Decay in Trees (CODIT) to seal off damaged tissue. According to the University of Minnesota Extension, a tree will attempt to wall off decay, but dozens of closely spaced nail holes can overwhelm the tree's chemical defense boundaries, leading to structural failure years down the line. To build a tree home responsibly, you must minimize the number of puncture wounds and use specialized hardware designed for living wood.
Step 1: Selecting the Right Tree Species
Not all trees are engineered to hold the dynamic and static loads of a tree home. Softwoods and fast-growing species often lack the shear strength required to hold heavy steel bolts without splitting. You need a mature, healthy hardwood with a dense Janka hardness rating and a wide, stable trunk.
| Tree Species | Suitability | Janka Hardness (lbf) | Arborist Notes |
|---|---|---|---|
| White Oak | Excellent | 1,360 | Superior load-bearing; highly resistant to rot and decay. |
| Hickory | Excellent | 1,820 | Extremely dense; requires pre-drilling but holds hardware exceptionally well. |
| Red Maple | Moderate | 950 | Good for lighter structures; prone to heartwood decay if wounds are mishandled. |
| White Pine | Poor | 420 | Softwood; high risk of bolt pull-out and branch snap under dynamic wind loads. |
| Birch | Poor | 1,260 | Hard but brittle; shallow root system makes it unstable for elevated structures. |
For optimal safety and tree health, select a tree with a trunk diameter of at least 18 inches at the base, and ensure the attachment points are on the main trunk or primary scaffold branches that are at least 8 to 10 inches in diameter. The Arbor Day Foundation recommends a thorough health inspection to ensure the tree is free from fungal conks, deep bark fissures, or deadwood before any construction begins.
Step 2: Using Treehouse Attachment Bolts (TABs)
The gold standard in modern arboriculture for building a tree home is the Treehouse Attachment Bolt (TAB), sometimes referred to as a Garnier Limb (GL). Unlike a standard lag screw, a TAB features a thick, smooth shaft and a wide flange (called a boss) that rests against the outside of the bark.
Hardware Sizing and Load Capacities
A standard 1.25-inch diameter TAB, when installed correctly into a healthy hardwood like White Oak, can support a shear load of over 8,000 pounds. This immense strength allows you to use just two or four main attachment points for an entire platform, drastically reducing the number of wounds inflicted on the tree.
The Precision Drilling Process
Installing a TAB is not as simple as driving a screw into a 2x4. It requires heavy-duty equipment and precise technique to prevent bark tearing and wood splintering.
- Bit Selection: Use a high-quality ship auger bit. For a 1.25-inch TAB, you typically need a 1-inch or 1.125-inch auger bit (always defer to the specific TAB manufacturer's drilling chart, as threading depths vary).
- Drilling Angle: Drill slightly upward at a 1 to 2-degree angle. This ensures that rainwater naturally drains out of the hole rather than pooling inside the heartwood, which could accelerate internal decay.
- Depth Control: Mark your drill bit with tape to ensure you penetrate past the sapwood and into the dense heartwood, usually requiring a depth of 8 to 12 inches depending on the bolt length.
- Bark Preservation: Use a sharp hole saw or chisel to cleanly remove the bark exactly where the TAB boss will sit. The flange must rest flush against the hard sapwood, not on top of the soft, compressible bark, which would rot and cause the bolt to loosen.
Step 3: Allowing for Tree Growth and Movement
Trees are dynamic, living structures. They grow outward (secondary growth) and sway in the wind. If you rigidly attach a wooden beam between two separate trees, the natural, independent swaying caused by wind gusts will eventually tear your structure apart or rip the bark off the trees.
💡 Pro Tip: Dynamic Sliding Brackets
When spanning a gap between two trees, bolt your main support beam securely to the primary tree using a standard TAB. On the secondary tree, install a TAB with a sliding treehouse bracket. This specialized hardware features a long, slotted steel channel that allows the beam to slide back and forth up to 4 to 6 feet as the trees sway independently in the wind, completely eliminating structural stress and bark tearing.
Furthermore, as the tree grows wider, it will eventually envelop the smooth shaft of the TAB. Because the boss (flange) keeps the wooden beam spaced 3 to 6 inches away from the trunk, the tree can continue to expand its girth without the wooden beams girdling the trunk. Over a decade or two, the tree will literally grow over the smooth shaft, locking the bolt into the wood with the tree's own biological mass.
Post-Build Tree Care and Monitoring
Once the tree home is built, your responsibility to the tree's health is not over. The construction process compacts the soil around the root zone, and the added weight changes the tree's center of gravity.
- Mulch the Root Zone: Apply a 2-to-3-inch layer of organic wood chip mulch in a wide ring around the base of the tree (out to the drip line if possible) to retain moisture and regulate soil temperature. Keep the mulch at least 3 inches away from the trunk flare to prevent collar rot.
- Deep Watering: During the first two summers after construction, provide deep, slow watering during dry spells. The tree needs extra energy to compartmentalize the drill wounds and sustain the new canopy growth required to balance the added weight of the structure.
- Annual Inspections: Every spring, inspect the TAB boss. If the tree's bark is beginning to grow over the flange, do not cut the bark away; this is a sign of a healthy, sealing wound. However, if you see sap weeping heavily from the bolt site, fungal fruiting bodies, or cracking in the wood above the bolt, consult a certified arborist immediately.
Frequently Asked Questions
Do I need a permit to build a tree home?
Permit requirements vary wildly by municipality. Many suburban zoning boards classify treehouses under 100 square feet as "temporary play equipment" that does not require a permit, provided it is set back from property lines. However, if you are building a massive, multi-story structure with plumbing or electricity, it will likely be classified as an Accessory Dwelling Unit (ADU) or permanent outbuilding, requiring full permitting and inspections.
Can I build a tree home in a tree with a hollow trunk?
Generally, no. While a hollow trunk does not automatically mean a tree is dead or structurally unsound (trees can live for centuries as hollow tubes), the missing heartwood severely reduces the wood's ability to grip the threads and shaft of a Treehouse Attachment Bolt. The bolt may pull out under the dynamic load of children playing. Always have an ISA Certified Arborist perform a sonic tomography or resistance drilling test to assess the remaining wall thickness before installing heavy hardware.
Will the tree eventually swallow the treehouse?
If designed correctly, no. By using the wide flange of a TAB to keep the wooden beams spaced several inches away from the bark, the tree can expand its trunk diameter for decades without touching the structure. If you use nails or wrap ropes directly against the bark, the tree will absolutely swallow the materials, leading to severe structural rot in the lumber and fatal girdling for the tree.

