
Tree Care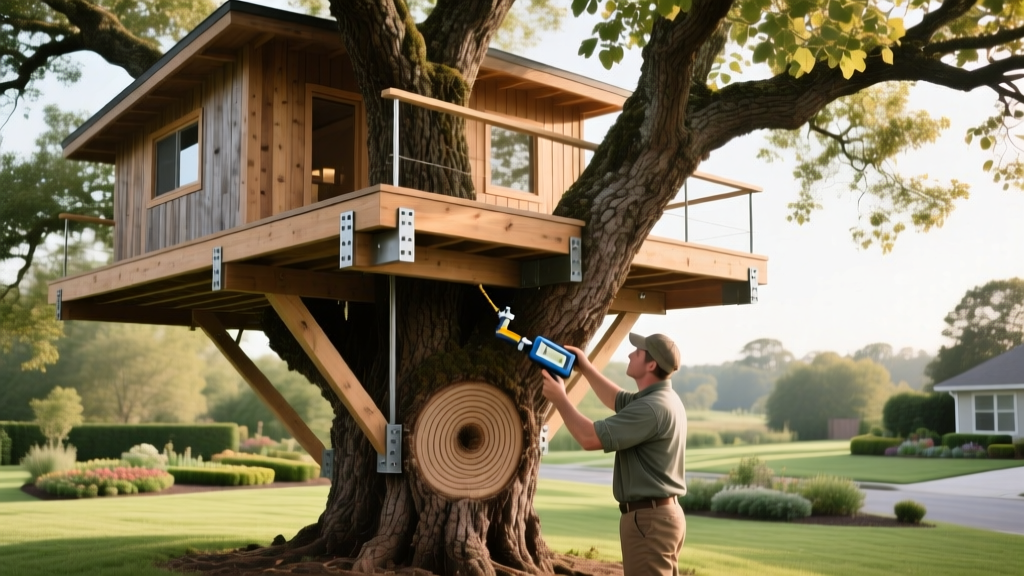
How to Build a Tree House: Diagnosing Tree Health & Load Solutions
Building a treehouse is fundamentally an exercise in applied arboriculture. While most DIY guides focus exclusively on carpentry, they ignore the biological reality of the host tree. The most common failure mode in backyard treehouses is not structural collapse, but the slow death of the host tree due to girdling, cambium damage, and critical root zone compaction. To understand how to build a tree house that lasts decades without killing your tree, you must approach the project through the lens of problem diagnosis and structural-botanical solutions.
Phase 1: Host Tree Diagnostics and Load-Bearing Capacity
The first diagnostic hurdle is determining if your tree can physically support the dead load (the structure) and live load (occupants, wind, snow). A common mistake is selecting a tree based on canopy size rather than trunk density and root architecture.
The DBH and Species Matrix
Trunk diameter at breast height (DBH)—measured 4.5 feet above the ground—is your primary metric. For a standard 8x8 foot treehouse weighing roughly 2,500 lbs, you need a minimum DBH of 12 inches for a single-tree support, or 18 inches if the tree is bearing the majority of a multi-tree span. However, DBH is useless without accounting for wood density and rot resistance.
| Tree Species | Janka Hardness (lbf) | Min DBH (Single Tree) | Rot Resistance & Notes |
|---|---|---|---|
| White Oak | 1,360 | 12 inches | Excellent. Dense heartwood resists bolt tear-out and decay. |
| Hickory | 1,820 | 10 inches | Superior. Extremely hard, but prone to shock-splitting if drilled improperly. |
| Douglas Fir | 660 | 16 inches | Moderate. Requires larger lag bolts and wider load distribution. |
| White Pine | 420 | 20+ inches | Poor. Soft wood compresses under heavy loads; avoid for primary supports. |
Diagnostic Warning: Canopy Dieback
Before finalizing your tree selection, inspect the upper canopy. If more than 15% of the upper branches show dieback, or if you spot fungal conks (shelf mushrooms) on the lower trunk, the tree is in decline. According to the Arbor Day Foundation, fungal fruiting bodies indicate advanced internal heart rot, rendering the tree structurally compromised regardless of its exterior DBH.
Before finalizing your tree selection, inspect the upper canopy. If more than 15% of the upper branches show dieback, or if you spot fungal conks (shelf mushrooms) on the lower trunk, the tree is in decline. According to the Arbor Day Foundation, fungal fruiting bodies indicate advanced internal heart rot, rendering the tree structurally compromised regardless of its exterior DBH.
Phase 2: Solving the Attachment Problem with TABs
The most catastrophic mistake builders make is using standard galvanized lag screws or wrapping cables around the trunk. As the tree grows outward (secondary growth), cables and tight brackets girdle the phloem and cambium layers, effectively strangling the tree. Nails and standard screws create multiple wound sites that invite pathogens.
The industry-standard solution is the Treehouse Attachment Bolt (TAB). A TAB is a specialized, heavy-duty 304-grade stainless steel bolt featuring a threaded shaft, a smooth cylindrical boss (which the tree grows around), and a perpendicular perch that holds the support beam away from the bark.
Step-by-Step TAB Installation Protocol
- Calculate Load Points: For an 8x8 structure, use a minimum of four TABs. As of 2026, commercial-grade TABs (like the Garnier Limb series) cost between $110 and $160 each, but they are non-negotiable for tree health.
- Drill the Pilot Hole: Use a sharp, self-feeding auger bit matching the exact core diameter of the TAB (typically 1.25 inches). Drill perfectly level into the heartwood to a depth of 6 to 8 inches. Never use a spade bit, which tears the cambium.
- Thread the TAB: Using a heavy-duty impact wrench or a specialized TAB installation tool, drive the threaded shaft into the heartwood until the smooth boss is flush against the bark.
- Establish the Growth Gap: The support beam must rest on the TAB's perch, leaving a strict 2-inch clearance between the back of the beam and the tree's bark. This allows the tree to expand outward over the next 15-20 years without touching the structure.
Phase 3: Mitigating Critical Root Zone (CRZ) Compaction
While builders focus on the trunk, the roots are often destroyed during construction. The Critical Root Zone (CRZ) is the area where the majority of a tree's fine, water-absorbing feeder roots live. Soil compaction from foot traffic, wheelbarrows, and material piles crushes soil macropores, suffocating the roots.
The CRZ Formula and Protection Plan
Calculate the CRZ using the standard arborist formula: 1 foot of radial distance for every 1 inch of trunk DBH. If your host oak has a 20-inch DBH, the CRZ extends 20 feet in all directions from the trunk.
- Temporary Trackways: Lay down 3/4-inch plywood sheets over the CRZ to distribute the weight of wheelbarrows and foot traffic. Remove them daily.
- Material Staging: Stage all lumber, concrete, and heavy hardware outside the CRZ boundary. Never mix concrete or wash tools inside the drip line, as the alkaline runoff alters soil pH and damages roots.
- Mulch Buffer: Apply a 3-inch layer of coarse arborist wood chips over the CRZ before construction begins to act as a shock absorber. Keep the mulch 4 inches away from the trunk flare to prevent collar rot.
'Soil compaction reduces pore space, limiting oxygen diffusion to roots. Once a tree's feeder roots die from compaction, the canopy will show stress symptoms 2 to 5 years later, long after the treehouse is built.' — University of Minnesota Extension
Phase 4: Dynamic Sway and Wind Load Engineering
Trees are not static pillars; they are dynamic organisms that sway in the wind. A mature oak can sway several inches in a moderate breeze. If you bolt rigid beams between two separate trees, the differential movement will either tear the beams apart or rip the TABs out of the wood.
The Sliding Bracket Solution
When spanning a beam between two trees, one end must be fixed, and the other must slide. 1. Fixed End: Bolt the beam directly to the TAB perch on Tree A using a 1-inch stainless steel through-bolt. 2. Sliding End: On Tree B, install a heavy-duty sliding bracket (such as the Simpson Strong-Tie LS or similar structural slide bearings). Drill an elongated, horizontal slot through the beam. As Tree B sways independently of Tree A, the bolt slides laterally within the slot, absorbing the kinetic energy without stressing the wood fibers.
Troubleshooting Common Treehouse Failure Modes
Even with proper planning, biological variables can cause issues. Use this diagnostic matrix to identify and solve post-construction problems.
| Symptom | Diagnosis / Cause | Corrective Solution |
|---|---|---|
| Heavy sap bleeding around the bolt site | Drill bit overheated the cambium, or installation occurred during peak spring sap flow (March-April). | Do not seal with tar or paint (this traps moisture and causes rot). Allow it to air-dry and compartmentalize naturally. Schedule future drilling for late summer or winter dormancy. |
| Bark swelling over the TAB perch | The 2-inch growth gap was insufficient, or the tree is a fast-growing species like Silver Maple. | Unbolt the support beam, remove the perch, add a 1.5-inch stainless steel spacer sleeve to the boss, and reattach the perch further from the bark. |
| Structure swaying violently, causing joint squeaks | Diagonal knee braces are too rigidly attached to the lower trunk, fighting the tree's natural harmonic sway. | Replace rigid lower-trunk attachments with flexible, heavy-duty steel cable tensioners that allow for micro-movements while still providing vertical load support. |
Building a treehouse requires respecting the biology of the host. By utilizing proper diagnostic metrics, investing in specialized TAB hardware, and protecting the critical root zone, you ensure the structure remains safe and the tree remains healthy. For complex builds or trees showing signs of stress, always consult a certified arborist through the International Society of Arboriculture before driving the first bolt.

