
Tree Care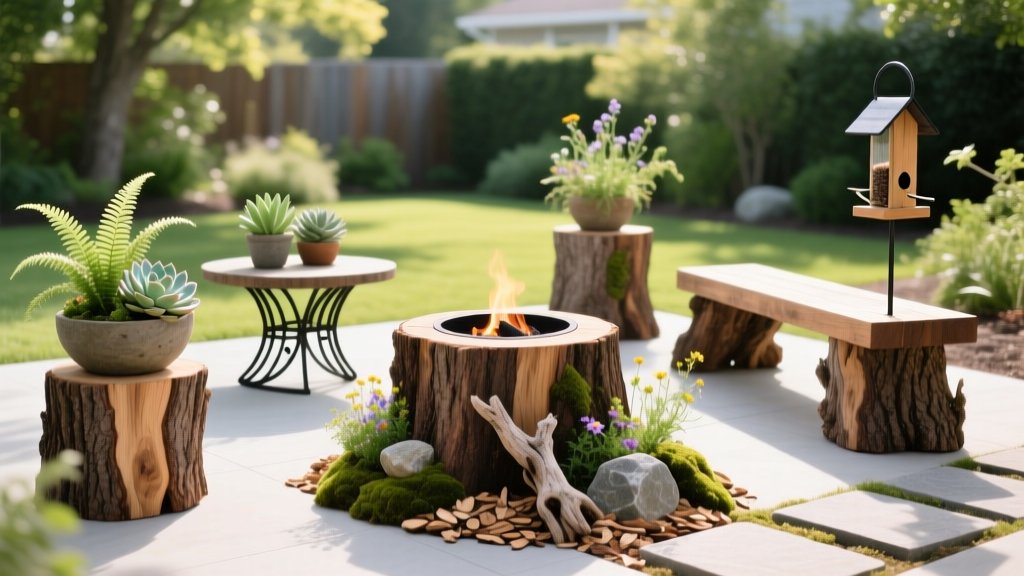
12 Creative Tree Stump Ideas to Upcycle After Tree Removal
The Hidden Value in Leftover Wood
When a hazardous or dying tree is removed, homeowners are often left with an unsightly stump. As of 2026, professional stump grinding services charge an average of $4 to $6 per inch of diameter, meaning a large 30-inch oak stump can cost upwards of $180 just to eradicate. However, viewing the remnant as a liability ignores its potential. By exploring creative tree stump ideas, you can transform this leftover wood into functional landscaping features, ecological habitats, and artistic yard focal points without spending a dime on removal.
Before grabbing a chainsaw or calling a grinding service, assess the stump's structural integrity. The species of the tree and its current decay level will dictate which upcycling projects are viable. Dense hardwoods like Black Locust, Osage Orange, and White Oak can remain structurally sound for 15 to 20 years, while softer woods like Pine, Birch, and Aspen may succumb to fungal rot in as little as 3 to 5 years.
Stump Condition Matrix: Choosing Your Project
Not every stump is suitable for a load-bearing stool or a sealed table. Use this decision framework to match your stump's current biological state with the most appropriate upcycling strategy.
| Stump Condition | Visual & Tactile Signs | Best Upcycling Applications | Avoid |
|---|---|---|---|
| Solid & Freshly Cut | Bark intact, wood firm, no fungal brackets, sap still weeping. | Pedestal tables, seating stools, planter bases. | Immediate sealing (traps moisture and causes internal rot). |
| Weathered & Curing | Bark peeling, surface dry, minor checking (cracking), no soft spots. | Fairy gardens, carved art, pollinator hotels. | Heavy weight-bearing without internal reinforcement. |
| Soft & Decaying | Spongy texture, presence of carpenter ants, mushroom fruiting bodies. | Nurse logs, moss gardens, wildlife brush piles. | Sealing, painting, or using as furniture. |
Functional Landscaping Upcycles
1. Natural Pedestal Tables
A flat-topped stump makes an excellent rustic side table for a patio or fire pit area. To achieve a level surface on an uneven stump, rent a chainsaw mill or use an angle grinder equipped with a 40-grit wood carving disc (such as the Arbortech TURBOPlane). Once leveled, the wood must cure for 3 to 6 months before sealing. Apply a high-quality end-grain sealer like Anchorseal 2 (approximately $48 per gallon) to prevent the wood from splitting as it loses moisture. Two coats on the top grain and one coat on the exposed side bark will lock in the natural aesthetics while repelling rain.
2. Built-In Planters for Ferns and Moss
For stumps that are beginning to soften at the core, hollow them out to create a natural planter. Use a 2-inch spade bit or a Forstner bit to drill overlapping holes 6 to 8 inches deep into the center of the stump. Chisel out the remaining webbing to create a bowl-like cavity. Line the bottom with a 1-inch layer of gravel for drainage, then fill with a moisture-retaining mix like Miracle-Gro Moisture Control Potting Mix. This setup is ideal for shade-loving plants such as Japanese Painted Ferns, Hostas, or sheet moss.
3. Hose and Tool Valets
Drive three 1/2-inch galvanized steel rebar stakes into the top of a medium-sized stump, leaving 18 inches exposed. This creates a heavy, wind-proof valet for wrapping garden hoses, hanging pruning shears, or holding a coiled soaker hose. The immense weight of the root ball anchors the valet far better than lightweight plastic garden organizers.
Ecological & Wildlife Projects
4. Native Pollinator Hotels
Solitary bees, such as mason bees and leafcutter bees, are vital for garden pollination but do not live in hives. They nest in hollow stems and abandoned beetle burrows. You can replicate this habitat by drilling horizontal holes into the side of a solid stump. According to guidelines from the Xerces Society for Invertebrate Conservation, use a 5/16-inch drill bit for mason bees and a 3/8-inch bit for leafcutter bees. Drill the holes 4 to 6 inches deep, spacing them about 3/4 inch apart. Do not drill all the way through the stump; the closed back end is required for the bees to pack their pollen provisions.
5. The 'Nurse Log' Decomposition Zone
If the stump is heavily decayed, do not fight nature. Accelerate the breakdown process by turning it into a nurse log. As the wood rots, it acts as a sponge, retaining moisture and slowly releasing nitrogen, phosphorus, and potassium back into the soil. Plant native woodland groundcovers like Wild Ginger or Creeping Phlox directly around the base. The decaying root system will feed these plants for a decade, creating a rich, biologically active microclimate in your yard.
Warning: Carpenter Ants and Termites
If you notice large, black carpenter ants excavating smooth galleries inside the stump, the internal structural integrity is compromised. While carpenter ants do not eat wood (they only excavate damp, decaying wood), their presence indicates advanced internal rot. According to the University of Minnesota Extension, if the stump is within 10 feet of your home's foundation, it is safer to hire a professional to grind and remove it rather than upcycle it, to prevent the colony from expanding toward your house.
If you notice large, black carpenter ants excavating smooth galleries inside the stump, the internal structural integrity is compromised. While carpenter ants do not eat wood (they only excavate damp, decaying wood), their presence indicates advanced internal rot. According to the University of Minnesota Extension, if the stump is within 10 feet of your home's foundation, it is safer to hire a professional to grind and remove it rather than upcycle it, to prevent the colony from expanding toward your house.
Artistic & Playful Yard Additions
6. Fairy Garden Habitats
Stumps under 24 inches tall are the perfect foundation for miniature fairy gardens. Carve small doorways into the base using a rotary tool (like a Dremel 4300) with a high-speed cutter bit. Use non-toxic, exterior-grade acrylic paints to add details, and surround the base with low-growing succulents like Sedum 'Angelina' or creeping thyme to simulate a miniature forest floor.
7. Ergonomic Stump Stools
For seating around a fire pit, cut the stump to an ergonomic height of 16 to 18 inches. If the stump is still in the ground, you may need to dig a trench around the base to get a reciprocating saw flush with the soil line. Sand the top surface progressively using 60-grit, then 120-grit, and finally 220-grit sandpaper. Finish with three coats of exterior marine-grade spar urethane to protect the seat from UV degradation and rain.
8. Outdoor Game Boards
A wide, flat stump can be transformed into a permanent checkerboard or tic-tac-toe station. Use a router with a straight-cut bit to carve shallow grooves into the top grain, creating the grid. Fill the grooves with a dark, exterior wood stain, and leave the rest of the wood natural. Pair it with a set of painted river stones stored in a nearby weatherproof bucket.
Step-by-Step: Prepping and Sealing a Stump for Longevity
To ensure your upcycled stump survives the elements for years rather than months, proper preparation is non-negotiable. Follow this exact protocol for freshly cut stumps:
- Debark the Sides (Optional): If the bark is loose, strip it off using a drawknife or a flat pry bar. Bark traps moisture and harbors wood-boring beetles. Leaving the bark on is aesthetically pleasing but reduces the stump's lifespan by 30% to 50%.
- Level the Top: Use a carpenter's level and a chalk line to mark a horizontal cut line. Cut along the line with a chainsaw, then smooth the surface with an angle grinder.
- Allow for Curing: Freshly cut 'green' wood has a moisture content of 40% to 60%. If you seal it immediately, the trapped moisture will cause catastrophic fungal rot from the inside out. Allow the stump to dry in the sun for 3 to 6 months until deep radial cracks (checking) begin to form.
- Fill and Sand: Fill large structural cracks with a two-part exterior epoxy wood filler. Once cured, sand the entire top surface to 120-grit smoothness.
- Apply the Sealant: Apply a penetrating wood sealer. For the top end-grain (which acts like a bundle of straws wicking moisture), apply two heavy coats of a wax-based emulsion sealer. For the sides, a standard water-repellent preservative like Thompson's WaterSeal Advanced Natural Wood Protector ($26 per gallon) is sufficient.
Frequently Asked Questions
How long will an upcycled tree stump last in the yard?
An untreated pine or birch stump will decompose in 3 to 7 years. A properly sealed White Oak, Black Locust, or Cedar stump can last 15 to 25 years. Elevating the stump slightly off the soil using hidden gravel or stone piers prevents ground moisture from wicking up into the root base, extending its life significantly.
Can I accelerate the decay process if I want it gone faster?
Yes. If you decide against upcycling and want the stump to rot naturally, drill several 1-inch holes into the top and fill them with high-nitrogen fertilizer or Epsom salt. Cover the stump with a black plastic tarp to trap heat and moisture. This biological acceleration can reduce a 10-year decay cycle down to 12 to 18 months, according to the Arbor Day Foundation.
Is it safe to burn a treated stump in my fire pit?
Never burn a stump that has been treated with wood sealants, epoxy, paints, or chemical stump removal accelerators (like potassium nitrate). Burning treated wood releases toxic volatile organic compounds (VOCs) and heavy metals into the air. Only burn untreated, naturally cured hardwood stumps.

