
Tree Care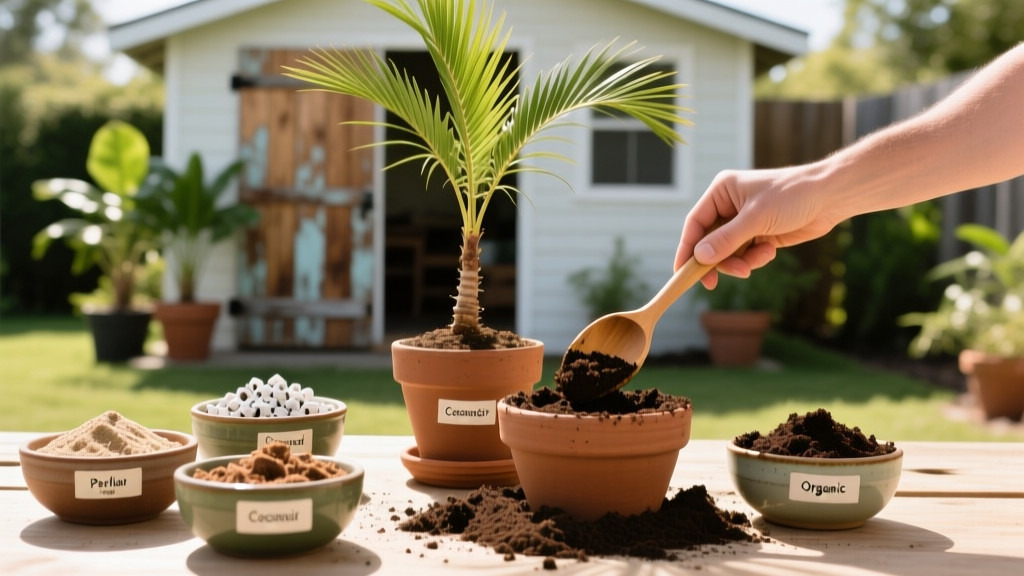
DIY Potting Soil for Palm Trees: Mixing Guide & Recipes
Why Standard Potting Mix Fails Palms
Container-grown palms fail primarily due to root asphyxiation, not underwatering. Unlike broadleaf tropicals, palms possess adventitious root systems that require exceptionally high oxygen levels at the root zone. Standard commercial potting soils—often heavily reliant on fine peat moss and vermiculite—retain too much moisture and collapse over time, suffocating palm roots and inviting fatal pathogens like Phytophthora root rot.
To cultivate thriving container palms, from indoor Parlor palms to outdoor Majesty palms, you must abandon generic topsoil and engineer a highly porous, fast-draining substrate. This guide details the exact materials, mesh sizes, and mixing ratios required to formulate the ideal potting soil for palm trees.
⚠️ The Peat Moss Trap: Many commercial "Cactus & Palm" mixes still contain up to 40% sphagnum peat moss. While peat holds water well, it becomes hydrophobic when completely dry and compacts heavily when wet. For long-term palm health, buffered coco coir is a vastly superior alternative that resists compaction and maintains a neutral pH.
Core Ingredients for Custom Palm Soil
Formulating a premium palm substrate requires balancing three distinct physical properties: moisture retention, macro-porosity, and chemical buffering. Sourcing the correct grades of these materials is critical.
1. The Base: Buffered Coco Coir
Coco coir provides the moisture-holding capacity palms need without the waterlogging associated with peat. You must use washed and buffered coir (look for an Electrical Conductivity or EC level below 0.5 mS/cm). Unbuffered coir contains high sodium levels that will induce severe nutrient lockout, specifically preventing calcium and magnesium uptake.
2. The Structure: Pine Bark Fines & Pumice
This is where most DIY mixes fail. You need rigid, non-decomposing materials to create permanent air pockets.
- Pine Bark Fines (1/4 inch mesh): Also sold as "soil conditioner." Avoid large mulch chips, which create air voids that dry out roots, and avoid fine sawdust, which acts like a sponge.
- Horticultural Pumice or Perlite (3/8 inch mesh): Pumice is vastly superior to perlite for palms. Perlite floats to the top of the pot over time and crushes easily. Pumice is porous volcanic rock that permanently maintains soil structure and absorbs excess moisture. Avoid "play sand" entirely; its fine, uniform particles lock together like concrete when wet.
3. The Nutrition & pH Buffers
Palms thrive in a slightly acidic to neutral pH range of 6.0 to 6.5. Because coir and pine bark are slightly acidic and lack calcium, you must amend the mix with agricultural dolomitic limestone at a rate of 1 cup per cubic foot of soil. This buffers the pH and provides a slow-release source of calcium and magnesium—two macronutrients palms heavily deplete.
💡 Debunking the Gravel Drainage Myth: Never place a layer of gravel or rocks at the bottom of a palm pot. Soil physics dictates that water will not cross the textural boundary from fine soil into coarse gravel until the soil above is 100% saturated. This creates a "perched water table," raising the soggy zone directly into the palm's root ball. Use soil all the way to the bottom and ensure the pot has adequate drainage holes.
Commercial vs. DIY Palm Soil Comparison
While commercial mixes offer convenience, they often require heavy amendment to be truly suitable for long-term palm cultivation. Here is how a high-end commercial blend compares to our custom DIY recipe.
| Feature | Premium Commercial Palm Mix | Custom DIY Palm Substrate |
|---|---|---|
| Average Cost (per cu ft) | $8.00 - $14.00 | $4.50 - $6.00 (bulk sourcing) |
| Primary Base Material | Peat Moss & Composted Forest Products | Buffered Coco Coir & Pine Bark Fines |
| Drainage Rate | Moderate (slows over 6 months) | Excellent (maintains for 2+ years) |
| Compaction Risk | High (requires repotting annually) | Very Low (rigid pumice/bark matrix) |
| Pre-charged Nutrients | Yes (usually synthetic N-P-K) | No (allows precise custom fertilization) |
Species-Specific Mixing Ratios
Not all palms have identical moisture requirements. Adjust your potting soil for palm trees based on the specific genus you are cultivating.
Tropical & High-Moisture Palms (Areca, Majesty, Kentia)
- 40% Buffered Coco Coir
- 30% Pine Bark Fines (1/4 inch)
- 20% Horticultural Pumice (3/8 inch)
- 10% Worm Castings (for biological activity and trace minerals)
Desert & Drought-Tolerant Palms (Sago, Ponytail, Mexican Fan)
- 20% Buffered Coco Coir
- 20% Pine Bark Fines (1/4 inch)
- 50% Pumice or Coarse Silica Sand (#2 grade)
- 10% Crushed Oyster Shell (for calcium and slow pH buffering)
Step-by-Step Repotting Protocol
Palms are highly sensitive to root disturbance. Transplant shock can stall growth for an entire season. Follow this precise protocol when moving a palm into your newly mixed soil.
- Hydrate the Root Ball: Water the palm thoroughly 24 hours before repotting. A hydrated root ball holds together better and suffers less micro-tearing during the transfer.
- Select the Correct Vessel: Choose a pot that is only 2 to 3 inches wider in diameter than the current root ball. Excessive soil volume around the roots holds water that the plant cannot transpire, leading to rot. Ensure the pot has at least three drainage holes.
- Pre-Moisten the Substrate: Your custom mix should be mixed with water in a wheelbarrow until it feels like a wrung-out sponge. Planting in bone-dry coir will cause the coir to pull moisture out of the palm's roots.
- Set the Grade: Add enough soil to the bottom so the palm's root flare sits exactly 1 inch below the pot's rim. Never bury the trunk flare; this invites fungal collar rot.
- Backfill and Settle: Add soil around the sides, using a wooden dowel to gently poke the mix down into air pockets. Do not stomp on the soil or pack it tightly with your hands.
- The Initial Drench: Water slowly until it flows freely from the bottom drainage holes. This settles the soil particles against the roots.
Nutrient Integration & Maintenance
Palm trees are heavy feeders, particularly demanding of magnesium, manganese, and boron. Standard N-P-K fertilizers often cause fatal deficiencies in container palms. Because our DIY potting soil is largely inert, you must integrate a palm-specific, controlled-release fertilizer at the time of potting.
Mix Osmocote Smart-Release 19-6-12 or a specialized 8-2-12-4Mg palm fertilizer into the top 2 inches of soil at a rate of 1 tablespoon per gallon of pot volume. According to the University of Florida IFAS Palm Nutrition Guide, maintaining a 3:1:3 ratio of Nitrogen to Phosphorus to Potassium, supplemented with 4% Magnesium, is critical to prevent the yellowing and necrosis associated with nutrient translocation failures in older fronds.
"Container-grown palms are entirely dependent on the grower for nutrition. Leaching from frequent watering rapidly depletes water-soluble nutrients, making coated, slow-release prills and regular micronutrient drenches mandatory for long-term vigor."
— Adapted from Clemson University HGIC Palms Factsheet
Troubleshooting Soil & Root Failures
Even with the perfect mix, environmental factors can alter soil chemistry and structure over time. Use this diagnostic matrix to correct emerging issues.
| Symptom | Underlying Soil Cause | Corrective Action |
|---|---|---|
| Yellowing lower fronds (while new growth is green) | Magnesium deficiency or pH above 7.0 locking out nutrients. | Drench with Epsom salts (1 tbsp/gallon). Test soil pH; apply elemental sulfur if pH is too high. |
| Brown, crispy leaf tips | Salt buildup from synthetic fertilizers or tap water. | Flush the pot with 3x its volume in distilled or rain water. Scrape off the top 1 inch of soil. |
| Soil pulling away from pot edges | Coir/peat hydrophobia due to complete dehydration. | Submerge the entire pot in a basin of water with a drop of dish soap (surfactant) for 30 minutes. |
| Foul odor & black mushy roots | Anaerobic conditions; soil has compacted and drainage holes are blocked. | Emergency repot. Wash roots in 3% hydrogen peroxide solution, trim dead roots, and replant in fresh, drier pumice-heavy mix. |
By engineering your own potting soil for palm trees rather than relying on generic bagged mixes, you gain total control over the root zone environment. The initial investment in sourcing pumice and buffered coir pays immediate dividends in the form of vigorous spear growth, deep green fronds, and a drastically reduced risk of fatal root diseases.

