
Tree Care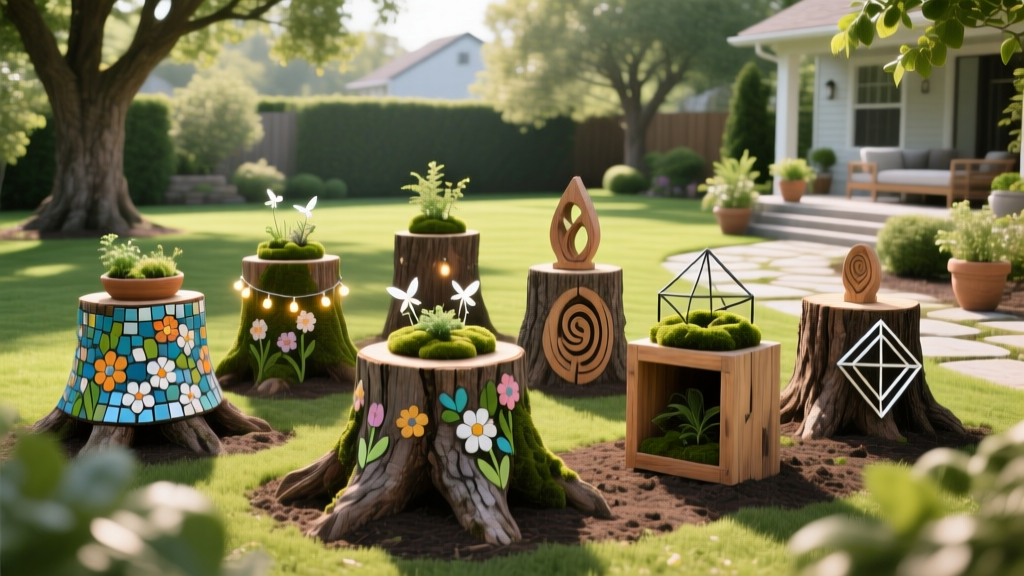
Beyond Grinding: 8 Decorating Ideas for Tree Stumps in Yards
When a hazardous or dead tree is removed, homeowners face a secondary decision: pay a professional to grind the stump or leave it in place. Stump grinding typically costs between $3 and $5 per inch of diameter, meaning a 24-inch oak stump can cost upwards of $120 to $450 to remove entirely. Instead of erasing the tree's history and paying for heavy machinery access, integrating the remaining wood into your landscape design offers an eco-friendly, cost-effective alternative. If you are exploring decorating ideas for tree stumps, this guide bridges the gap between post-removal cleanup and functional yard art.
Assessing Your Stump: Is It Safe to Decorate?
Before applying any of the decorating ideas for tree stumps below, evaluate the wood's structural integrity. A stump riddled with carpenter ants or advanced Armillaria root rot will collapse within a single season, ruining your hardscaping efforts. According to the University of Minnesota Extension, stumps from trees removed due to fungal infections should generally be ground out to prevent the spread of spores to nearby healthy root systems.
🪵 The "Screwdriver Test" for Stump Viability:
Press a flathead screwdriver into the outer cambium layer (just inside the bark). If it penetrates deeper than 1/4 inch with mild pressure, the wood is too decayed for weight-bearing projects like tables or birdbath pedestals. However, heavily decayed stumps are perfect for hollowed planters, fairy gardens, or wildlife habitats.
Press a flathead screwdriver into the outer cambium layer (just inside the bark). If it penetrates deeper than 1/4 inch with mild pressure, the wood is too decayed for weight-bearing projects like tables or birdbath pedestals. However, heavily decayed stumps are perfect for hollowed planters, fairy gardens, or wildlife habitats.
8 High-Impact Decorating Ideas for Tree Stumps
1. The Living Planter (Hollowed Core)
Transform the stump into a self-contained garden bed. Use an Arbortech Mini Carver or a standard 2-inch spade bit attached to a high-torque drill to hollow the center 4 to 6 inches deep. Crucially, drill three 3/4-inch drainage holes at a 45-degree downward angle through the outer bark to prevent waterlogging, which accelerates rot. Fill the cavity with a 60/40 mix of potting soil and perlite, and plant trailing succulents, creeping thyme, or shade-tolerant ferns depending on your yard's light exposure.
2. Rustic Pedestal for Heavy Birdbaths
Granite or concrete birdbaths often weigh over 80 lbs, making them prone to sinking into soft mulch beds. A solid tree stump provides a permanent, frost-heave-resistant base. Level the stump's top cut using a masonry sand bed and a 24-inch spirit level. Secure the stone basin to the wood using PL Premium Polyurethane Construction Adhesive. Unlike standard silicone, polyurethane adhesive expands slightly to fill wood grain gaps and withstands seasonal freeze-thaw cycles without becoming brittle.
3. Solar-Integrated Pathway Beacons
For stumps bordering walkways, turn them into subtle nighttime markers. Use a plunge router with a 1/2-inch straight bit to carve a shallow channel down the side of the stump. Run low-voltage copper wire through the channel, connecting it to a 2-watt solar LED puck light embedded flush into the top of the stump. Seal the wood around the light housing with clear exterior caulk to prevent moisture intrusion into the wiring.
4. Fairy Garden Terracing
Carve shallow, 2-inch deep staircases and platforms into the side bark using a woodworking chisel. Secure miniature resin houses and bridges using copper nails. Copper is highly recommended here because it resists rust and naturally deters certain wood-boring pests from nesting in the nail holes, preserving the stump's lifespan.
5. Sealed Patio Side Table
A flat-cut stump makes an excellent rustic side table for outdoor seating areas. Sand the top surface progressively through 40, 80, 120, and 220 grits using a random orbital sander. To protect the wood from UV graying and moisture, apply three coats of a marine-grade spar urethane, such as TotalBoat Lust. Spar urethanes contain UV blockers and remain flexible, allowing the wood to expand and contract with humidity changes without cracking the finish.
6. Natural Mushroom Cultivation Log
If the stump is located in a shaded, damp area of your yard, repurpose it for edible landscaping. Drill 5/16-inch holes in a diamond pattern, spaced 4 inches apart across the top and sides. Insert shiitake or oyster mushroom plug spawn into the holes and seal them with melted beeswax. Keep the stump moist during the summer, and you will harvest gourmet mushrooms by early autumn.
7. Mosaic Tile Topper
For a vibrant, artistic touch, apply a 1/2-inch layer of exterior-grade thinset mortar to the flat top of the stump. Press in broken ceramic tiles, sea glass, or smooth river stones. Once cured, grout the design with a sanded, polymer-modified grout. The polymers provide the flexibility needed to prevent the grout lines from cracking during winter freezes.
8. Wildlife Brush Base
Leave the stump raw and stack trimmed, dried branches from your seasonal pruning around the base. This creates a "brush pile" shelter for overwintering beneficial insects, toads, and ground-foraging birds like sparrows. As the stump and branches slowly decay, they return vital carbon and nutrients to the surrounding soil food web.
Material & Tool Cost Breakdown
Repurposing a stump requires an upfront investment in tools and sealants, but it almost always costs less than hiring a professional arborist with a stump grinder. Below is a cost comparison for a standard 20-inch diameter stump.
| Method | Estimated Cost | Time Required | Longevity |
|---|---|---|---|
| Professional Stump Grinding | $150 - $300 | 1 - 2 Hours | Permanent Removal |
| DIY Living Planter | $35 - $60 | 3 - 4 Hours | 3 - 5 Years |
| DIY Sealed Patio Table | $80 - $120 | 2 Days (with curing) | 7 - 10+ Years |
Preserving vs. Accelerating Decay
Your decorating strategy should align with how long you want the stump to remain in your yard. If you are building a heavy pedestal or a sealed table, you must halt the decomposition process. Apply a wood preservative containing copper naphthenate (such as Cuprinol Green) to the exposed end grain and the base where the wood meets the soil. This creates a toxic barrier for wood-decaying fungi and termites, extending the stump's life by a decade or more.
Conversely, if you are using the stump as a temporary fairy garden or wildlife brush base and want it to disappear naturally within two to three years, accelerate the decay. Drill deep holes into the top of the stump and fill them with a high-nitrogen fertilizer, such as 46-0-0 Urea. The nitrogen feeds the bacteria and fungi responsible for breaking down lignin and cellulose, turning the stump into soft, nutrient-rich compost much faster than natural decomposition.
Frequently Asked Questions
Will decorating a tree stump attract termites to my house?
A stump located more than 20 feet from your home's foundation poses minimal risk to your structure. However, if the stump is within 10 feet of your house, it is highly recommended to grind it out or treat the soil around it with a liquid termiticide barrier (like Termidor) to prevent subterranean termites from using the stump as a bridge to your home's sill plate.
Can I grow vegetables in a hollowed-out tree stump?
It is not recommended to grow edible root vegetables or leafy greens in a decaying tree stump. As the wood breaks down, it can harbor fungal pathogens and heavy metals (depending on the tree species and soil history). Stick to ornamental plants, succulents, or non-edible flowers for living stump planters.
How do I stop a decorated stump from sprouting new shoots?
Species like elm, poplar, and willow are notorious for sending up "suckers" from the root system even after the main trunk is removed. To prevent this, drill several 1-inch holes into the top of the stump immediately after the tree is felled and fill them with a systemic stump killer containing triclopyr or glyphosate. The chemical translocates down into the root system, killing the tissue responsible for generating new shoots without harming the surrounding soil.

