Tree Care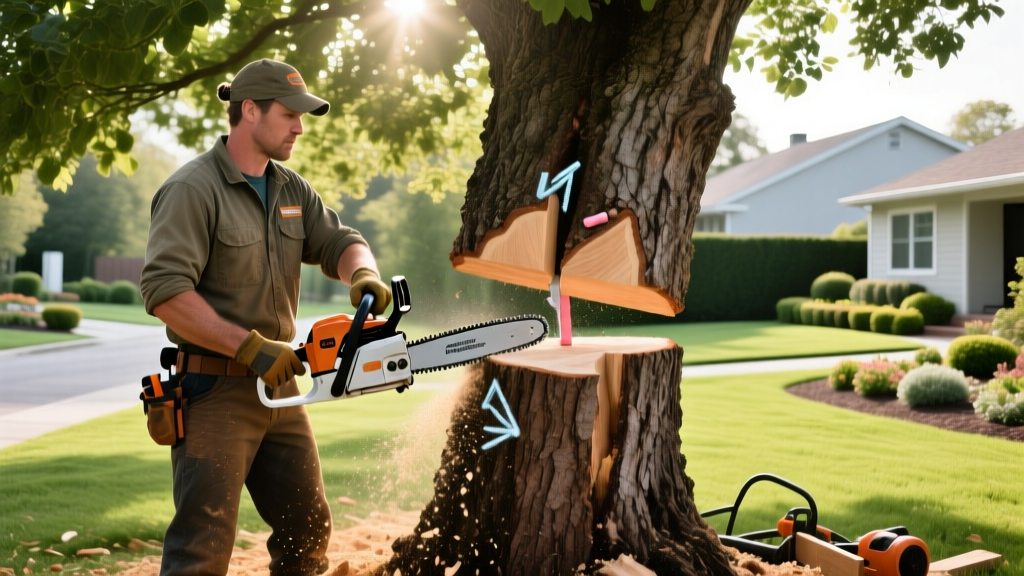
How to Fell Trees Safely: Notch, Hinge, and Back Cut Guide
Pre-Felling Assessment: Reading the Tree and the Site
Felling a mature yard tree requires precise geometry, an understanding of wood tension, and strict adherence to safety protocols. While professional arborists charge between $800 and $2,500 to remove a 50-foot oak, homeowners can execute the task themselves if the tree is in an open area, free from power lines, and under 20 inches in diameter. Before starting the chainsaw, you must evaluate the tree's natural lean, weight distribution, and structural defects.
To gauge the side lean, use the axe handle trick: hold an axe handle perfectly plumb at arm's length and align it with the tree trunk. Step back and observe where the top of the tree falls relative to the handle. Even a 2-degree side lean can cause a 60-foot tree to miss your target zone by several feet. Next, inspect the canopy for 'widowmakers'—dead or broken branches lodged in the upper canopy that can dislodge during the vibration of the fall. According to Penn State Extension, removing loose deadwood with a pole saw or rope before felling is a critical, often overlooked safety step.
Warning: When to Call a Professional
Do not attempt to fell the tree yourself if it exhibits severe decay at the base, a hollow trunk, a heavy forward lean toward a structure, or if the drop zone contains utility lines. Trees with a diameter exceeding 24 inches or those requiring rigging and sectional dismantling demand certified arborist intervention.
Required Equipment and PPE Specifications
Using underpowered equipment or skipping personal protective equipment (PPE) is the primary cause of amateur felling injuries. For trees between 12 and 20 inches in diameter, a mid-range professional chainsaw with a 16 to 20-inch bar is required. Below is a precise gear checklist with current market pricing and safety standards.
| Equipment Category | Recommended Specification / Model | Estimated Cost | Safety Standard |
|---|---|---|---|
| Chainsaw | Husqvarna 572 XP or Stihl MS 261 C-M (18-inch bar) | $750 - $1,100 | ANSI B175.1 |
| Forestry Helmet | Husqvarna Pro Forest or TR Industrial with mesh visor | $110 - $140 | EN 397 / ANSI Z89.1 |
| Chainsaw Chaps | Forester or Woodland Pro (5-layer Kevlar/Tek Warp) | $90 - $130 | ASTM F1897-14 |
| Felling Wedges | 8-inch and 10-inch ABS plastic (Oregon or Stihl brand) | $15 - $25 (pair) | N/A |
| Felling Axe / Mallet | 24-inch fiberglass handle felling axe or dead-blow mallet | $40 - $60 | N/A |
Executing the Open-Face Notch (The Modern Standard)
The traditional 45-degree notch taught to older generations is obsolete and dangerous. Modern directional felling relies on the 70-to-90-degree open-face notch. An open face allows the tree to fall further before the hinge wood snaps, providing better steering control and drastically reducing the risk of the tree kicking back off the stump.
Step 1: The Top Cut
Make the top cut at a downward angle of roughly 60 degrees. The depth of this cut should penetrate exactly one-quarter to one-third of the tree's total diameter. Ensure the cut is perfectly level side-to-side; an uneven top cut will cause the tree to twist as it falls.
Step 2: The Bottom Cut
Make the bottom cut at an upward angle of 20 to 30 degrees, intersecting perfectly with the apex of the top cut. The resulting notch should open at 70 to 90 degrees. When the two cuts meet, the 'cookie' (the wedge of wood) should fall out cleanly. If it does not, use your felling axe to sever the remaining hinge fibers inside the notch—never run your chainsaw back into a closed notch, as this will pinch the bar and dull the chain instantly.
The Hinge Wood and Back Cut Mechanics
The hinge wood is the uncut strip of trunk left between the face notch and the back cut. It acts as a physical hinge, guiding the tree to the ground and preventing it from sliding off the stump. The thickness of the hinge must be exactly 10% of the tree's diameter at breast height (DBH).
| Tree Diameter (DBH) | Target Hinge Thickness | Target Hinge Length (Width of Cut) |
|---|---|---|
| 10 inches | 1.0 inch | 8.0 inches (80% of diameter) |
| 15 inches | 1.5 inches | 12.0 inches |
| 20 inches | 2.0 inches | 16.0 inches |
Executing the Back Cut
The back cut (or felling cut) is made horizontally on the opposite side of the tree, exactly 1 to 2 inches higher than the apex of the face notch. This height differential creates a 'step' that prevents the tree from sliding backward off the stump during the fall. Do not cut through the hinge wood. Leave the 10% hinge intact.
The Plunge Cut Method for Thick Trees
If the tree's diameter is wider than your chainsaw's bar length, a standard back cut is impossible. Instead, use a plunge cut. Start the back cut by plunging the tip of the bar directly into the center of the trunk, behind the hinge line. Bore straight through to the opposite side, then cut backward to establish the back corner, and forward to establish the front corner, leaving a 2-inch 'strap' of wood at the very back. Once your wedges are driven in, cut the final strap to release the tree.
The Escape Route and Managing the Fall
Before making the back cut, clear your escape route. The Occupational Safety and Health Administration (OSHA) mandates that the escape path must be cleared of all tripping hazards and vegetation. Your escape route should be at a 135-degree angle from the direction of the fall (45 degrees backward and to the side). Never retreat directly behind the tree; if the trunk splits or kicks back, the area directly behind the stump is the primary crush zone.
As you near the end of the back cut, drive your 8-inch or 10-inch ABS felling wedges into the kerf. Use your felling axe or mallet to pound the wedges deep. This lifts the tree slightly, transferring the weight off the chainsaw bar and forcing the tree's center of gravity past its pivot point. Once the tree begins to tip, pull the chainsaw out, engage the chain brake, and immediately retreat down your 135-degree escape path while keeping your eyes on the canopy for falling debris.
Pro Tip: Managing the Stump
After the tree is on the ground, return to the stump. A high, jagged stump is a tripping hazard and indicates poor cutting technique. The ideal stump height is roughly 10% of the tree's diameter, leaving a clean, readable face notch and hinge for post-felling analysis.
Troubleshooting Felling Hazards: Barber Chairs and Lodged Trees
Even with perfect geometry, wood tension can create catastrophic failure modes. The most dangerous is the 'barber chair,' where the trunk splits vertically upward from the back cut before the tree falls, sending a heavy slab of wood backward. Barber chairing occurs most frequently in forward-leaning trees with high tension wood on the back side. To prevent this, leave a slightly thicker hinge (up to 15% of the diameter) and drive your felling wedges as early as possible to relieve tension on the back cut.
If a tree falls but gets caught in the branches of an adjacent tree, it becomes a 'lodged' or 'hung' tree. Never attempt to cut the hinge or the trunk of a lodged tree to force it down. The trunk is under extreme, unpredictable tension and can snap or roll violently. OSHA strictly prohibits working under or cutting a lodged tree without mechanical assistance. The only safe resolution is to use a heavy-duty come-along winch, a skid steer, or a professional arborist's aerial lift to pull the tree free from a safe distance.
Post-Felling: Limbing and Bucking Tension Zones
Once the tree is down, the danger is not over. Limbing (removing branches) and bucking (cutting the trunk into logs) require an understanding of compression and tension zones. Branches on the top side of the fallen trunk are under compression; cut these first, working from the trunk outward. Branches on the bottom side are under extreme tension. If you cut a tension branch flush with the trunk, the chainsaw bar will be violently pinched or the branch will snap upward. Always cut tension branches from the outside in, leaving a small relief cut on the compression side to allow the branch to drop safely. When bucking the main trunk, always identify whether the log is supported at both ends (requiring a top-down relief cut followed by a bottom-up finishing cut) or supported at one end to avoid binding your 18-inch bar in the kerf.