
Tree Care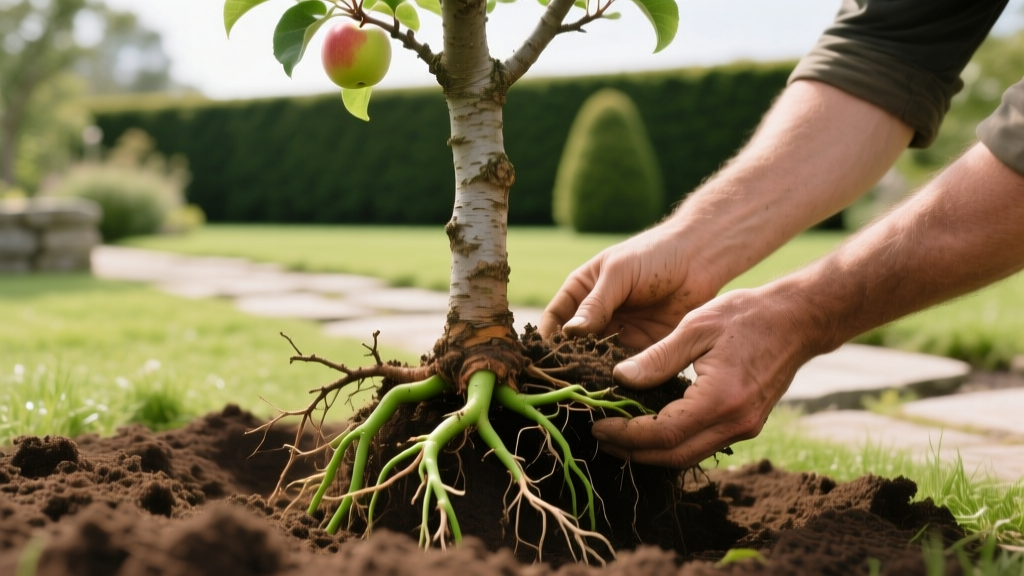
How to Grow Fruit Trees from Bare-Root: The Complete Establishment Guide
The Physiology of Bare-Root Establishment
Learning how to grow fruit trees successfully begins long before the first harvest. The establishment phase—a critical 18-to-24-month physiological window—dictates the structural integrity, disease resilience, and ultimate yield ceiling of your orchard. While container-grown trees offer convenience, bare-root fruit trees remain the professional standard for home orchards. They are typically 30% to 50% less expensive ($25 to $45 per tree compared to $60+ for potted equivalents), possess a more natural, un-spiraled root architecture, and experience less transplant shock when planted during late winter dormancy.
However, bare-root stock is unforgiving of poor technique. Exposed to air, the fine feeder roots can desiccate in under 15 minutes. This guide details the exact, step-by-step protocols used by commercial orchardists to ensure your bare-root fruit trees transition from dormant wood to vigorous, fruit-bearing assets.
Decoding Rootstocks and Chill Hours
The most common mistake home gardeners make is selecting a fruit tree based solely on the scion (the fruiting variety, like 'Honeycrisp' or 'Elberta' peach) while ignoring the rootstock. The rootstock controls the tree's mature size, soil tolerance, and disease resistance. According to Cornell University's Fruit Resources, matching the rootstock to your specific soil profile is non-negotiable for long-term survival.
Apple Rootstock Comparison Matrix
| Rootstock Series | Mature Height | Key Traits & Tolerances | Best Use Case |
|---|---|---|---|
| Budagovsky 9 (B.9) | 8-10 ft (Dwarf) | Cold hardy, fire blight resistant, requires permanent staking. | High-density backyard planting, poor drainage soils. |
| Geneva 41 (G.41) | 10-12 ft (Semi-Dwarf) | High yield efficiency, excellent fire blight and crown rot resistance. | Modern home orchards, replant sites with soil fatigue. |
| Malling 106 (MM.106) | 14-18 ft (Semi-Dwarf) | Vigorous, well-anchored, no staking needed. Susceptible to crown rot. | Large properties with well-drained, sandy loam soils. |
| Geneva 890 (G.890) | 16-20 ft (Semi-Standard) | Extremely vigorous, cold hardy, tolerates heavy clay soils. | Large estates, marginal soils where vigor is required. |
The Chill Hour Imperative
Fruit trees require a specific number of 'chill hours' (hours between 32°F and 45°F) to break dormancy and set fruit. Planting a high-chill variety in a warm climate results in erratic, delayed leafing and poor fruit set. Conversely, low-chill varieties planted in northern zones will break dormancy during early winter thaws, only to be killed by subsequent deep freezes. Always verify the chill hour requirement of your scion against your local USDA extension data before purchasing.
Pro Tip: The Hydration Protocol
Upon receiving bare-root trees, immediately submerge the root systems in a bucket of water mixed with a seaweed-based rooting hormone (such as Kelpak at a 1:1000 dilution) for 12 to 24 hours before planting. This rehydrates the cambium and kickstarts root hormone production.
Site Selection and the 'Bathtub Effect'
Fruit trees require a minimum of 8 hours of direct, unfiltered sunlight daily during the growing season. However, sunlight is secondary to soil drainage. Phytophthora crown rot and Verticillium wilt thrive in poorly drained soils, killing young trees within their first two years.
Executing the Percolation Test
- Dig a test hole 12 inches deep and 12 inches wide at the exact planting location.
- Fill the hole with water and let it drain completely (this pre-soaks the soil).
- Refill the hole to the top and measure the water level drop after exactly one hour.
- Ideal Drainage: 1 to 6 inches per hour.
- Poor Drainage: Less than 1 inch per hour. You must plant on a raised berm (18-24 inches high) or install French drains.
Avoiding the Backfill 'Bathtub Effect'
A pervasive myth in amateur gardening is that you should amend the planting hole with rich compost and peat moss. The UC Agriculture and Natural Resources (UC ANR) home orchard guidelines explicitly warn against this. When you fill a hole with loose, highly organic soil and surround it with dense, undisturbed native clay, you create a 'bathtub.' Water will rush into the loose hole but fail to percolate into the surrounding clay, drowning the roots. Always backfill with the exact native soil you excavated. Save your compost for surface mulching.
The Bare-Root Planting Sequence
Timing is critical. Plant bare-root trees in late winter or early spring, exactly 2 to 4 weeks before your region's average last frost date, when the soil is workable but not waterlogged.
- Root Pruning: Using sterilized, sharp bypass pruners, trim any broken, circling, or excessively long roots. Make clean cuts just below the damaged tissue. This stimulates the growth of new, lateral feeder roots.
- Hole Dimensions: Dig a hole twice as wide as the root spread, but only as deep as the root system. The hole should resemble a wide, shallow saucer, not a deep post-hole.
- Identifying the Graft Union: Locate the swollen knob where the scion is grafted to the rootstock. This union must remain 2 to 3 inches above the final soil grade. If buried, the scion will sprout its own roots, bypassing the dwarfing or disease-resistant traits of the rootstock.
- Setting the Tree: Create a small cone of native soil in the center of the hole. Drape the roots naturally over the cone, ensuring no roots are bent sharply upward (J-rooting).
- Backfilling and Watering: Shovel the native soil back in. Every 4 inches, tamp the soil gently with your boot and water it in to eliminate air pockets. Do not use a heavy tamper, which compacts the soil and destroys soil structure.
Warning: Stake Only When Necessary
Over-staking weakens trunk caliper development. Only stake bare-root trees if they are in high-wind areas, planted on highly dwarfing rootstocks (like B.9 or M.9), or if the trunk cannot support the canopy. Use a flexible tree tie and remove the stake after the first growing season.
Post-Planting Establishment: Watering and Mulching
Once planted, the tree has lost a significant portion of its root mass during the nursery harvesting process. Your primary goal for the first 18 months is to maintain consistent soil moisture without inducing hypoxia (oxygen deprivation).
The 3-3-3 Mulching Rule
Apply a 3-inch layer of coarse arborist wood chips in a 3-foot radius around the tree, but keep the mulch exactly 3 inches away from the trunk. Never pile mulch against the bark ('volcano mulching'), as this traps moisture against the cambium, inviting fungal cankers and encouraging rodent girdling during winter.
Year-One Watering Volumes
A newly planted 1-inch caliper bare-root tree requires approximately 10 to 15 gallons of water per week during the growing season. However, this must be adjusted based on evapotranspiration rates:
- Spring (60°F - 75°F): 5-8 gallons per week, applied in two deep soakings.
- Peak Summer (85°F+): 15-20 gallons per week, applied in three soakings.
- Method: Use a slow-drip soaker hose or a 5-gallon bucket with a 1/8-inch hole drilled in the bottom, placed over the root zone. Fast, shallow watering from a sprinkler only wets the top inch of soil and encourages surface rooting.
Year-One Pruning and Structural Training
The cuts you make in the first spring determine the tree's architecture for the next two decades. The goal is to establish strong 'crotch angles' (the angle where a branch meets the trunk). Branches growing at narrow angles (less than 30 degrees) are structurally weak and will split under the weight of mature fruit.
Central Leader vs. Open Center
- Central Leader (Apples, Pears, Cherries): Maintain a single, dominant vertical trunk. Select 4 to 5 scaffold branches spaced evenly around the trunk and vertically 6 to 8 inches apart. Use wooden clothespins or branch spreaders in early summer to force these branches into a 45-to-60-degree angle from the trunk.
- Open Center / Vase (Peaches, Plums, Nectarines): Stone fruits are highly susceptible to fungal diseases in humid canopies. Cut the central leader off just above the top 3 or 4 lateral branches to create an open, bowl-like shape that maximizes airflow and UV penetration to the inner wood.
Troubleshooting Early Establishment Failures
Even with perfect planting, environmental variables can cause stress. Recognize these early failure modes to intervene before the tree declines:
- Symptom: Leaves emerge but suddenly wilt and turn brown in early summer.
Diagnosis: Transplant shock compounded by underwatering. The limited root system cannot support the spring canopy flush during the first summer heatwave.
Fix: Increase watering frequency immediately and apply a 2-inch layer of additional mulch to reduce soil temperature. - Symptom: Tree fails to leaf out by late spring, but the bark scratches green.
Diagnosis: 'Delayed bud break,' common in bare-root stone fruits planted in cold, wet soils.
Fix: Do not overwater. Wait. Ensure soil is draining. The tree is simply waiting for deeper soil temperatures to reach 55°F. - Symptom: Yellowing leaves with green veins (chlorosis) in mid-summer.
Diagnosis: Iron or manganese deficiency, typically caused by high soil pH (above 7.2) locking up micronutrients.
Fix: Apply chelated iron (Fe-EDDHA formulation, which remains stable in high pH soils) as a soil drench according to package rates. Do not use standard iron sulfate, which will quickly bind in alkaline soils.
'The success of a fruit tree is 80% determined before the shovel even hits the dirt. Site selection, rootstock compatibility, and understanding your local microclimate are the true drivers of a productive orchard.' — Commercial Orchard Management Principles
Mastering how to grow fruit trees from bare-root stock requires patience and a willingness to follow physiological rules rather than gardening myths. By prioritizing the graft union, avoiding the backfill bathtub effect, and committing to a rigorous first-year watering schedule, you will establish a robust root system capable of supporting decades of heavy, high-quality fruit production.

