
Tree Care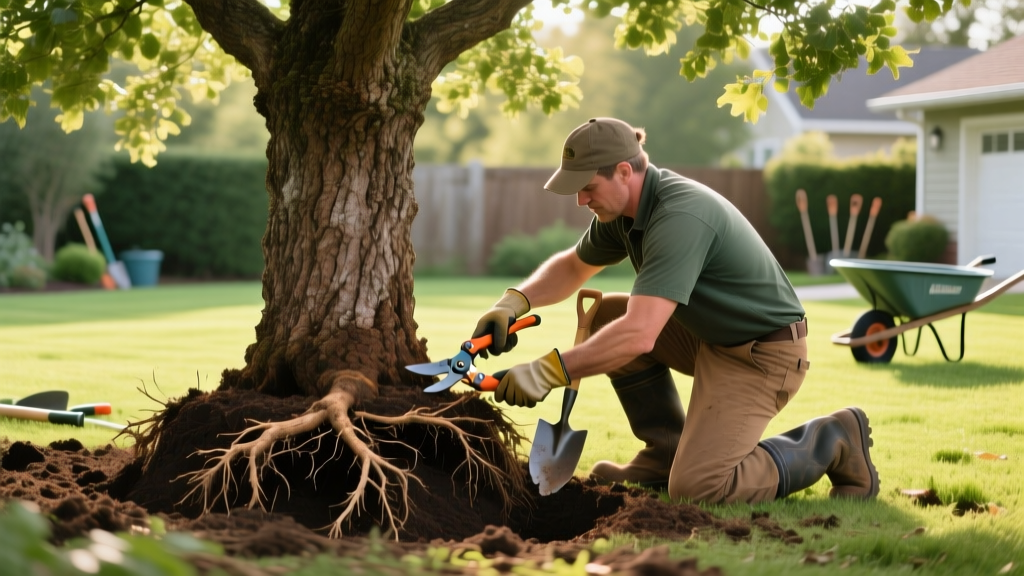
How to Move a Tree Safely: Root Pruning & Transplant Guide
Diagnostic: Should You Move It or Replace It?
Relocating an established tree is a high-stakes horticultural procedure. The primary cause of transplant failure is the severing of the tree's fine, water-absorbing feeder roots, which typically extend far beyond the drip line. When you dig up a tree, you leave up to 90% of its root system behind. Before committing to the labor and expense of moving a tree, evaluate its viability using the diagnostic matrix below. Trees with a trunk caliper (diameter measured 6 inches above the soil line) greater than 4 inches require mechanical intervention and professional root-pruning schedules to survive.
| Trunk Caliper | Estimated Root Ball Weight | DIY Survival Rate | Recommended Extraction Method |
|---|---|---|---|
| Under 2 inches | 50 - 150 lbs | High (80%+) | Manual digging with sharp spade |
| 2 to 4 inches | 300 - 900 lbs | Moderate (50%) | Manual digging with come-along winch |
| 4 to 8 inches | 1,500 - 4,000 lbs | Very Low (<10%) | Mini tree spade or professional rig |
| Over 8 inches | 5,000+ lbs | N/A | Commercial tree spade and crane |
Phase 1: Pre-Move Root Pruning (The Secret to Survival)
According to Clemson University Extension, the most critical step in learning how to move a tree successfully occurs months before the actual extraction. Root pruning forces the tree to generate a dense network of new feeder roots close to the trunk, inside the future root ball.
The Caliper-to-Root-Ball Formula
Industry standards dictate that the root ball diameter should be 9 to 12 inches for every 1 inch of trunk caliper. For example, a tree with a 3-inch caliper requires a minimum root ball diameter of 27 to 36 inches. Mark this circumference on the ground using landscaping spray paint.
Executing the Root Prune
- Timing: Perform root pruning 6 to 8 months before the move. Prune in early spring for a fall transplant, or in early fall for a spring transplant.
- Trenching: Using a sharp, flat-blade nursery spade (such as the Fiskars 46-inch Steel D-Handle), dig a trench 6 inches wide and 12 to 18 inches deep along your marked circle.
- Severing: Make clean cuts through lateral roots. Jagged, torn roots are highly susceptible to fungal pathogens like Armillaria root rot. Sharpen your spade with a mill file before starting.
- Backfilling: Refill the trench with a 50/50 mix of native soil and coarse compost to encourage rapid feeder root regeneration inside the root ball.
Expert Warning: Never attempt to move a tree without prior root pruning unless it is a very small sapling (under 1.5-inch caliper) or you are using a mechanical tree spade that extracts a massive, undisturbed soil core.
Phase 2: Extraction and Transport
Once the 6-to-8-month waiting period has passed and the tree is dormant, you can proceed with extraction. The goal is to keep the root ball intact; if the soil cracks and falls away from the roots, the tree will likely experience fatal desiccation.
Digging and Wrapping
Dig outside your original root-pruning trench, angling slightly inward to create a bowl shape. Once the root ball is undercut, wrap it tightly in natural, untreated jute burlap. Never use synthetic polypropylene burlap, as it will not decompose in the new planting hole and will girdle the roots over time. Secure the burlap with 4-inch landscape nails or heavy-duty twine.
Lifting Mechanics
Critical Failure Point: Never lift or drag the tree by its trunk. The weight of the root ball will strip the bark and tear the cambium layer, effectively girdling the tree. Always lift from the base of the root ball using a canvas sling, plywood sled, or the bucket of a skid steer.
For DIY moves on 2-to-4-inch caliper trees, use a heavy-duty come-along winch anchored to a mature, stable tree or a vehicle hitch to drag the root ball onto a reinforced tarp or wheelbarrow.
Phase 3: Replanting and Stabilization
The Morton Arboretum emphasizes that planting depth is the most common cause of post-transplant mortality. The root flare (the point where the trunk widens and transitions into roots) must be visible and positioned 1 to 2 inches above the surrounding grade to account for soil settling.
The Replanting Protocol
- Hole Dimensions: Dig the new hole 2 to 3 times wider than the root ball, but no deeper. The bottom of the hole must be undisturbed, solid native soil to prevent the heavy root ball from sinking post-planting.
- Positioning: Lower the tree into the hole. Orient the most aesthetically pleasing side toward the primary viewing angle, but ensure the root flare is at the correct depth.
- Burlap Removal: Once the tree is set and partially backfilled, cut away the top third of the burlap and remove all twine or wire baskets. Leaving wire baskets on restricts trunk expansion and secondary root growth.
- Backfilling: Use the native soil you excavated. Do not amend the backfill with heavy peat moss or rich potting soil; this creates a 'bathtub effect' where water pools in the loose soil around the root ball, drowning the tree.
Stabilization: Guying vs. Staking
Avoid rigid wooden stakes driven next to the trunk; they cause bark abrasion and prevent the trunk from developing reaction wood (taper). Instead, use a 3-point guying system. Drive 3-foot rebar stakes at a 45-degree angle outside the root zone, and attach wide, flat nylon webbing straps to the lower third of the trunk. Allow 1 inch of lateral slack so the tree can sway slightly in the wind, which stimulates trunk thickening.
Troubleshooting Transplant Shock
Even with perfect execution, a moved tree will experience stress. Monitor the canopy closely during the first growing season and intervene based on specific symptoms.
| Symptom | Probable Cause | Corrective Action |
|---|---|---|
| Leaf scorch (browning edges) | Insufficient water reaching deep roots | Apply water slowly using a root-watering probe (e.g., Dramm Deep Root Waterer) at 10 gallons per inch of caliper weekly. |
| Premature leaf drop in spring | Transplant shock / root loss | Spray canopy with an anti-desiccant like Wilt Pruf to reduce transpiration while roots re-establish. |
| Yellowing foliage (Chlorosis) | Poor drainage / root asphyxiation | Check soil moisture at 8 inches deep. If soggy, cease watering and aerate the backfill zone. |
| Trunk splitting or peeling | Southwest winter injury or sunscald | Wrap the trunk with white tree wrap paper from November to March to reflect winter sun. |
Cost & Equipment Breakdown: DIY vs. Professional
Deciding whether to hire a certified arborist or tackle the move yourself depends heavily on budget, tree size, and risk tolerance. Below is a realistic cost analysis for moving a tree with a 3-inch trunk caliper in 2026.
| Expense Category | DIY Approach | Professional Tree Service |
|---|---|---|
| Labor & Extraction | $0 (Sweat equity, 6-10 hours) | $800 - $1,500 (Includes crew and truck) |
| Equipment Rentals | $150 - $300 (Mini-excavator / come-along) | $0 (Included in service fee) |
| Materials (Burlap, straps, soil) | $75 - $120 | $0 (Included in service fee) |
| Anti-desiccant & Root Stimulant | $40 - $60 | $50 - $100 (Billed as an add-on treatment) |
| Total Estimated Cost | $265 - $480 | $850 - $1,700 |
| Survival Guarantee | None | Typically 1-year replacement guarantee |
Moving a tree is not a task to rush. By adhering to the 6-month root pruning schedule, calculating the correct root ball dimensions, and ensuring the root flare sits above grade, you drastically shift the odds in favor of your tree's long-term survival in its new location.

