
Tree Care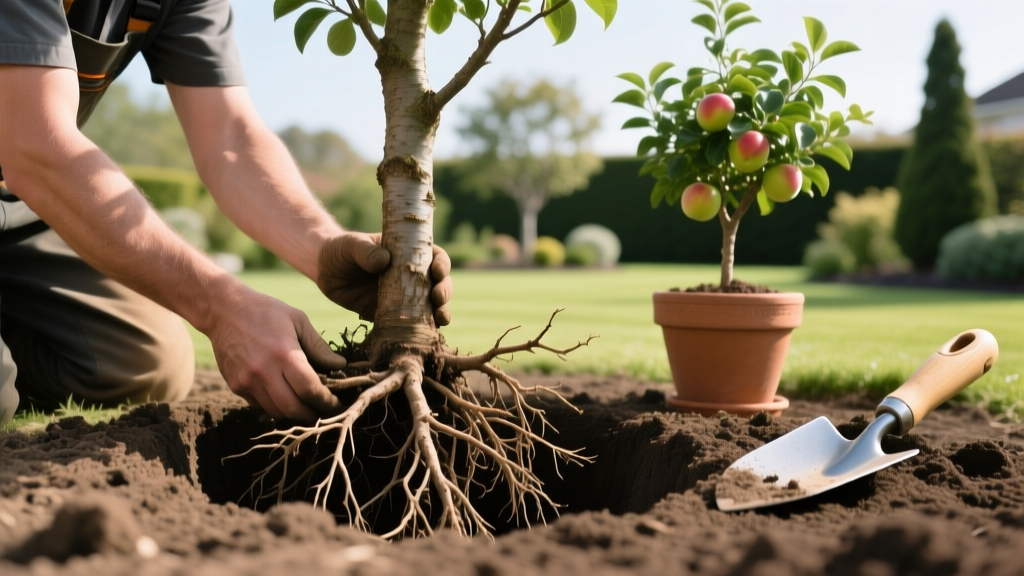
How to Plant a Fruit Tree: Bare-Root vs. Potted Transplant Guide
The Economics and Biology of Fruit Tree Establishment
Understanding how to plant a fruit tree correctly dictates whether it will yield hundreds of pounds of produce over its lifespan or succumb to root rot within three years. The majority of transplant failures do not occur because of poor cultivar selection, but due to improper planting depth, ignored soil hydrology, and failure to address circling roots. This guide bypasses generic advice and provides exact metrics, soil percolation thresholds, and root-washing protocols required for successful establishment of both bare-root and container-grown fruit trees.
Decision Matrix: Bare-Root vs. Container-Grown Stock
Before breaking ground, you must select the right nursery stock format. Each presents distinct biological advantages and logistical constraints.
| Metric | Bare-Root Trees | Container-Grown (Potted) Trees |
|---|---|---|
| Average Cost (Standard Semi-Dwarf) | $25 - $45 | $65 - $120 |
| Planting Window | Strictly dormant (Late Fall to Early Spring) | Year-round (avoiding peak summer heat) |
| Root Architecture | Natural, radially spreading roots | High risk of girdling/circling roots |
| Transplant Shock | High initial shock, rapid long-term growth | Low initial shock, potential long-term stunting |
| First-Year Survival Rate | 85% (if planted in dormancy) | 92% (if root-washed properly) |
Site Selection and Soil Hydrology Metrics
Fruit trees require specific soil drainage rates. Planting in heavy clay without testing percolation is the leading cause of Phytophthora root rot in stone fruits (peaches, cherries, plums).
The 12-Inch Percolation Test
- Dig a test hole exactly 12 inches deep and 12 inches wide at the proposed planting site.
- Fill the hole with water and allow it to drain completely (this pre-saturates the soil).
- Refill the hole to the top and measure the water level drop after exactly one hour.
- Ideal Metric: The water level should drop between 1.0 and 2.0 inches per hour.
- Failure Metric: If the drop is less than 0.5 inches per hour, you have heavy clay. You must abandon standard in-ground planting and use the "Mound Technique" detailed below.
Warning: The Water Table Trap
If you hit standing water or a hard, impermeable clay pan while digging your initial planting hole, do not proceed. Digging a deep hole in heavy clay creates a "bathtub effect" where irrigation water pools and drowns the taproot. According to University of Minnesota Extension, planting on a 12-inch raised berm is mandatory in these conditions.
If you hit standing water or a hard, impermeable clay pan while digging your initial planting hole, do not proceed. Digging a deep hole in heavy clay creates a "bathtub effect" where irrigation water pools and drowns the taproot. According to University of Minnesota Extension, planting on a 12-inch raised berm is mandatory in these conditions.
Protocol A: How to Plant a Bare-Root Fruit Tree
Bare-root trees are dug from nursery fields while dormant and shipped without soil. They offer superior long-term root architecture but require precise handling to prevent desiccation.
Step 1: Hydration and Mycorrhizal Inoculation
Submerge the root system in a 5-gallon bucket of water for 12 to 24 hours prior to planting. Do not exceed 24 hours, or the roots will suffocate. For enhanced establishment, mix 1 ounce of a mycorrhizal inoculant (such as Plantworks Ltd MycoGrow) into the bucket to colonize the root hairs with beneficial fungi, increasing phosphorus uptake by up to 40%.
Step 2: Identifying the Graft Union
Locate the graft union—the distinct bulge or bend near the base of the trunk where the fruiting scion was joined to the rootstock. This union must remain 2 to 3 inches above the final soil grade. Burying the graft union allows the scion wood to develop its own root system, completely bypassing the dwarfing or disease-resistant traits of the rootstock you paid for.
Step 3: Excavation and Backfill
Dig a hole twice as wide as the root spread, but no deeper than the root ball itself. The tree must rest on undisturbed native soil at the bottom of the hole to prevent settling. Spread the roots radially like a wagon wheel. Backfill with the native soil you removed. Do not amend the backfill with compost or peat moss; creating a "pot effect" of rich soil surrounded by native clay discourages roots from expanding outward.
Protocol B: How to Plant a Potted (Container) Fruit Tree
Container trees are available year-round but harbor hidden structural defects that will kill the tree 5 to 10 years after planting if left unaddressed.
The Mandatory Root-Washing Technique
Nursery potting mixes are designed for rapid drainage in plastic pots, typically consisting of 80% pine bark and perlite. When planted directly into native soil, this hydrophobic mix dries out faster than the surrounding earth, strangling the roots. Furthermore, trees left in pots for over a season develop circling roots that eventually girdle the trunk.
"Washing the soil off the roots of container-grown trees before planting is no longer optional for arborists; it is the standard of care to prevent stem-girdling roots and ensure the root flare is properly positioned at grade." — Penn State Extension
Execution: Lay the tree on its side. Using a garden hose with a standard nozzle (approximately 40 PSI), wash away 100% of the potting mix until the entire root system is exposed. Use sterilized bypass pruners to cut away any roots that are circling the perimeter or diving straight down (J-roots). Plant the washed root system using the same native-soil backfill method described for bare-root trees.
The First 90 Days: Caliper-Based Watering Framework
Generic advice like "water deeply once a week" leads to establishment failure. Irrigation must be calculated based on the trunk caliper (the diameter of the trunk measured 6 inches above the soil line).
Weekly Hydration Matrix
| Trunk Caliper | Weekly Water Requirement | Application Method |
|---|---|---|
| 0.5 inch (Whip) | 1.5 Gallons | Slow drip at base, 2x per week |
| 1.0 inch | 3.0 Gallons | Slow drip at base, 2x per week |
| 1.5 inches | 4.5 Gallons | Soaker hose ring, 2x per week |
| 2.0 inches | 6.0 Gallons | Soaker hose ring, 2x per week |
Mulching Rule of 3s:
Apply exactly 3 inches of arborist wood chips in a 3-foot radius ring around the trunk. Keep the mulch exactly 3 inches away from the trunk bark itself. Volcano mulching (piling mulch against the bark) keeps the root crown perpetually moist, inviting Armillaria root rot and rodent girdling during winter.
Apply exactly 3 inches of arborist wood chips in a 3-foot radius ring around the trunk. Keep the mulch exactly 3 inches away from the trunk bark itself. Volcano mulching (piling mulch against the bark) keeps the root crown perpetually moist, inviting Armillaria root rot and rodent girdling during winter.
Staking Mechanics: When and How to Anchor
Research from the Almanac's horticultural partners confirms that unstaked trees develop thicker, more resilient trunks due to thigmomorphogenesis (the biological response to mechanical stress). Only stake your fruit tree if:
- The trunk caliper is less than 0.5 inches (a "whip").
- The tree is planted in a high-wind corridor or coastal zone.
- The root ball is loose and shifts when the trunk is pushed.
If staking is required, use two wooden stakes driven 18 inches into the ground, positioned outside the root ball on opposing sides. Attach the trunk using wide, flat canvas tree straps (never wire or twine). Allow exactly 1 inch of lateral sway in the strap to permit wind-induced trunk tapering. Remove the stakes entirely after 12 months.
Diagnostic Troubleshooting: First-Year Failure Modes
Monitor your newly planted fruit tree for these specific stress indicators during the first growing season:
- Chlorosis (Yellowing Leaves with Green Veins): Indicates high soil pH (above 7.0) locking out iron and manganese. Apply chelated iron (Fe-EDDHA) as a foliar spray immediately, and amend the soil with elemental sulfur in the fall to lower pH.
- Wilting Despite Wet Soil: The tree is drowning. The fine root hairs have died from hypoxia. Halt all irrigation immediately and use a soil auger to drill 4 vertical holes around the drip line to introduce oxygen to the root zone.
- Delayed Budbreak (Bare-Root Specific): If a spring-planted bare-root tree fails to leaf out by mid-May, perform the "scratch test." Scratch the bark on a primary branch with your thumbnail. If the cambium layer underneath is brown and dry, the tree has desiccated and must be replaced. If green, it is simply experiencing extended transplant shock; maintain the watering matrix and wait.

